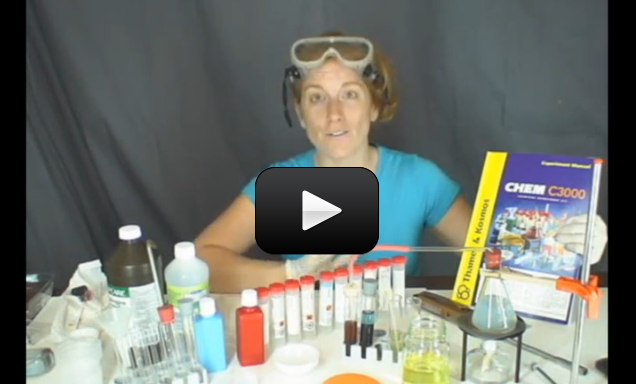
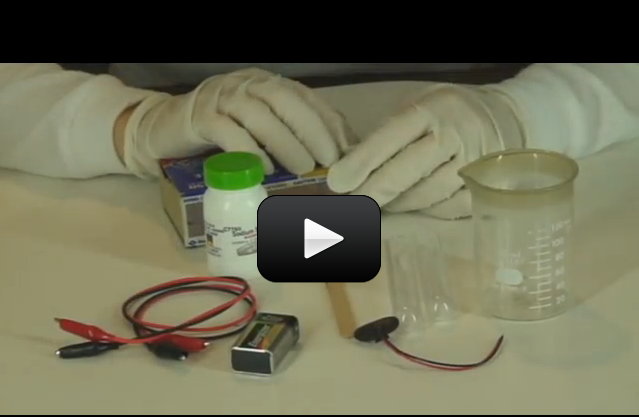
Chemistry is all about studying chemical reactions and the combinations of elements and molecules that combine to give new stuff.  Chemical reactions can be written down as a balanced equation that shows how much of each molecule and compound are needed for that particular reaction. Here’s how you do it:


[am4show have=’p9;p52;p91;’ guest_error=’Guest error message’ user_error=’User error message’ ]


[/am4show]


If you’re into magic shows, this is a good one to perform for an audience, because the solution goes from purple to pink to green to blue and back again!


Le Chatelier’s principle states that when the temperature is raised, an equilibrium will shift away from the side that contains energy. When temperature is lowered, the reaction shifts toward the side that contains the energy. That’s a little hard to understand, so that’s why there’s a really cool experiment that will show you exactly what we see happening with this principle.


Remember that exothermic reactions are chemical reactions that give off energy. In this experiment, this reaction is exothermic, which is going to be an important key in predicting which way the system will balance itself as it gets subjected to temperature changes.


[am4show have=’p9;p52;p91;’ guest_error=’Guest error message’ user_error=’User error message’ ]


Here’s how you do it:


ADULT SUPERVISION REQUIRED for this experiment because it involves ammonia and boiling water!!


Materials:


  • three test tubes
  • two medicine droppers
  • two beakers or glass jars
  • two small disposable cups
  • clear ammonia (not yellow) (IMPORTANT: Adult Supervision Required!) (MSDS)
  • distilled white vinegar (clear)
  • stove or alcohol burner
  • saucepans OR stand for the burner (with the wire mesh) and an extra beaker
  • water
  • crushed ice
  • red cabbage (not green)
  • safety goggles
  • gloves
  • adult help


Advanced Students: Download your Worksheet Lab here!


Experiment Steps:


  1. Perform this experiment in a well ventilated area and next to a sink or water hose.
  2. Keep away all small children and pets!
  3. Place 200 mL (a little more than 3/4 cup) in the pan and add a handful of diced leaves of red cabbage and boil for 3 minutes. Turn off the heat and let cool, discarding the solids. The liquid should be purple or dark blue.
  4. Label one of the cups with “NH3” and pour a small amount of clear ammonia in one of the disposable cups.
  5. Label the other cup with “CH3COOH” and pour a small amount of vinegar inside.
  6. Fill a glass jar or beaker with mostly ice and a little water.
  7. Place a glass jar mostly full of water in a pan and also fill the pan with water. Turn on the stove and heat the water and glass jar. When it’s hot (but not boiling), set it in the sink so you don’t accidentally bump or splash it. (You can also heat a jar of water using a microwave if you have one.)
  8. Place 20 drops of hot cabbage juice (be careful here!) into each test tube using your medicine dropper.
  9. Rinse out the medicine dropper. (Don’t skip this step!)
  10. Place 15 drops vinegar to each of two of the test tubes. Put a stopper on the top and swirl it around. Don’t put anything in the third one except cabbage juice, because this one is your “control” so you can compare the color changes.
  11. What color is the test tube now compared with plain cabbage juice?
  12. Add ammonia one drop at a time to only one of the test tubes with vinegar in it until it turns green (any shade). Swirl the test tube after each drop.
  13. Add ammonia one drop at a time to the other test tubes with vinegar in it until it turns green (any shade). Swirl the test tube after each drop.
  14. Place both test tubes in the ice water bath to cool them down for at least a minute. When you pull them out, they should be the same color, right?
  15. Now put only one of the ammonia test tubes back in the ice bath and put the other in the jar that has the hot water (be careful!).
  16. After 30-45 seconds, pull out the test tubes from the ice bath and the hot water and compare. What happened? (If the one from the hot water is not bluer than the ice bath, try again with hotter water. Don’t let it sit for longer than a minute or you’ll drive the ammonia out of the solution.)
  17. Now put both test tubes in the ice bath for a couple of minutes. What color are they now? Are they the same or different?

What’s going on?


When ammonia and vinegar were mixed in the solution, it created this equilibrium:


NH3 + C2H4O2 <–> NH4+ + C2H3O2–


This reaction produces energy, which means it’s exothermic. Placing the test tube in the ice bath lowers the temperature shifts the reaction toward the products which causes the cabbage juice to turn green, indicating a basic solution.


When you added the cabbage juice, it served as an indicator to tell whither the solution was acidic or basic. The anthocyanin from the cabbage juice turns pink with acids like vinegar and blue with bases like baking soda, and green with bases like ammonia.


When the test tube is placed in the hot water, the solution turns blue to indicate that the reaction shifted toward the reactants, making a less basic solution than it was in the ice water. The solution is still basic, but not as strongly as when placed in the ice bath.


There’s more to this principle (including how pressure or concentration affect the equilibrium), but it’s the same idea. If the temperature, pressure (volume) or concentration of a chemical system at equilibrium changes, then the equilibrium shifts to compensate for that change.  Chemists use this principle to predict how a change in pressure, volume, concentration, or temperature will affect a chemical system in equilibrium. Knowing this ahead of time allows chemists to figure out how to get the most products out of (or least out of, such as with smog) a reaction.


[/am4show]


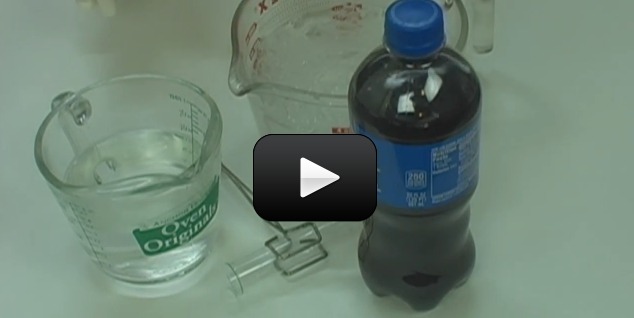
We’re going to do an experiment where it will look like we can boil soda on command… but the truth is, it’s not really boiling in the first place! If you drink soda, save one for doing this experiment. Otherwise, get one that’s “diet” (without the sugar, it’s a lot easier to clean up).


[am4show have=’p9;p52;p91;’ guest_error=’Guest error message’ user_error=’User error message’ ]


Materials:


  • two beakers or two saucepans
  • test tube
  • test tube clamp
  • stove or alcohol burner with stand
  • ice
  • soda (cold!)
  • gloves
  • goggles


Advanced Students: Download your Worksheet Lab here!


Experiment:


  1. Use the saucepan to heat a jar full of water until boiling (be sure to put an inch of water in the pan also or you’ll crack the jar).
  2. Fill one of the beakers with mostly ice and a little water. This is your ice bath.
  3. Fill your test tube half full with soda, and set it in the beaker with the hot water. What happens?
  4. Use the test tube clamp to remove the test tube from the hot water and place it in the ice bath. What happens now after you wait a few minutes?
  5. After a bit, place the test tube back into the hot water. What happens after a few minutes?
  6. Repeat this process and notice how and when the soda bubbles, and when it doesn’t. What do you think is happening?

What’s going on? The boiling point of the soda is much higher than the boiling point of water (due to the sugar added to the solution), however it sure looks like it is boiling, doesn’t it? Soda (a liquid solvent) has carbon dioxide gas (a gaseous solute) dissolved in it. When you heat it up, the increase in temperature makes the carbon dioxide comes out of the solution. Lowering the temperature makes the gas dissolve into the liquid, because the solubility of the soda is increased (how much gas you can dissolve into the solution). Gases are less soluble in hot solvents than cold, which is the opposite for solid solutes. Said another way, you can dissolve more salt in hot water than cold, and dissolve more gas bubbles in cold water than hot.
[/am4show]


Molecules are the building blocks of matter.


You’ve probably heard that before, right? But that does it mean? What does a molecule look like? How big are they?


While you technically can measure the size of a molecule, despite the fact it’s usually too small to do even with a regular microscope, what you can’t do is see an image of the molecule itself. The reason has to do with the limits of nature and wavelengths of light, not because our technology isn’t there yet, or we’re not smart enough to figure it out. Scientists have to get creative about the ways they do about measuring something that isn’t possible to see with the eyes.


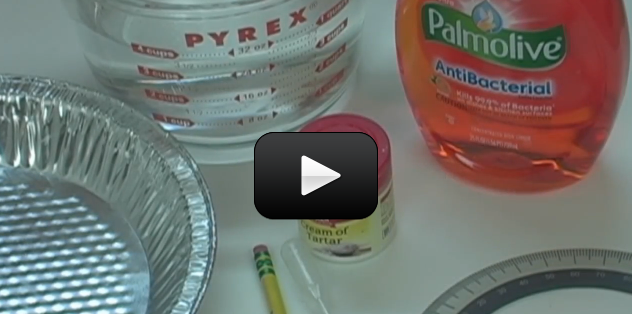
Here’s a cool experiment you can do that will approximate the size of a molecule. Here’s what you need:


[am4show have=’p8;p9;p11;p38;p92;p26;p53;p86;p87;’ guest_error=’Guest error message’ user_error=’User error message’ ]


Materials:


  • liquid dish soap
  • chalk dust
  • medicine dropper
  • pie pan
  • ruler
  • water
  • calculator

Download student worksheet and exercises here!


  1. Place water in the pie pan and sprinkle in the chalk dust. You want a light, even coating on the surface.
  2. Place dish soap inside the medicine dropper and hold it up.
  3. Squeeze the medicine dropper carefully and slowly so that a single drop forms at the tip. Don’t let it fall!
  4. Hold the ruler up and measure the drop. Record this in your data sheet.
  5. Hold the tip of the dropper over the pie pan near the surface and let it drop onto the water near the center of the pie pan.
  6. Watch it carefully as it spreads out to be one molecule thick!
  7. Quickly measure and record the diameter of the layer of the detergent on your data sheet.
  8. Use equations for sphere and cylinder volume to determine the height (which we assume to be one molecule thick) of the soap when it’s spread out. That’s the approximate width of the molecule!

[/am4show]


Chemical Data & Safe Handling Information Sheet

What do I really need to know first? First of all, the chemicals in this set should be stored out of reach of pets and children. Grab the chemicals right now and stuff them in a safe place where accidents can’t happen. Do this NOW!


When you’re done storing your chemicals out of reach, watch this video:


[am4show have=’p8;p9;p25;p52;’ guest_error=’Guest error message’ user_error=’User error message’ ]


Now go grab your chemistry box and watch the video below. The packaging of your chemistry set might be a little different, but the important concepts are the same. We’re going to learn how to read the secret code on the chemicals, which parts are which inside the set, and get our chemistry lab ready to work with.


In this unit, you will learn how to build your own home chemistry lab safely under the direction of professionals. We’ll show you how to do real chemistry experiments, provide chemical storage information, give guidelines on proper chemical disposal when you’re finished, highlight lab tips and tricks, and warn you about things to watch out for. This is real chemistry for real kids.


NOTE:For the Alcohol Burner Wick: Tape tightly around one end, making the end small and tapered. You can also put glue (white glue or rubber cement work great) into the fibers at one end. As the glue hardens, form the end into a smaller and tapered end. It will slide through easily, and cut the end off and your ready to go.


How do I use this information? You have two options, depending on your comfort level and ultimate educational goals. You can just watch the videos and talk about what’s going on with your child, or you can watch the videos and then perform the experiment with your child.


This unit includes the instructional videos for Chemistry, and is meant to be used in conjunction with the experiments in the Thames and Cosmos C1000 and/orC3000 chemistry lab kits. The manual included in the C1000 and 3000 has complete safety information and many more experiments for you to complete after you finish this unit.


All experiments presented here at AT YOUR OWN RISK. You are fully responsible for your own safety and those around you. (No building nuclear reactors in your garage.)


To put it simply, don’t eat anything in your chemistry lab, keep children and pets away from your lab, lock up your chemicals safely, learn how to store your chemicals safely, and don’t create large quantities of anything explosive, corrosive, or toxic. Always wear safety equipment and do your experiments in a spot what has plenty of air for ventilation, water and a drain, and a phone.


In all seriousness, be safe, have fun, play with the kids, and if you run across anything that boggles the mind, let us know and we’ll try to help you out.
[/am4show]


You can go your whole life without paying any attention to the chemistry behind acids and bases. But you use acids and bases all the time! They are all around you. We identify acids and bases by measuring their pH.


Every liquid has a pH. If you pay particular attention to this lab, you will even be able to identify most acids and bases and understand why they do what they do. Acids range from very strong to very weak. The strongest acids will dissolve steel. The weakest acids are in your drink box. The strongest bases behave similarly. They can burn your skin or you can wash your hands with them.


Acid rain is one aspect of low pH that you can see every day if you look for it. This is a strange name, isn’t it? We get rained on all the time. If people were dissolving, if the rain made their skin smoke and burn, you’d think it would make headlines, wouldn’t you? The truth is acid rain is too weak to harm us except in very rare and localized conditions. But it’s hard on limestone buildings.


[am4show have=’p8;p9;p25;p52;’ guest_error=’Guest error message’ user_error=’User error message’ ]


Acids are liquids with a pH less than seven. A pH of seven is considered neutral. Bases are liquids with a pH greater than seven.


The combustion of fossil fuels such as oil, gasoline, and coal, create acid rain. Rain, normally at a pH of about 5.6, is always at least slightly acidic. Carbon dioxide is released into the air reacts with moisture in the air to form carbonic acid (HCO3). Sulfur dioxide and nitrogen oxides are released into the air by fossil fuel combustion. They react with the slightly acidic rain and form sulfuric acid (H2SO4) and nitric acid (HNO3).


We’re going to have fun with color changes in this experiment. We will make magic paper that changes color to tell us important things about liquids. It’s called litmus paper.


Litmus is harvested from a plant called a lichen, and bottled up as a powder. We’ll take the powder and make an acid-base indicator with it. Then we will use what we make to test solutions. And if you exercise your mind a bit, you will discover ways to use your litmus paper to discover things about the house and the world around you.


Materials:


  • Test tube rack
  • 2 Test tubes
  • Test tube stopper
  • Distilled water
  • Ruler
  • Litmus powder (MSDS)
  • Measuring spoon
  • Denatured alcohol (MSDS)
  • Pipette
  • Sodium carbonate (Na2CO3) (MSDS)
  • Sodium hydrogen sulfate (NaHSO4) (MSDS) Sodium hydrogen sulfate is very toxic. Respect it, handle it carefully and responsibly. Do not take it for granted.
  • Scissors
  • Filter paper (or paper towel or coffee filter)
  • Impervious surface

NOTE: Be very careful when handling the sodium hydrogen sulfate – it’s highly corrosive and dangerous when wet. Handle this chemical only with gloves, and be sure to read over the MSDS before using.


We will be using a ruler to measure the amount of water in a test tube. Ordinarily, chemists use more accurate measurement tools than a ruler. For the first part of this lab, making litmus solution, all we need is an approximate volume of water.


We will also be shaking a liquid in a test tube. Ever leave the top of a blender off when the “on” button is depressed? If not, just believe that it’s not a good idea. There is a certain technique t use when shaking up a liquid. We’ll place a stopper on a test tube and shake vigorously. Remember to do that as a chemist would do.


In a laboratory, whenever a chemist stoppers a solution and shakes it, it will be done the same way no matter if it is a toxic substance or just salt and water. That way, they are in the habit of doing it one way, the right way, so a mistake is not made at any time. A mistake at the wrong time could even be fatal.


Stopper the test tube firmly. Seat it well, but don’t grind down on the stopper. A test tube is thin-walled glassware, and as we grip harder it could collapse in our hand and now we have open cuts, blood, and toxic chemical is now entering your bloodstream. Stoppered firmly, we hold the test tube in our hand and place our thumb over the stopper for added security. To top off our safety measures, point the test tube, with a thumb firmly on top, away from us or anyone else and shake to our heart’s content.


We need to be careful with our chemicals. After using a chemical, cap the container to prevent spillage and contamination. Clean everything thoroughly after you are finished with the lab, or if you are going to reuse a tool. To dip a measuring spoon into one chemical after another, contaminates the chemicals and will affect your results.


Download Student Worksheet & Exercises


Clean everything thoroughly after you are finished with the lab. After cleaning with soap and water, rinse thoroughly. Chemists use the rule of “three” in cleaning glassware and tools. After washing, chemists rinse out all visible soap and then rinse three times more.


Place all chemicals, cleaned tools, and glassware in their respective storage places.


Dispose of all solid waste in the garbage. Liquids can be washed down the drain with running water. Let the water run awhile to ensure that they have been diluted and sent downstream.


You can test how acidic different substances are with an acid-base indicator like litmus paper.


Using the litmus powder in the chemistry set, we will make litmus paper. Our litmus paper is going to start out blue, and will turn red when an acid is placed on it. You can turn it back to blue by placing a few drops of a basic solution on it.


Let’s look a little further into the chemistry behind acids and bases. An acid produces hydronium ions (example: H3O+) when dissolved in water. The + or – notation on a molecule tells us that after a chemical reaction creates it, the molecule is left with a net positive (electrons have been lost) or net negative charge (electrons have been added). Now, the ion could have more than just a +1 or -1 charge. Often, we will discover molecules with positive or negative charges of 2, 3, or 4.


Every liquid has a pH, and some of them may surprise you. Fruits contain citric acid, malic acid, and ascorbic acids, and the distilled white vinegar in your kitchen is a weak form of acetic acid. You’ll find carbonic acids in sodas, and lactic acid in buttermilk. And remember that acids taste sour and bases taste bitter? Don’t taste your chemicals, but the sour taste of vinegar and lemons and the bitter taste of club soda water and baking soda are familiar to people.


Generally, acids are sour in taste, change litmus paper from blue to red, react with metals to produce a metal salt and hydrogen, react with bases to produce a salt and water, and conduct electricity. Strong acids often produce a stinging feeling on mucus membranes (don’t ever taste an acid, or any chemical for that matter!).


Acids are proton donors (they produce H+ ions). Strong acids and bases all have one thing in common: they break apart (completely dissociate) into ions when placed in water. This means that once you dunk the acid molecule in water, it splits apart and does not exist as a whole molecule in water. Strong acids form H+ and an anion, such as sulfuric acid:


H2SO4 –> H++ HSO4


There are six strong acids:


  • hydrochloric acid (HCl)
  • nitric acid (HNO3) used in fireworks and explosives
  • sulfuric acid (H2SO4) which is the acid in your car battery
  • hydrobromic acid (HBr)
  • hydroiodic acid (HI)
  • perchloric acid (HClO4)

The record-holder for the world’s strongest acid are the carborane superacids (over a million times stronger than concentrated sulfuric acid). Carborane acids are not highly corrosive even though are super-strong. Here’s the difference between acid strength and corrosiveness: the carborane acid is quick to donate protons, making it a super-strong acid. However, it not as reactive (negatively charged) as hydrofluoric (HF) acid, which is so corrosive that it will dissolve glass, many metals, and most plastics.


What makes the HF so corrosive is the highly reactive Fl– ion. Even though HF is super-corrosive, it’s not a strong acid because it does not completely dissociate (break apart into H+ and Fl–) in water. Do you see the difference? Weak acids only partly dissociate in water, such as acetic acid (CH3COOH).


On the other hand, bases taste bitter (again, don’t even think about putting these in your mouth!), feel slippery (don’t touch bases with your bare hands!), don’t change the color of litmus paper, but can turn red litmus back to blue, conduct electricity when in a solution, and react with acids to form salts and water. Soaps and detergents are usually bases, along with house cleaning products like ammonia.


Bases are also electron pair donors (they produce OH– ions). Strong bases also completely dissociate into the OH– (hydroxide ion) and a cation. LiOH (lithium hydroxide), NaOH (sodium hydroxide), KOH (potassium hydroxide), RbOH (rubidium hydroxide), CsOH (cesium hydroxide), Ca(OH)2 (calcium hydroxide), Sr(OH)2 (strontium hydroxide), and Ba(OH)2 (barium hydroxide). Weak bases only partly dissociate in water, such as ammonia (NH3)


pH stands for “power of hydrogen” and is a measure of how acidic a substance is. We can make homemade indicators to test how acidic (or basic) something is by squeezing out a special kind of juice (dye) called anthocyanin. Certain flowers have anthocyanin in their petals, which can change color depending on how acidic the soil is (hibiscus, hydrangeas, and marigolds for example). The more acidic a substance, the more red the indicator will become.


Going Further

Experiment: What household items are acidic or basic? Test various liquids to see. You may be surprised. Liquids you should be sure to test are vinegar, lemon or orange juice, baking soda, and cola. Use a dropper to place drops onto the paper instead of dunking the strip into your entire carton of orange juice. Litmus flavored orange juice is not my first choice in the morning.


Experiment: Collect soil samples from various places. Not the types of plants growing in the immediate area you are sampling from. Place about an inch of dirt in the bottom of a test tube. Fill the test tube near the top with water. Use distilled water if you have it for more accuracy. Stopper the tube and shake vigorously. Use your pipette to place drops of the water on your litmus paper and see if the soil is acidic or basic. Is there a correlation between the acidity of the soil and the plants that grow there?


Note: Litmus paper will not be able to indicate how acidic the rain in your area is, because the acid content in the water droplet is not high enough to register on the indicator. The effects of acid rain take time to develop and require more sensitive equipment to detect. [/am4show]

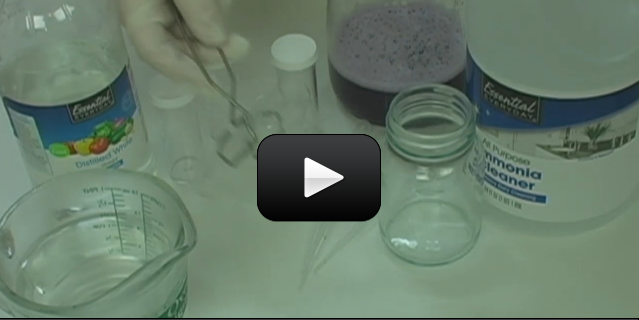
Magnesium is one of the most common elements in the Earth’s crust. This alkaline earth metal is silvery white, and soft. As you perform this lab, think about why magnesium is used in emergency flares and fireworks. Farmers use it in fertilizers, pharmacists use it in laxatives and antacids, and engineers mix it with aluminum to create the BMW N52 6-cylinder magnesium engine block. Photographers used to use magnesium powder in the camera’s flash before xenon bulbs were available.


Most folks, however, equate magnesium with a burning white flame. Magnesium fires burn too hot to be extinguished using water, so most firefighters use sand or graphite.


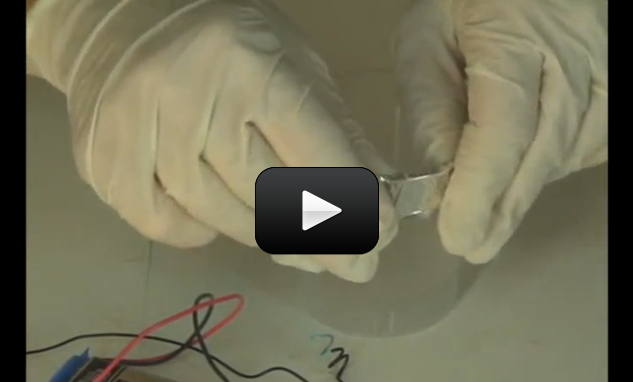
We’re going to learn how to (safely) ignite a piece of magnesium in the first experiment, and next how to get energy from it by using it in a battery in the second experiment. Are you ready?


[am4show have=’p8;p9;p25;p52;p58;’ guest_error=’Guest error message’ user_error=’User error message’ ]


Materials:


  • magnesium strip (MSDS)
  • matches with adult help
  • tile or concrete surface (something non-flammable)
  • gloves, goggles

Burning magnesium produces ultraviolet light. This isn’t good for your eyes, and the brightness of the flame is another danger for your eyes. Avoid looking directly into the flame.


Burning magnesium is so hot that if it gets on your skin it will burn to it and not come off. As difficult as burning magnesium is to put out, avoid letting the burning metal come in contact with you or anything else that might catch fire.


As explained later in this lab, magnesium burns in carbon dioxide. Therefore, a CO2 fire extinguisher won’t work to put it out. Water won’t work, CO2 won’t work. It takes a dry chemical fire extinguisher to put it out, or just wait for it to burn up completely on its own.


Magnesium is a metal, and in this experiment, you’ll find that some metals can burn. The magnesium in this first experiment combines with the oxygen in the air to produce a highly exothermic reaction (gives off heat and light). The ash left from this experiment is magnesium oxide:


2Mg (s) + O2 (g) –> 2Mg O (s)


Not all the magnesium from this experiment turned directly into the ash on the table – some of it transformed into the smoke that escaped into the air.


Caution: Do NOT look directly at the white flame (which also contains UV), and do NOT inhale the smoke from this experiment!


Download Student Worksheet & Exercises


Here’s what’s going on in this experiment:


As you burn your magnesium, you will get your very own fireworks show….a little one, but still cool.


2Mg + O2 –> 2MgO


Magnesium burned in oxygen yields magnesium oxide. Because the temperature of burning magnesium is so high, small amounts of magnesium react with nitrogen in the air and produce magnesium nitride.


3Mg + N2 –> 2Mg3N2


Magnesium plus nitrogen yield magnesium nitride. Magnesium will also burn in a beaker of dry ice instead of in air (oxygen).


2Mg + CO2 –> 2MgO + C


Magnesium burned in carbon dioxide yields magnesium oxide and carbon (ash, charcoal, etc.)


Cleanup: Rinse off and pat dry the rest of the magnesium strip.


Storage: Place everything back in its proper place in your chemistry set.


Disposal: Dispose of all solid waste in the garbage.


Magnesium Battery

Now let’s see how to make a battery using magnesium, table salt, copper wire, and sodium hydrogen sulfate (AKA sodium bisulfate).


Materials:


  • magnesium strip
  • test tube and rack
  • light bulb (from a flashlight)
  • 2 pieces of wire
  • measuring cup of water
  • salt (sodium chloride)
  • copper wire (no insulation, solid core)
  • measuring spoon
  • sodium hydrogen sulfate (NaHSO4) (MSDS) Sodium hydrogen sulfate is very toxic. Respect it, handle it carefully and responsibly. Do not take it for granted.
  • gloves, goggles

NOTE: Be very careful when handling the sodium hydrogen sulfate – it’s highly corrosive and dangerous when wet. Handle this chemical only with gloves, and be sure to read over the MSDS before using.


We’re going to do another electrolysis experiment, but this time using magnesium instead of zinc. In the previous electrolysis experiment, we used electrical energy to start a chemical reaction, but this time we’re going to use chemical energy to generate electricity. Using two electrodes, magnesium and copper, we can create a voltaic cell.


TIP: Use sandpaper to scuff up the surfaces of the copper and magnesium so they are fresh and oxide-free for this experiment. And do this experiment in a DARK room.


How cool is it to generate electricity from a few strips of metal and salt water? Pretty neat! This is the way carbon-core batteries work (the super-cheap brands labeled ‘Heavy Duty’ are carbon-zinc or ‘dry cell’ batteries). However, in dry cell batteries scientists use a crumbly paste instead of a watery solution (hence the name) by mixing in additives.


In this chemical reaction, when the magnesium metal enters into the solution, it leaves 2 electrons behind and turns into a magnesium ion:


Oxidation: Mg (s) –> Mg2+(aq) + 2e–


The magnesium strip takes on a negative charge (cathode), and the copper strip takes on a positive charge (anode). The copper strip snatches up the electrons:


Reduction: Cu2+(aq) + 2e– –> Cu (s)


and you have a flow of electrons that run through the wire from surplus (cathode) to shortage (anode), which lights up the bulb.


Note: You can substitute a zinc strip or aluminum strip for the magnesium strip and a carbon rod (from a pencil) for the copper wire.


Going further: You can expand on this experiment by substituting copper sulfate and a salt bridge to make a voltaic cell from two half-cells in Experiment 16.5 of the Illustrated Guide to Home Chemistry Experiments.


[/am4show]


In this lab, we’re going to investigate the wonders of electrochemistry. Electrochemistry became a new branch of chemistry in 1832, founded by Michael Faraday. Michael Faraday is considered the “father of electrochemistry”. The knowledge gained from his work has filtered down to this lab. YOU will be like Michael Faraday. I imagined he would have been overjoyed to do this lab and see the results. You are soooo lucky to be able to take an active part in this experiment. Here’s what you’re going to do…


You will be “creating” metallic copper from a solution of copper sulfate and water, and depositing it on a negative electrode. Copper is one of our more interesting elements. Copper is a metal, and element 29 on your periodic table. It conducts heat and electricity very well.


Many things around you are made of copper. Copper wire is used in electrical wiring. It has been used for centuries in the form of pipes to distribute water and other fluids in homes and in industry. The Statue of Liberty is a wonderful example of how beautiful 180,000 pounds of copper can be. Yes, it is made of copper, and no, it doesn’t look like a penny…..on the surface. The green color is copper oxide, which forms on the surface of copper exposed to air and water. The oxide is formed on the surface and does not attack the bulk of the copper. You could say that copper oxide protects the copper.


[am4show have=’p8;p9;p25;p52;p91;’ guest_error=’Guest error message’ user_error=’User error message’ ]


Our bodies use copper to our advantage, but in a proper form that is not toxic. Too much copper will make you sick and could kill you. Remember…don’t eat your chemistry set!


Materials:


  • Carbon rod (MSDS)
  • Copper sulfate (CuSo4) (MSDS)
  • Aluminum foil
  • 9V battery with clip
  • 2 wires
  • Disposable cup
  • Water

You are going to make a saturated solution of copper sulfate (CuSO4) in water. Pour a measuring spoon of granulated copper sulfate in the measuring cup of water. Stir well. Continue adding a spoonful and stirring until no more crystals will go into solution. The solution is saturated when no more crystals will dissolve and there are undissolved crystals at the bottom of the container.


C1000: Experiment


Download Student Worksheet & Exercises


Here’s what’s going on in this experiment:


CuSO4 + H2O (Copper sulfate is added to water)


CuSO4 + H2O –> Cu2+ + SO42- (Copper sulfate plus water yields positively charged carbon ion and negatively charged sulfate ion)


When mixed with water, copper sulfate dissociates into copper and sulfate ions. Notice that the ions, now separated, take on negative and positive charges.


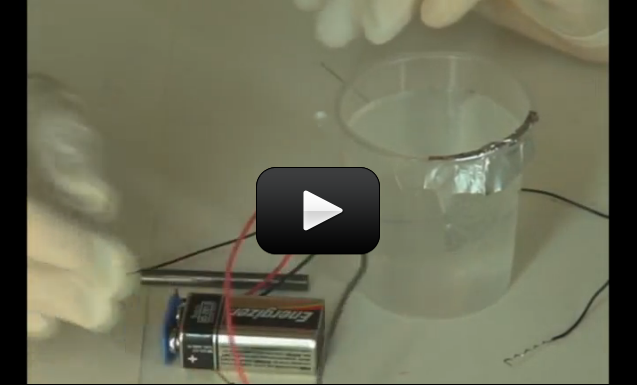
Next, 9V of electricity is passed through the solution with an electrode of carbon and an electrode of aluminum foil inserted into the solution. As electricity flows from one electrode to another, the copper ions, being positively charged, are attracted to the negative electrode. You can confirm this in two ways. One, if litmus paper, held close to an electrode, turns blue, that is the negative electrode. The other way is to just follow the negative lead from the battery to the negative electrode.


As the process moves along, the negative electrode gains copper ions. Evidence of this is seen on the surface of the electrode.


Here’s the breakdown of the entire process:

When the copper sulfate (CuSO4) mixed with water (H2O), the copper sulfate dissociated:


CuSO4 –> Cu2+ + SO42-


When power is added to the solution, the copper ions move toward the negative cathode (carbon rod) and take electrons from it, forming solid copper right on the electrode:


Cu2++ 2e– –> Cu(s)


On the positive anode (the aluminum foil), you’ll see bubbles instead of a solid forming. The anode attracted electrons from the water molecule to form oxygen bubbles:


6H2O –> O2 + 4H3O+ + 4e–


Let’s put these two reactions together to get the overall reaction of:


2Cu2+ + 6H2O –> 2Cu + O2 + 4H3O+


Note the difference between galvanic cells and electrolytic cells: galvanic use spontaneous chemical reactions (like in a car battery) to generate electricity, and electrolytic cells use electricity to make the chemical reaction to occur and move electrons to move in a way they would go on their own (like in this experiment).


Clean up: Clean everything thoroughly after you are finished with the lab. After cleaning with soap and water, rinse thoroughly. Chemists use the rule of “three” in cleaning glassware and tools. Rinse three times, wash with soap, rinse three times.


Wipe off the carbon rod to remove the copper. The aluminum goes in the trash, but the solution and solids at the bottom cannot. The liquid contains copper, a toxic heavy metal that needs proper disposal and safety precautions. Another chemical reaction needs to be performed to remove the heavy metal from the copper sulfate. Add a thumb sized piece of steel wool to the solution. The chemical reaction will pull out the copper out of the solution. The liquid can be washed down the drain. The solids cannot be washed down the drain, but they can be put in the trash. Use a little water to rinse the container free of the solids.


Place all chemicals, cleaned tools, and glassware in their respective storage places.


Dispose of all solid waste in the garbage. Liquids can be washed down the drain with running water. Let the water run awhile to ensure that they have been diluted and sent downstream.


Going Further

Here is a link to information about making your own geode (crystal lined rock) of copper sulfate crystals:


http://chemistry.about.com/od/growingcrystals/ht/geode.htm


[/am4show]


If we don’t have salt, we die. It’s that simple. The chemical formula for salt is NaCl. Broken down, we have Na (sodium) and Cl (chlorine). Either one of these can be fatal in sufficient quantities. When chemically combined, these two deadly elements become table salt. What once could kill now keeps us alive. Isn’t chemistry awesome?


Chlorine, element 17, is called a halogen as are all the elements in the 17th row. All halogens have similar chemical properties. They are highly reactive nonmetals, and react easily with most metals. Sodium is a metal, and is bonded with sodium in the table salt used in this lab. Besides being found in salt, chlorine has many uses in our world such as killing bacteria in our water, making plastic, cleaning products, and the list goes on. A very useful chemical, and is among the top ten chemicals produced in the United States. Ever since its discovery in 1774, chlorine has been very useful. It is found in nature in sodium chloride, but in very small concentrations. Seawater, the most abundant source of chlorine, has a concentration of only 19g of chlorine per liter.


[am4show have=’p8;p9;p25;p52;p91;’ guest_error=’Guest error message’ user_error=’User error message’ ]


Although chlorine is abundant in nature (about 2% of the mass of the ocean is chloride ions), scientists have developed a safe way to make chlorine. Chlorine has been manufactured for a hundred years through different processes, including: Membrane Cell, Diaphragm Cell, and Mercury Cell processes. In the first two processes, salt water (NaCl + H2O) and caustic soda (NaOH) are used along with a power supply to generate chlorine and hydrogen gas.


Molecules that contain chlorine that find their way into the upper atmosphere can destroy the ozone layer. The ozone-oxygen cycle is a chemical process that transforms the harmful UV light (240-310nm) from the sun into heat. The oxygen and ozone molecules are constantly being switched back and forth as the sun’s UV breaks down the ozone and the oxygen molecules reacts with other oxygen atoms.


This reaction converts UV radiation into thermal energy which heats up the atmosphere (this reaction happens slowly):


O3 –> O2 + O


If two free oxygen atoms meet, they form a new oxygen molecule:


2O –> O2


If this new molecule meets another free oxygen, it creates another ozone molecule:


O2 + O –> O3


If an ozone and an oxygen molecule meet, they form two oxygen, and this process removes ozone from the atmosphere. This process is very slow, however, so the naturally occurring reaction of:


O3 + O –> 2O2


is nothing to worry about. It’s when this reaction gets sped up by catalysts that we have to pay close attention. There are many catalysts that can speed up the removal of ozone, such as chlorine, bromine, and nitric oxide (NO3). And since they are catalysts in the reaction (meaning they simply speed up the reaction without getting used), they can do this over and over again before they move out of the atmosphere completely. One chlorine atom can speed up (catalyze) tens of thousands of ozone removal reactions before it moves out of the stratosphere. Scary, huh?


CFCs (chlorofluorocarbons) such as aerosols, refrigerants (R-12), and solvents have been banned because of their damaging effect on the atmosphere. When sunlight hits a CFC, it splits off a chlorine ion:


CCl3F –> CCl2F– + Cl–


This free chlorine ion catalyzes the ozone into oxygen:


O3 + O– + Cl–? 2 O2 + Cl–


The chlorine we’re going to generate in our experiment is a minuscule amount. Even so, it is still a good idea to perform this experiment in an area with good ventilation or outdoors.


Remember to wear your gloves and goggles. True, the amount of chlorine produced is small and pretty harmless. But there are several factors that make it prudent to wear your protection. Not everyone has the same sensitivity to chemicals. Even in this lab, a person could get their skin irritated to some degree. Eyes are very sensitive organs, and I know I don’t want any amount of chlorine contacting my eyes.


Here’s what you’re going to need to do this experiment:


Materials:


  • 9V battery clip
  • carbon rod
  • wires
  • disposable cup
  • salt
  • water
  • aluminum foil
  • gloves, goggles

We will be observing a decomposition reaction. A decomposition reaction separates a substance into two or more substances that may differ from each other and from the original substance.


ZcQr –> Zc + Qr


When separated, the free elements to the right of the equation become ions, one positively charged and one negatively charged.


A very important concept to learn in this lab is that charged particles (ions) will move toward either a positive or negative electrode. The ions that move toward the anode (positive terminal) are anions, and the ones that move toward the cathode (negative) are cations.


Decomposition of any kind is the breaking down of the whole into smaller parts that were once part of the whole.


Download Student Worksheet & Exercises


Here’s what’s going on in this experiment:


An electrical charge is passing through a saturated solution of salt (NaCl). It will sit there and just be salt unless that electrical charge is imposed on it. The electrical charge excites the molecules, and causes the molecules of salt to decompose, to pull apart, to break into simpler parts. These ions are negatively and positively charged. Negatively charges particles have more electrons than protons and seek a balance. In order to have an electric current, you need to have positive and negative electrodes. Opposites attract, so the negative ions move to the positive electrode and the positive ions are attracted to the negative electrode.


NaCl –> Na+ + Cl–


Sodium chloride decomposes into sodium and chlorine ions.


The anode (positive, carbon rod) soaks up free electrons, which get pumped to the cathode (negative, aluminum foil) and released into the solution. If you press litmus paper against the aluminum strip, you’ll find it’s blue (basic), and red when pressed to the anode (carbon rod). The bubbles on the carbon rod are made of chlorine. The chlorine ions in the solution are attracted to the positive pole (carbon rod) and quickly combine to form chlorine gas:


2Cl– –> Cl2


The sodium ions move toward the aluminum foil and split the water molecule into ions:


H2O –> H+ + OH–


The hydrogen ions are converted into hydrogen gas:


2H+ –> H2


The sodium ions (Na+) that remain in the solution combine with the OH- ions to create sodium hydroxide which turns the litmus paper blue:


Na+ + OH– –> NaOH


The main concept I want you to understand with this experiment is that charged particles (ions) will move toward either a positive or negative electrode. The ions that move toward the anode (positive terminal) are anions, and the ones that move toward the cathode (negative) are cations.


Before you dispose of the solution, try this variation on the experiment: remove the foil and hold a salt-water filled test tube (filled to the top with salt water and capped with a gloved thumb and submerged into the solution). Place the cathode wire into the tube and you’ll see bubbles rising up into the tube. What type of gas is it? (Hint: wait until the tube is nearly full before removing it and using a match to test.)


Cleanup: Clean everything thoroughly after you are finished with the lab. After cleaning with soap and water, rinse thoroughly. Chemists use the rule of “three” in cleaning glassware and tools. After washing, chemists rinse out all visible soap and then rinse three times more.


Storage: Place all chemicals, cleaned tools, and glassware in their respective storage places.


Disposal: Dispose of all solid waste in the garbage. Liquids can be washed down the drain with running water. Let the water run awhile to ensure that they have been diluted and sent downstream.


[/am4show]


Electricity. Chemistry. Nothing in common, have nothing to do with each other. Wrong! Electrochemistry has been a fact since 1774. Once electricity was applied to particular solutions, changes occurred that scientists of the time did not expect.


In this lab, we will discover some of the same things that Farraday found over 300 years ago. We will be there as things tear apart, particles rush about, and the power of attraction is very strong. We’re not talking about dancing, we’re talking about something much more important and interesting….we’re talking about ELECTROCHEMISTRY!


[am4show have=’p8;p9;p25;p52;’ guest_error=’Guest error message’ user_error=’User error message’ ]


Materials:


  • Test tube rack
  • 9V battery clip
  • 9V battery
  • Flashlight lamp
  • Gloves
  • Electrical wires
  • Aluminum foil
  • Water
  • Sugar
  • Salt
  • Sodium carbonate (MSDS)
  • Measuring spoon

When the salt sodium chloride (NaCl) mixes with water, it separates into its positively (Na+) and negatively (Cl-) charged particles (ions). When a substance mixes with water and separates into its positive and negative parts, it’s called a ‘salt’.


Salts can be any color of the rainbow, from the deep orange of potassium dichromate to the vivid purple of potassium permanganate to the inky black of manganese dioxide. Did you know that MSG (monosodium glutamate) is a salt? Most salts are not consumable, as in the lead poisoning you’d get if you ingested lead diacetate.


If you pass a current through the solution of salt and water, opposites attract: the positive ions are attracted tot he negative pole and the negative ions go toward the positive pole. These migrations ions allow electricity to flow, which is why ‘salt’ solutions conduct electricity.


C1000: Experiments


Download Student Worksheet & Exercises


Here’s what’s going on in this experiment:


Our experiment uses a saturated solution of table salt that is just sitting in a container minding its own business. That just won’t do! We must intervene. Our 9V battery pushes its voltage through the saltwater. That electric current tears the sodium from the chlorine. These positively and negatively charged ions rush about, looking for something they are attracted to. Opposites attract, so positively charged sodium ions find spending time with the negative electrode a treat. They are very happy together. Negatively charged chlorine ions are attracted to the positive electrode. The match is wonderful, and the negativity and the positivity somehow enjoy the time spent with each other.


NaCl –> Na+ + Cl–


Sodium chloride decomposes into sodium and chlorine ions


Cleanup: Clean everything thoroughly after you are finished with the lab. After cleaning with soap and water, rinse thoroughly. Chemists use the rule of “three” in cleaning glassware and tools. After washing, chemists rinse out all visible soap and then rinse three times more.


Storage: Place all chemicals, cleaned tools, and glassware in their respective storage places.


Disposal: Dispose of all solid waste in the garbage. Liquids can be washed down the drain with running water. Let the water run awhile to ensure that they have been diluted and sent downstream.


[/am4show]


Ammonia has been used by doctors, farmers, chemists, alchemists, weightlifters, and our families since Roman times. Doctors revive unconscious patients, farmers use it in fertilizer, alchemists tried to use it to make gold, weightlifters sniff it into their lungs to invigorate their respiratory system and clear their heads prior to lifting tremendous loads. At home, ammonia is used to clean up the ketchup you spilled on the floor and never cleaned up.


The ammonia molecule (NH3) is a colorless gas with a strong odor – it’s the smell of freshly cleaned floors and windows. Mom is not cleaning with straight ammonia (it’s gas at room temperature because it boils at -28oF, so the stuff she cleans with is actually ammonium hydroxide, a solution of ammonia and water). Ammonia is found when plants and animals decompose, and it’s also in rainwater, volcanoes, your kidneys (to neutralize excess acid), in the ocean, some fertilizers, in Jupiter’s lower cloud decks, and trace amounts are found in our own atmosphere (it’s lighter than air).


[am4show have=’p8;p9;p25;p52;p91;’ guest_error=’Guest error message’ user_error=’User error message’ ]


Ammonia is a strong base – it combines with acids to form salts:


NH3 + HCl –> NH4Cl


But ammonia also can act as a weak acid. Remember, an acid is a proton donor, as in this reaction with lithium, where the ammonia molecule donated one hydrogen atom:


2 Li + 2 NH3 –> 2 LiNH2 + H2


In this experiment, we make a stink and then we see something that will make us go ooooooh…and aaaaw. How fun is that? But you need to follow the instructions carefully and perform your experiment safely. Promise?


Ammonia will be generated by the combination of ammonium chloride and sodium carbonate. The amount of ammonia generated in this experiment is not a large amount. However, you really should experience this particular stink.


Materials:


  • 3 test tubes and rack
  • sodium carbonate (MSDS)
  • ammonium chloride (MSDS)
  • copper sulfate (MSDS)
  • sodium hydrogen sulfate (NaHSO4) (MSDS) Sodium hydrogen sulfate is very toxic. Respect it, handle it carefully and responsibly. Do not take it for granted.
  • water
  • test tube stopper
  • measuring spoon
  • gloves, goggles

NOTE: Be very careful when handling the sodium hydrogen sulfate – it’s highly corrosive and dangerous when wet. Handle this chemical only with gloves, and be sure to read over the MSDS before using.


A chemical reaction is going to occur when the ammonium chloride, sodium chloride, and another chemical reaction is going to occur when the copper sulfate is added. These compounds are the reactants in our chemical reaction, and the blue liquid, CuCl (copper chloride), at the end of the experiment, will be our product. This experiment displays two types of reactions, a decomposition reaction when we combine ammonium chloride and sodium chloride, and a double replacement reaction when we add copper sulfate to the mixture.


C1000: Experiments


Download Student Worksheet & Exercises


When we combine ammonium chloride and sodium carbonate, ammonia will be produced. We will add copper sulfate to that mixture, producing two chemical compounds with totally different properties from those exhibited by the original chemicals.


Two chemical reactions will occur in this experiment:


(1) When you add ammonium chloride and sodium chloride to the water, a decomposition reaction will occur that produces ammonia gas, carbon dioxide gas, and sodium chloride dissolved in water. It is identified as a decomposition reaction because the reactants breakdown into elements or simpler compounds.


NaHCO3 + 2NH4Cl –> NH3 + CO2 + NaCl + 2H2O


sodium carbonate + ammonium chloride –> ammonia + carbon dioxide + sodium chloride + water


(2) The next reaction takes place when copper sulfate is added to the sodium chloride and water. The products of this reaction are sodium sulfate and copper chloride (the blue color). This reaction is identified as a double replacement reaction due to the fact that the two reactants break apart and recombine, the reactants trading parts, recombining to form two other different compounds with properties completely different than those of the reactants.


NaCl + CuSO4 —> NaSO4 + CuCl


sodium chloride + copper sulfate –> sodium sulfate + copper chloride


Big suggestion here: All chemical vapors are best experienced by “wafting”, a procedure that brings the vapor to you, instead of sticking your nose in the test tube, bringing you to the vapors. Please get in the habit of smelling properly. If ammonia vapors can bring unconscious people back to consciousness, you should probably make sure you are sniffing safely.


Reminder: Always wash your hands or gloves, and your chemistry tools, when switching from one chemical to another to avoid contamination that could affect the experiment adversely.


Store: Put all chemicals away in their proper places to keep them organized and ready to be used again. All tools should be put away as well, but make sure hat they have been cleaned and dried before storing them. A rule of thumb in chemistry is always wash something three times.


Disposal: Pour liquids down the drain using plenty of water. Throw solid waste into the outside garbage to prevent filling the house with bad smells.


[/am4show]


This experiment is for advanced students.


Purple and white colors, making the whitewash that Tom Sawyer used, and produce an exothermic chemical reaction…..does it get any better?


Limewater is one of the compounds we work with in this experiment. Limewater was used in the old days of America. We’re talking about the 80’s…..the 1880’s.


Traveling medicine shows sold what was called “patent medicines”. These usually had no medicinal properties at all. The man in charge, the salesman of the operation, was called a “huckster”. He would have the one of the people gathered around to listen to him blow into limewater. Their exhaled breath contains carbon dioxide, and the lime water turned cloudy, just like in our experiment.


The man would hold up the glass with the cloudy limewater in it and pour in some of his fantastic remedy. As long as the “medicine” was acidic, it would turn the cloudy limewater clear. This was proof that the remedy would cure whatever ailed the person.


[am4show have=’p9;p52;’ guest_error=’Guest error message’ user_error=’User error message’ ]


Today, lime water is used in the traditional making of corn tortillas, tamales, and corn chips. People who have marine (saltwater) aquariums use lime water to assist in maintaining a healthy tank. Lime water is also used in the hide tanning process to remove hair. Parchment paper is made possible by the use of lime water as well. Here’s what you’ll need for your experiment with limewater:


Materials:


  • Granulated white sugar (MSDS)
  • Distilled water
  • Test tube rack
  • 2 test tubes
  • On-hole rubber stopper
  • Measuring spoon
  • 900 bend glass tubing
  • Test tube clamp
  • Potassium permanganate (KMnO4) (MSDS)
  • Sodium hydrogen sulfate (NaHSO4 ) (MSDS) Sodium hydrogen sulfate is very toxic. Respect it, handle it carefully and responsibly. Do not take it for granted.
  • Measuring syringe
  • Calcium hydroxide, Ca(OH)2 (MSDS) to add to H20 to make limewater (MSDS)

NOTE: Be very careful when handling the sodium hydrogen sulfate – it’s highly corrosive and dangerous when wet. Handle this chemical only with gloves, and be sure to read over the MSDS before using.


Keep the potassium permanganate solution from entering the glass tube and being transported into the limewater.


Saturated calcium hydroxide solution has been historically called lime water Ca(OH)2 . That is what we will be bubbling our carbon dioxide into. It looks like water, but isn’t. Limewater smells like dirt and has an alkaline taste. (Don’t taste to find out. Not a safe laboratory practice.)


Saturated calcium hydroxide solution has been used as paint since the early years of the settlement of America. Ever hear of Tom Sawyer and the whitewashed fence? Whitewash is another name for limewater. We’re going to be using some pretty nasty chemicals, but you already follow all the safety precautions. Just remember to remember, and be careful.


The solution in one of your test tubes is going t undergo a chemical reaction to produce carbon dioxide. Another solution will be the indicator that CO2 has been produced.


C3000: Experiment


Download Student Worksheet & Exercises


Here’s what’s going on in this experiment:


When carbon dioxide is produced and bubbled into the lime water, a chemical reaction takes place.


Ca(OH)2 + CO2 –> CaCO3 + H2O


Calcium hydroxide (lime water) and carbon dioxide yields calcium carbonate and water. A milky precipitate forms that is calcium carbonate (CaCO3).


Cleanup: Clean everything thoroughly after you are finished with the lab. After cleaning with soap and water, rinse thoroughly. Chemists use the rule of “three” in cleaning glassware and tools. After washing, chemists rinse out all visible soap and then rinse three times more.


Storage: Place all chemicals, cleaned tools, and glassware in their respective storage places.


Disposal: Dispose of all solid waste in the garbage. Liquids can be washed down the drain with running water. Let the water run awhile to ensure that they have been diluted and sent downstream.


[/am4show]


This experiment is for advanced students. This is a repeat of the experiment: Can Fish Drown? but now we’re going to do this experiment again with your new chemistry glassware.


The aquarium looked normal in every way, except for the fish. They were breathing very fast and sinking head first to the bottom of the tank. They would sink a few inches, then jerk into proper movement again.


The student had to figure out what was wrong. He had set up the aquarium as an ongoing science project, and it was his responsibility to maintain the fish tank. His grade depended on it.


He went to his mom for help. She looked over the setup. “Have you tested the water?”


A quizzical look on his face, the boy said, “Everything is normal nitrates, nitrites, hardness, alkalinity, and pH. The pH was a little acidic, but not outside the proper range.”


[am4show have=’p9;p52;p91;’ guest_error=’Guest error message’ user_error=’User error message’ ]


His mother said to him, “Show me how you would look if you were gasping for air and look in the mirror while you do it.”


He did, and he remarked, “I look like my fish.” I swear a light bulb actually appeared over his head and lit all up. He said, “They need air!” His mom was standing near the aquarium holding an air pump, vinyl tubing, and an air stone.


“Looking for this?” His mom said. He and his mom set up the air pump and soon his fish were jumping in the air and kissing him on the cheek. Well, maybe not that last part, but you get the idea. Water does not contain an inexhaustible amount of oxygen in it. It must be replenished if there is something in the water that is using it up.


The oxygen carrying capacity of water varies with conditions. Rainbow trout are found in cold water streams because the colder the water, the more oxygen it will hold. Rainbow trout need lots of oxygen in their water to survive. Other species of fish are found only in warmer water because they are adapted to a condition of less oxygen in the water. Still other fish can gulp the air from the surface if the water is severely depleted of oxygen. I have seen carp gulping air as they swim around in a pond looking for food on a hot summer day.


In this experiment we will discover that water does contain oxygen. We will subject the water to heat and we will see the oxygen for ourselves.


Materials:


  • Test tube rack
  • Test tube
  • Test tube holder
  • Rubber stopper
  • 90 degree bent glass tubing
  • Alcohol burner
  • Striker

Be careful not to let your water boil. Pressure will build up inside the test tube because only a small amount of pressure at a time can leave via the glass tubing. Pressure will build up and the stopper will fly off or the test tube will rupture. (Glass shrapnel and boiling water will get all over you. Not a pleasant thought.)


Inserting the glass tubing into and through the stopper is the most dangerous part of this lab or any other lab requiring this to be done. Most lab injuries, student or chemist, are due to cuts from broken glass. Proper technique will save you the pain of a deep cut. Lubricate the rubber stopper with glycerol if you have it. (It is a non-reactive laboratory grease that will not contaminate as badly as household or automotive oils and greases.) DO NOT use any other grease or oil. You probably don’t have any glycerol, so your second choice is just plain old water.


So, water on the tubing, gently start the glass tubing into the stopper. Don’t grip the glass with your hands, get a thick wash cloth, small towel, or work gloves and grab the tubing. Gently twist the tubing as you push gently on the tubing. Don’t pull to one side or the other, make your push a straight line. Once the tubing gets going, don’t stop unless you have to. Your second shot may be much more difficult because you have pushed a lot of the water off the tubing.


You are not going to see a chemical change. You are not going to work with chemicals. You are going to see for yourself that there is oxygen in water. That is, of course, what fish use up in the water. Unless it is replenished, fish can’t breath and they suffocate….not drown. The oxygen is replenished in the wild through various means. We can replenish the water with air pumps and water changes.


C3000: Experiment


Cleanup: Clean everything thoroughly after you are finished with the lab. After cleaning with soap and water, rinse thoroughly. Chemists use the rule of “three” in cleaning glassware and tools. After washing, chemists rinse out all visible soap and then rinse three times more.


Heated surfaces will be hot for awhile. Let things rest for a couple of minutes before doing your cleanup.


Your test tube probably has a blackened surface. It should wipe off easily, or will with a little soap, water, and a light touch.


Storage: Place all chemicals, cleaned tools, and glassware in their respective storage places.


Disposal: Dispose of all solid waste in the garbage. Liquids can be washed down the drain with running water. Let the water run awhile to ensure that they have been diluted and sent downstream.


The filter pump in your fish tank ‘aerates’ the water. The simple act of letting water dribble like a waterfall is usually enough to mix air back in. Which is why flowing rivers and streams are popular with fish – all that fresh air getting mixed in must feel good! The constant movement of the river replaces any air lost and the fish stay happy (and breathing). Does it make sense that fish can’t live in stagnant or boiled water?


[/am4show]


This experiment is for advanced students.


Don’t put this in your car….yet. Hydrogen generation, capture, and combustion are big deals right now. The next phase of transportation, and a move away from fossil fuels in not found in electric cars. Electric cars are waiting until hydrogen fuel cell vehicles become practical. It can be done and is being done.


Cars being powered by hydrogen are here, but not on the market yet. Engineers and chemists are always finding new ways to improve the chemical reaction that produces hydrogen and making the vehicles more efficiently use the fuel. Hydrogen fuel is not just easy to make, it is inexpensive, and the “exhaust” is water.


We will generate hydrogen in this lab. We will also see how combustible it is. Just let your imagination wander….just a bit and you will see noiseless cars and trucks zipping along the streets and interstates, carrying people and cargo. The Indianapolis 500 wouldn’t be quite the same, though. “And there they go, roaring, I mean quietly entering turn two…”


[am4show have=’p9;p52;p68;p80;’ guest_error=’Guest error message’ user_error=’User error message’ ]


Materials:


  • Goggles
  • Gloves
  • Measuring syringe
  • Water
  • Test tube rack
  • One-hole rubber stopper
  • Alcohol burner
  • Lighter
  • Test tube
  • Test tube holder
  • Water bath
  • Chemistry stand
  • Rubber tubing
  • 90 degree bend glass tubing
  • Zn powder (MSDS)
  • Copper sulfate CuSo4 (MSDS)
  • Sodium hydrogen sulfate NaHSO4 (MSDS) Sodium hydrogen sulfate is very toxic. Respect it, handle it carefully and responsibly. Do not take it for granted.

NOTE: Be very careful when handling the sodium hydrogen sulfate – it’s highly corrosive and dangerous when wet. Handle this chemical only with gloves, and be sure to read over the MSDS before using.


We will combine sodium hydrogen sulfate, water, and zinc. As soon as they are all together in our test tube, bubbles will begin forming in the solution. The bubbles will continue coming off, but we can speed up the reaction by adding a little copper sulfate. Now, instead of leisurely coming off, the gas is being given off quickly and we must act quickly ourselves to capture as much of the gas as possible. We can aid the gas movement ourselves by swirling the solution gently.


C3000: Experiment


Download Student Worksheet & Exercises


Here’s what’s going on in this experiment:


NaHSO4 + H2O + Zn + CuSO4 –> H2 + NaSO4 + CuHSO4 + ZnO


Sodium hydrogen sulfate is added to water and dissolved completely. Zinc is added and hydrogen gas is generated by the chemical reaction. Copper sulfate is added as a catalyst to speed up the generation of hydrogen.


Double replacement occurs where the compounds are broken apart and the pieces realign and re-bond with different parts of the original molecules, and zinc oxide is left as a byproduct of the oxidation of the zinc powder. Hydrogen gas is freed in the reaction.


Cleanup: We are going to clean everything thoroughly after we finish the lab. After cleaning with soap and water, rinse thoroughly. Chemists use the rule of “three” in cleaning glassware and tools. After washing, chemists rinse out all visible soap and then rinse three times more.


Storage: Place cleaned tools and glassware in their respective storage places.


Disposal: Liquids must be neutralized before they can be washed down the drain. Solids are thrown in the outside trash.


[/am4show]


This experiment is for advanced students.


In industry, hydrogen peroxide is used in paper making to bleach the pulp before they form it into paper. Biologists, when preparing bones for display, use peroxide to whiten the bones.


At home, 3% peroxide combined with ammonium hydroxide is used to give dark-haired people their desired blonde moment. Peroxide is also used on wounds to clean them and remove dead tissue. Peroxide slows the flow from small blood vessels and oozing in wounds as well.


[am4show have=’p9;p52;p91;’ guest_error=’Guest error message’ user_error=’User error message’ ]


Peroxide is a chemical produced in a Bombardier Beetle, and it squirts its irritating load into the face or onto the lips of a predator. Zebra fish produce peroxide after their skin is damaged. This action acts as a signal to produce an abundance of white cells to fight any infection and assist in the healing.


Scientists believe that healing can occur in humans in the same way. Future experiments may prove them right. It is also believed that people who have asthma have elevated levels of peroxide in their lungs, levels much higher than people without asthma.


Hydrogen peroxide can also help an animal that has eaten poison. A small amount of it can be put down the animal’s throat to induce vomiting and clear the poison out of their body as much as possible. Did your dog get too close to a skunk? There is no real “cure” other than a lot of time outside to air out, but peroxide mixed with hand soap is pretty good at removing the stink. Then, how you remove that stink from yourself…..another problem.


Materials:


  • 2 test tubes
  • Burner
  • Lighter
  • Chemistry stand
  • Test tube holder
  • Glass jar
  • Water pan
  • Water
  • Rubber tubing
  • 90o glass tubing
  • 3% Hydrogen peroxide (H2O2) (MSDS)

Hydrogen peroxide comes in a dark bottle because sunlight will slowly decompose hydrogen peroxide in the same way that we are doing with the exception that our way is much quicker.


When finished heating hydrogen peroxide, if you leave everything together, water will climb the tubing and attempt to enter the hot test tube. Cold water and hot peroxide are not safely compatible. To avoid this, remove the stopper from the test tube and set it aside while the solution cools.


Wait until all the equipment is cool enough to touch before disassembling for cleaning and storage.


When heating the test tube, be careful. Don’t heat in one place for too long. Move the flame of the burner around periodically to heat the reaction area of the test tube uniformly.


Don’t boil the peroxide too vigorously. If boiling gets too wild, remove the burner form the test tube until it calms down, then move it back to heat again.


At all times, keep the flame and peroxide apart…well apart.


Hydrogen peroxide is going to get broken down, is going to decompose, into the base elements of hydrogen and oxygen.


C3000: Experiment


Download Student Worksheet & Exercises


Here’s what’s going on in this experiment:


Hydrogen peroxide (H2O2) breaks down with heat. A decomposition reaction occurs where hydrogen peroxide breaks down into its component elements, H2 and O2


2H2O2 –> 2H2O + O2


2 molecules of hydrogen peroxide are heated, creating a chemical decomposition reaction, producing 2 molecules of water and 1 molecule of oxygen.


Cleanup: Clean everything thoroughly after you are finished with the lab. After cleaning with soap and water, rinse thoroughly. Chemists use the rule of “three” in cleaning glassware and tools. After washing, chemists rinse out all visible soap and then rinse three times more.


Storage: Place cleaned tools and glassware in their respective storage places.


Disposal: Liquids can be washed down the drain


Going further: Elephant’s Toothpaste

A really fun experiment with hydrogen peroxide is making Elephant’s toothpaste. It requires an adult helper, and is fun for the kid and the adult.


Materials:


  • Empty 20 or 24 ounce plastic bottle
  • 3 % hydrogen peroxide
  • Liquid dish soap
  • Warm water
  • Food coloring
  • One packet or 2 1/2 ounces of yeast
  • One really big container to contain the big mess – laundry tub, bathtub, etc.

This video below is a demonstration of the Elephant Toothpaste experiment using much nastier chemicals than the ones I’ve mentioned above… the hot gas generated is actually oxygen. Enjoy!


Procedure:


  • Dissolve the yeast in a little warm water and stir well. Use just enough water to make a pourable liquid. Let it sit for about 5 minutes while you prepare the rest of the experiment.
  • Pour 1/2 cup of hydrogen peroxide, 1/4 cup of dish soap and a little bit of food coloring in the bottle. Swirl to mix and put the bottle in the middle of your large pot, container or sink.
  • Pour the yeast solution into the bottle. A funnel can help, but be prepared to pour fairly quickly and remove it again because the reaction will start as soon as you start pouring.
  • Stand back and watch the fun!

[/am4show]


This experiment is for advanced students.


This time we’re going to use a lot of equipment… really break out all the chemistry stuff. We’ll need all this stuff to generate oxygen with potassium permanganate (KMNO4). We will work with this toxic chemical and we will be careful…won’t we?


[am4show have=’p9;p52;’ guest_error=’Guest error message’ user_error=’User error message’ ]


Oxygen is pretty important… it’s only the single most important thing that mammals need. Besides breathing, oxygen is important for so much on this world. Oxygen is used in welding, rocket fuel, and water treatment. Without oxygen, there is no oxidation and no fire. Simply put, we wouldn’t have rusty bicycles or campfires. Can your believe it?


Potassium permanganate is an important chemical in the film industry. It is used to make props like cloth, ropes, and glass, appear “old”. Some films it has been used in are “Troy”, “Indiana Jones”, and “300”. The KMnO4 stains any organic material. KMnO4 is also used as an antiseptic, and is used to treat skin ulcers and rashes. It is also used to treat foot fungus…..phew! People living in the country are sometimes plagued with an iron taste or a rotten egg smell in the water from their wells. Potassium permanganate can be used to remove the taste and smell from the water.


Materials:


  • Chemistry stand
  • Plastic tub
  • Water
  • 2 test tubes
  • Test tube clamp
  • Potassium permanganate (KMnO4) (MSDS)
  • Alcohol burner
  • Lighter
  • One-hole rubber stopper
  • Solid rubber stopper
  • 900 bend glass tube
  • Measuring spoon
  • Rubber tubing
  • Match
  • Wooden splint

Be careful inserting the glass tubing into the stopper. Wet the short end of the glass tube with water and gently push and twist the glass through the stopper. Wear work gloves and work carefully and slowly. Do not use oil or grease you have laying around the house.


When lighting the oxygen in the test tube, use a wooden splint. Wooden splints can be purchased from craft stores, or make your own by shaving thin strips from a piece of pine wood.


C3000: Experiment


Download Student Worksheet & Exercises


Here’s what’s going on in this experiment:


2KMnO4 + O2 –> K2MnO4 + MnO2 + O2


Potassium permanganate is heated and produces potassium manganate, manganese dioxide, and oxygen


Oxygen is generated by heating the KMnO4, and is collected in the test tubes. We will test the contents of the tubes to see if oxygen has been generated. What do you think will happen when a glowing splint is pushed up inside the test tube? Don’t know? Do the experiment and try to figure it out. Remember, in order for there to be flame, you need fuel and oxygen. If that gas was carbon dioxide, what would happen when the glowing splint was placed inside?


Cleanup: Clean everything thoroughly after you are finished with the lab. After cleaning with soap and water, rinse thoroughly. Chemists use the rule of “three” in cleaning glassware and tools. After washing, chemists rinse out all visible soap and then rinse three times more.


Storage: Place all chemicals, cleaned tools, and glassware in their respective storage places.


Disposal: Dispose of all solid waste in the garbage. Liquids can be washed down the drain with running water. Let the water run awhile to ensure that they have been diluted and sent downstream.


[/am4show]


This experiment is for advanced students.


Zinc (Zn), is a metal and it is found as element #30 on the periodic table. We need a little zinc to keep our bodies balanced, but too much is very dangerous.


Zinc is just like the common, everyday substance that we all know as di-hydrogen monoxide (which is the chemical name for water). We need water to survive, but too much will kill us.


DHMO: In chemistry, “Di” equals the number 2; hydrogen is H; mono equals the number one; and oxide is derived from oxygen, and its symbol is O. Put these together and you have Di-hydrogen (H2), and mono oxygen (O). Put them together, what do you have? Water!


[am4show have=’p9;p52;’ guest_error=’Guest error message’ user_error=’User error message’ ]


Materials:


  • Goggles
  • Gloves
  • Test tube rack
  • 3 test tubes
  • Burner
  • Lighter
  • Zinc powder (Zn) (MSDS)
  • Calcium hydroxide (Ca(OH)2 (MSDS)
  • Rubber tubing
  • Measuring spoon
  • Solid rubber stopper
  • Pan
  • Water
  • Chemistry stand
  • Test tube holder
  • 90o glass tubing
  • One-hole rubber stopper
  • Evaporating dish
  • Dish soap
  • Wood splint
  • Measuring syringe

Be careful of the hot test tubes! It may not look hot, but don’t find out the hard way. If a chemist wants to know if something is hot, he places the back of his hand near the surface. If he feels heat, he concludes that it is hot. That’s the same way we test a person’s forehead for a fever. The back of your hand is more sensitive than the front.


Zinc, zinc oxide, and calcium hydroxide are dangerous chemicals. Use your safety equipment. Dispose of the residue in the test tube in the outside garbage.


We will be creating hydrogen gas by making a heterogeneous mixture of zinc powder and calcium hydroxide and heat it. The hydrogen bubbles into test tube in a water bath. When we mix our test tube of hydrogen with the air the room, the hydrogen burns…it actually explodes. Our amounts are small, but you will witness a cool, small, explosion.


In the second part of the lab we will again create hydrogen. This time, we have a tricky way to add oxygen to the hydrogen and we are able to create a ration of 2 parts hydrogen to 1 part oxygen. This is the perfect ratio to make the most explosive mixture of hydrogen and oxygen. The explosion here is very cool.


C3000: Experiment


Download Student Worksheet & Exercises


Here’s what’s going on in this experiment:


In the first part of the lab we produce hydrogen by combining two dry chemicals and heating them. Now two things will happen. Calcium hydroxide, when heated, produces water.


Ca(OH)2 –> CaO + H2O


Calcium hydroxide, when heated, produces calcium oxide and water. This is an oxidation reaction because the calcium oxidizes….combines with the oxygen and releases the other elements.


Next, Zinc will react with water created by calcium hydroxide. As the Ca(OH)2 is heated and turns to water and calcium oxide, the zinc then reacts and produces zinc oxide and hydrogen gas.


Zn + H2O –> ZnO + H2


Zinc when heated in the presence of water, produces zinc oxide and hydrogen gas. This is a single replacement reaction as oxygen kicks out hydrogen and replaces it with zinc.


Here’s the safety information for the products of the reaction:


Cleanup: Clean everything thoroughly after you are finished with the lab. After cleaning with soap and water, rinse thoroughly. Chemists use the rule of “three” in cleaning glassware and tools. After washing, chemists rinse out all visible soap and then rinse three times more. Dry all equipment.


Storage: Place all chemicals, cleaned tools, and glassware in their respective storage places.


Disposal: Dispose of all solid waste in the outside garbage. Liquids can be washed down the drain.


[/am4show]


This experiment is for advanced students.


Lewis and Clark did this same experiment when they reached the Oregon coast in 1805. Men from the expedition traveled fifteen miles south of the fort they had built at the mouth of the Columbia River to where Seaside, Oregon now thrives.


In 1805, however, it was just men from the fort and Indians. They built an oven of rocks. For six weeks, they processed 1,400 gallons of seawater, boiling the water off to gain 28 gallons of salt.


[am4show have=’p9;p52;’ guest_error=’Guest error message’ user_error=’User error message’ ]


Lewis and Clark National Historic Park commemorates the struggles of the expedition. (The reconstructed fort is also there to visit.) It is Fort Clatsop National Memorial, and is quite an experience to go through the fort.


Lewis and Clark went to great lengths to obtain salt. The men had been complaining that fish without salt had become something to avoid. Salt is important to us as well. It is a condiment, an addition to food that brings out the food’s natural flavor. Besides its food value, salt is used as a food preservative. It destroys bacteria in food by removing moisture from their “bodies” and killing them.


Sodium chloride, table salt, NaCl….they’re all acceptable names for salt. If NaCl is broken down into its component elements, the elements don’t act like our friend salt. Its components are sodium and chlorine.


Sodium is a highly reactive alkali metal, element #11 on the periodic table. It is exothermic in water, which means that is gives of heat as it reacts with water. Small pieces tossed into water will react with it. The sodium particles give off heat that melts them into round balls. The sodium particles bounce and scurry around the surface at a high rate of speed. If you ever get the chance to observe this, do it. The reaction continues until the sodium is gone. Sodium, as it reacts with the water, changes chemically into sodium hydroxide. These cool things that sodium does are also dangerous. Sodium and sodium hydroxide are caustic…they are so pH basic that they will burn you.


Chlorine is a halogen, group 17, element #17. Chlorine is used in bleach, disinfectants, and in swimming pool maintenance. It seems that anywhere you want to remove color or life, chlorine is your element. This property of chlorine to kill was used in war. (It would react with the mucous linings in their throat, undergoing a chemical reaction to turn into hydrochloric acid in their throats. Hydrochloric acid is a very dangerous acid, usually fatal once inside you.) Chlorine is known as bleach at home. Never, never, drink it or breathe its fumes.


Materials:


  • Goggles
  • Gloves
  • Jar or glass
  • 2 90o glass tubes
  • Chemistry stand
  • Rubber tubing
  • Test tube clamp
  • Erlenmeyer flask
  • One-hole rubber stopper
  • Wire screen
  • Alcohol burner
  • Lighter
  • Test tube
  • Water
  • Saltwater
  • Heating rod

Look out for the hot flask and other glassware. Allow everything to cool before cleaning.


When done heating, move the rubber tubing out of the water. There is a difference in pressure between the heated glassware and the water bath. That difference in pressure will cause the water to enter the tubing and cool water will flow into the hot glassware and could cause catastrophic damage to the glassware.


Never…Never!….drink the results of an experiment. Yeah, I know that plain old water is supposed to be in the test tube, but follow the experiment’s safety guidelines. You’ve had other stuff in that test tube, too.


C3000: Experiment


Download Student Worksheet & Exercises


Here’s what’s going on in this experiment:


That flask of saltwater will start to boil, and water vapor will leave the flask and travel to the test tube. There is no chemical change occurring in this experiment, but a physical one. A physical change involves a change in state (melting, freezing, vaporization, condensation, sublimation). Physical changes are things like crushing a can, melting an ice cube, breaking a bottle, or boiling saltwater until there is nothing left but salt and steam.


Cleanup: Clean everything thoroughly after you are finished with the lab. After cleaning with soap and water, rinse thoroughly. Chemists use the rule of “three” in cleaning glassware and tools. After washing, chemists rinse out all visible soap and then rinse three times more.


Storage: Place cleaned tools and glassware in their respective storage places.


Disposal: Liquids can be washed down the drain


[/am4show]


This experiment is for advanced students. This lab builds on concepts from the previous carbon dioxide lab.


Limewater….carbon dioxide…indicators. We don’t know too much about these things. Sure, we know a little. Carbon dioxide is exhaled by us and plants need it to grow. Burning fossil fuels produces carbon dioxide.


Indicators…something we observe that confirms to us that something specific is happening. Lime water turns cloudy and forms a precipitate in the presence of carbon dioxide. Blue litmus paper turns red in the presence of an acid. The dog barking at the door and dancing around indicates that you better let the dog out, and quick, to avoid….a pet spill?


[am4show have=’p9;p52;’ guest_error=’Guest error message’ user_error=’User error message’ ]


Materials:


  • Limewater from a previous lab (MSDS)
  • One-hole rubber stopper
  • 900 bend glass tubing
  • Test tube rack
  • 2 Test tubes
  • Sodium hydrogen sulfate (NaHSO4) (MSDS) Sodium hydrogen sulfate is very toxic. Respect it, handle it carefully and responsibly. Do not take it for granted.
  • Sodium carbonate (Na2CO3) (MSDS)

NOTE: Be very careful when handling the sodium hydrogen sulfate – it’s highly corrosive and dangerous when wet. Handle this chemical only with gloves, and be sure to read over the MSDS before using.


When pouring our limewater into the test tube, be careful! Limewater is dangerous to your skin and your nasal passages. Pour just the limewater into the test tube, not any solids that may have gotten into the limewater container.


A chemical reaction will occur between sodium hydrogen sulfate, sodium carbonate, and water. We could have used any combination of chemicals for this lab that will produce carbon dioxide (CO2), but these chemicals are already in our kits, so……


The reaction will create a gas, that gas, we think, is carbon dioxide. If we are right, we will be bubbling CO2 gas into lime water. If we observe the limewater becoming cloudy and if a precipitate forms on the bottom of the test tube, that is a positive indicator that CO2 is present.


C3000: Experiment


Download Student Worksheet & Exercises


Here’s what’s going on in this experiment:


Some combination of chemicals will produce carbon dioxide –> CO2 + ?


Notice that specific chemicals are not in the chemical equation? The actual chemistry of the chemical reaction is not our focus in this lab. We want to experience how an indicator can test for a particular compound or element.


Instead of sodium hydroxide and sodium carbonate and water, we could choose to combine vinegar and baking soda for example. Even simple household supplies can be chemicals for our experiments.


Cleanup: We are going to clean everything thoroughly after we finish the lab. After cleaning with soap and water, rinse thoroughly. Chemists use the rule of “three” in cleaning glassware and tools. After washing, chemists rinse out all visible soap and then rinse three times more.


Storage: Place cleaned tools and glassware in their respective storage places.


Disposal: Liquids can be washed down the drain. Solids are thrown in the trash.


[/am4show]


This experiment is for advanced students.


Who gets to burn something today? YOU get to burn something today!


You will be working with Zinc (Zn). Other labs in this kit allow us to burn metal, but there is a bit of a twist this time. We will be burning a powder.


Why a powder instead of a solid ribbon or foil as in the other labs? Have you heard of surface area being a factor in a chemical reaction? The more surface area there is to burn, the more dramatic the chemical change. So, with this fact in mind, a powder should burn faster or be more likely to burn than a large solid.


[am4show have=’p9;p52;’ guest_error=’Guest error message’ user_error=’User error message’ ]


Zinc (Zn) is a metallic element. It is element #30 on the periodic table. Chemically, it is similar to magnesium, another element that we use in our experiments.


Brass is an alloy of zinc and copper. Brass has been an important metal since the 10th century B.C. Alchemists in the dark ages burned zinc in air, just like we will do, to make what they called “white snow”. Their “white snow is our zinc oxide.


Zinc is an important element in our lives. Zinc deficiency causes lack of proper growth, delayed physical maturation, and susceptibility to infection. Zinc deficiency contributes to the death of 800,000 children per year. Excess zinc in our bodies can cause problems for us as well.


Materials:


  • Alcohol burner
  • Lighter
  • Measuring spoon
  • Zinc powder (MSDS)
  • Porcelain tile work surface

Remember to dispose of your zinc oxide in the outside trash, and conduct your experiment in a well ventilated area. Fumes from this experiment are irritating and a little dangerous.


C3000: Experiment


Download Student Worksheet & Exercises


Here’s what’s going on in this experiment:


Zinc powder will burn in the presence of oxygen, producing interesting colors. The flame from burning zinc is blue, as the zinc undergoes a chemical change to become zinc oxide. Zinc oxide is thermochromic. That means that it changes colors depending on the temperature. When cool, ZnO is white. When heated, zinc oxide turns yellow, and as it cools, returns to become a white powder again. The color changes are caused by a small loss of oxygen at high temperatures, and a small gain of oxygen as it cools in air.


2Zn + O2 –> 2ZnO


Zinc powder burned in air reacts with the oxygen and turns into zinc oxide. Zinc oxide is used in sunscreen and to treat burns, cuts, and diaper rash.


Cleanup: Clean everything thoroughly after you are finished with the lab. After cleaning with soap and water, rinse thoroughly. Chemists use the rule of “three” in cleaning tools. After washing, chemists rinse out all visible soap and then rinse three times more.


Storage: Place all chemicals and cleaned tools, and glassware in their respective storage places.


Disposal: Dispose of all solid waste in the garbage.


[/am4show]


This experiment is for advanced students.


Brimstone is another name for sulfur, and if you’ve ever smelled it burn…..whoa….I’m telling you ….you will see for yourself in this lab. It is quite a smell, for sure. Sulfur is element #6 on the periodic table. Sulfur is used in fertilizer, black powder, matches, and insecticides. In pioneer times sulfur was put into patent medicines and used as a laxative.


To further the evil reputation of sulfur, or brimstone, when sulfur is burned in a coal fired power plant, sulfur dioxide is produced. The sulfur is spewed into the air, where it is reacts with moisture in the air to form sulfuric acid. The clouds get full and need to let go of this sulfuric acid. Down comes the acid rain to wreak havoc on the masonry and plant life below.


[am4show have=’p9;p52;’ guest_error=’Guest error message’ user_error=’User error message’ ]


Materials:


  • Goggles
  • Gloves
  • Measuring spoon
  • Sulfur (MSDS)
  • Alcohol burner
  • Lighter
  • Test tube of O2

Be careful when bending the ends of your measuring spoon. Bend them where you need them and leave them alone. Continuing to bend, straighten, and re-bend will weaken the metal and cause your measuring spoon to break. We will do this experiment to compare the flames produced by burning sulfur in air and oxygen


C3000: Experiments


Download Student Worksheet & Exercises


Here’s what’s going on in this experiment:


S + O2 –> SO2


Sulfur and oxygen are heated and sulfur dioxide is produced. This is a synthesis reaction because the sulfur and the oxygen react and form a new substance, sulfur dioxide. We see the flame of sulfur dioxide burn in air. Small flame, little smoke. When the flame is left lit and placed in the oxygen, the flame flares up and lots of white smoke is generated. It appears that sulfur’s flame burns brighter and stronger in pure oxygen.


Cleanup: We are going to clean everything thoroughly after we finish the lab. After cleaning with soap and water, rinse thoroughly. Chemists use the rule of “three” in cleaning glassware and tools. After washing, chemists rinse out all visible soap and then rinse three times more.


Storage: Place cleaned tools and glassware in their respective storage places.


Disposal: Liquids can be washed down the drain. Solids are thrown in the trash.


[/am4show]


This experiment is for advanced students.


ACID!!! The word causes fear to creep in and get our attention.


BASIC!!! The word causes nothing to stir in most of us.


The truth is, a strong acid (pH 0-1) is dangerous, but a strong basic (pH 13-14) is just as dangerous. In this lab, we will get comfortable with the basics of bases and the acidity of acids along with how you can use both and tell the difference between them.


[am4show have=’p9;p52;’ guest_error=’Guest error message’ user_error=’User error message’ ]


Familiar acidic solutions:


  • pH 1: Stomach acid
  • pH 2: Lemon juice
  • pH 3: Vinegar
  • pH 4: Soda pop
  • pH 5: Rainwater (serious acid rain could have a pH of 2-4)
  • pH 6: Milk
  • pH 7: Distilled water
  • pH 8: Egg whites
  • pH 9: Baking soda
  • pH 10: Antacid
  • pH 11: Ammonia
  • pH 12: Limewater
  • pH 13: Drano
  • pH 14: Sodium hydroxide (NaOH)

Materials:


  • Lemon
  • Apple
  • Blue litmus paper
  • White vinegar
  • Clear glass cup
  • Tartaric acid (C4H6O6)
  • Measuring spoon
  • Measuring syringe
  • Water
  • Test tube rack
  • Test tube
  • Cool water
  • Sodium hydroxide (NaOH) (MSDS)
  • Dropper pipette
  • Calcium hydroxide (CaOH) (MSDS)
  • Erlenmeyer flask
  • Solid rubber stopper
  • Storage bottle
  • Stick-on label
  • Permanent marker

Acids usually taste sour and turn blue litmus paper red. There are exceptions. One exception to this is with apples. They contain malic acid. Malic acid does in fact taste sour by itself, but apples produce so much sugar that the sour taste of the acid is overpowered with sweetness. Making lemonade is a good example as well.


NaOH – Be very careful working with sodium hydroxide (NaOH). It isn’t an acid, so it shouldn’t be very harmful, right? WRONG! A strong base is just as dangerous as a strong acid. Please be careful when using them.


Don’t get confused and don’t forget what litmus paper indications mean. Acids turn blue litmus paper red, and bases turn red litmus paper blue. If you are testing a substance and the paper doesn’t change color, try the other type. The substance might not be neutral, but an acid or base that you used the wrong color litmus paper.


When testing with litmus paper, don’t dip the litmus paper into the chemical bottle. Use a clean dropper to transfer the chemical to the paper. Dipping into the chemical can and will, eventually, contaminate the chemical.


When shaking a liquid in a test tube or flask, put a solid rubber stopper on top. If you just start shaking from there, your stopper may fly across the room and scare your dog unnecessarily. The hot, or acidic, or basic contents of the container will find a place on the salad waiting to be served. The paramedics will be puzzled when they find the entire family, heads down, lettuce hanging from their mouths. With the stopper firmly inserted, wrap your hand around the container with your thumb over the stopper, pushing down to hold it in place while you shake.


After we finish the experiment, don’t discard the contents of the Erlenmeyer flask. It now contains limewater, a substance that we want to save for later experiments. Carefully pour the liquid into a storage bottle and discard the solids in the trash. Place a sticker on the bottle and/or use a permanent marker to label the bottle for future use. Keep the storage bottle out of direct sunlight when storing it.


We will explore for ourselves some of the properties of acids and bases. If we consider the acid-base theory discussed below, it will help us to further understand what we are experiencing in our lab.


C3000: Experiments


Download Student Worksheet & Exercises


Cleanup: We must clean everything thoroughly after we finish with the lab. After cleaning with soap and water, we need to rinse everything thoroughly. Chemists use the rule of “three” in cleaning glassware and tools. After washing, chemists rinse out all visible soap and then rinse three times more.


Storage: Place cleaned tools and glassware in their respective storage places.


Disposal: Liquids can be washed down the drain, and solids put in the trash.


[/am4show]


This experiment is for advanced students.


Ever use soap? Sodium hydroxide (NaOH) is the main component in lye soap. NaOH is mixed with some type of fat (vegetable, pig, cow, etc). Scent can be added for the ‘pretty’ factor and pumice or sand can be added for the manly “You’re coming off my hands and I’ll take no guff” factor. Lots of people still make their own soap and they enjoy doing it.


[am4show have=’p9;p52;p91;’ guest_error=’Guest error message’ user_error=’User error message’ ]


One of the coolest uses for sodium hydroxide is in tissue digestion. By “tissue” we mean meat, bone, sinew…..meaning bodies! People who pick up dead animal (road kills) for the county dump their catch in barrels containing sodium hydroxide. The NaOH eats everything up and then the “sludge” is dumped in the landfill. They used NaOH to make them decompose. So this stuff is nasty and should never be touched with your bare hands!!


Materials:


  • Erlenmeyer flask
  • Alcohol burner
  • Lighter
  • Heating rod
  • Sodium carbonate (Na2CO3) (MSDS)
  • Calcium hydroxide (Ca(OH)2) (MSDS)
  • Measuring spoon
  • Water
  • Tripod stand
  • Wire screen
  • Chemistry stand
  • Test tube holder
  • Test tube rack
  • Test tube
  • Filter paper
  • Funnel
  • Stock bottle for NaOH storage (MSDS)

Don’t inhale any fumes from reactions or powder welling out of chemical containers, especially calcium hydroxide dust. We want to test our product to see if it is NaOH. It should turn red litmus blue.


We will perform a bunch of operations in this lab.


  1. Heating our calcium hydroxide / sodium carbonate mixture to create calcium carbonate and sodium hydroxide.
  2. Filter out the calcium carbonate to collect the sodium hydroxide.
  3. Test our sodium hydroxide product for the properties of NaOH.

C3000: Experiments


Download Student Worksheet & Exercises


Here’s what’s going on in this experiment:


Ca (OH)2 + Na2CO3 –> 2NaOH + CaCO3


Calcium hydroxide and sodium carbonate are combined in water and heated to produce sodium hydroxide and calcium carbonate


This is a double replacement reaction because the calcium ion and the sodium ion have swapped places


Cleanup: We are going to clean everything thoroughly after we finish the lab. After cleaning with soap and water, rinse thoroughly. Chemists use the rule of “three” in cleaning glassware and tools. After washing, chemists rinse out all visible soap and then rinse three times more.


Storage: Place cleaned tools and glassware in their respective storage places.


Disposal: Liquids must be neutralized with vinegar, if a base, or baking soda, if an acid, before washing them down the drain. Before actually washing them down the drain check again with litmus paper to ensure that they have been neutralized. Solids are thrown in the trash.


[/am4show]


This experiment is for advanced students.

Potassium permanganate (KMnO4) in water turns an intense, deep, purple. It is important in the film industry for aging props and clothing to make them look much older than they are.

Also, artists use it in bone carving. People who carve antlers and bone use KMnO4 to darken the surface of the bone to make it look aged. They make the carving, soak it in potassium permanganate, then carve more, and repeat. The end result is a carving that has a light golden brown color. More dipping will darken the carving even more.

Potassium permanganate is going to undergo a chemical change with this activity. In this experiment, we will be able to witness several indicators of chemical change. Color changes, bubbles from gas generation, temperature change, and color disappearance are all indicators of chemical changes.

[am4show have='p9;p52;p91;' guest_error='Guest error message' user_error='User error message' ] Examples of chemical color changes we might be familiar with are autumn leaves changing color and a half eaten apple quickly turning brown.

Physical changes can mimic the indicators of chemical change, so we will need to always think through what we observe and then decide whether it is a physical or chemical change. Physical changes that mimic chemical changes can be color and temperature. The key is that physical changes are changes in state (solid, liquid, gas, sublimation) or changes in the condition of the material. In our pursuit of science knowledge, we will observe many physical and chemical changes. We need to be able to identify them accurately to really understand what is happening in an experiment.

Materials:
  • 3% Hydrogen peroxide (KMnO4) (MSDS)
  • Test tube rack
  • 2 test tubes
  • Potassium permanganate (KMnO4) (MSDS)
  • Sodium hydrogen sulfate (NaHSO4) (MSDS) Sodium hydrogen sulfate is very toxic. Respect it, handle it carefully and responsibly. Do not take it for granted.
  • Measuring syringe
  • Water
  • Measuring spoon
  • Solid rubber stopper
NOTE: Be very careful when handling the sodium hydrogen sulfate – it’s highly corrosive and dangerous when wet. Handle this chemical only with gloves, and be sure to read over the MSDS before using.

Always cap your chemicals after use and set them aside where they won’t get in the way. Your lab area should always be clear, clean, and uncluttered. Water and a fire extinguisher should be within arm’s reach. Always clean equipment before using any of it on another chemical.

Potassium permanganate is going to undergo a chemical reaction that will turn the deep violet or purple solution clear. It is a very cool experiment and looks like a lot of fun.

C3000: Experiment


Download Student Worksheet & Exercises

Here’s what’s going on in this experiment: KMnO4 + NaHSO4 + H2O2 = MnSO4 + O2 + NaOH + KOH

Potassium permanganate is added to sodium hydroxide, and then hydrogen peroxide is added and quickly capped.

MnSO4 + O2 + NaOH + KOH

The product of the reaction is manganese sulfate, oxygen, sodium hydroxide, and potassium hydroxide. The remaining chemicals are all clear, so the desired result is obtained.

Cleanup: Clean everything thoroughly after you are finished with the lab. After cleaning with soap and water, rinse thoroughly. Chemists use the rule of “three” in cleaning glassware and tools. After washing, chemists rinse out all visible soap and then rinse three times more.

Storage: Place cleaned tools and glassware in their respective storage places.

Disposal: Liquids can be washed down the drain

Click here for Homework Problem Set #14

[/am4show]

This experiment is for advanced students.

How do you know if your brother is stealing your candy? Unwrap a wrapped hard candy that he likes a lot. Roll the candy around in the powdered food dye that matches the candy. (Push the powder into the candy so it “disappears”.) Re-wrap the candy. Set the candy in the place where it usually disappears from. Wait ten minutes after the candy disappears. Find your brother. He will be sporting a new color on his hands and mouth. Dye is hard to remove. It will have to be worn every day at school until it fades away as the skin cells slough off. The dye he now wears is in indicator that he has been taking your candy.

[am4show have='p9;p52;' guest_error='Guest error message' user_error='User error message' ] Did you guess that this lab is about indicators? A reagent is chemical compound that creates a reaction in another substance; the product of that chemical reaction is an indicator of the presence, absence, or concentration of another substance.

Your brother’s situation is not a chemical reaction, but a reaction will be observed in his looks and his mood.

We are going to prepare copper sulfate and ammonium iron sulfate solutions and test them to see if our reagent, potassium hexacynoferrate II will cause chemical changes that indicate that copper is present in one, and iron is present in the other.

I’m sure your brother will stay far away from your candy from now on. I know this is obvious, but don't eat anything in this lab or use it to coat candy... that was just an example to illustrate what an indicator is and how to use it.

Materials:
  • Erlenmeyer flask
  • Water
  • Potassium hexacynoferrate II K4Fe(CN)6 (MSDS)
  • Copper sulfate CuSO4 (MSDS)
  • Measuring spoon
  • Solid rubber stopper
  • Test tube rack
  • 3 Test tubes
  • Measuring syringe
  • Small labeled container for NaOH
  • Dropper pipette
  • Ammonium iron sulfate NH4Fe(SO4)2 (MSDS)
  • Sodium hydroxide NaOH (MSDS)
We need to remember to only make as much Potassium hexacynoferrate II as we need. Label test tubes with contents information clearly visible. Always remember that when the term “reagent” is used in chemistry it is referring to an indicator chemical.

We will put together two solutions with metallic chemicals dissolved in water in each. Let’s pretend we have no idea if they are metallic or not. Many times as a chemist, when analyzing a customer’s of a production chemical, we are looking for metal in a solution as an indicator of something good or something bad. If one of the factory’s systems contains a corrosive liquid flowing through its veins, it would be good to know if some metal somewhere is corroding, being dissolved, by the fluid. Our tests could confirm a problem or set the boss’s mind to rest….and get us a big bonus if we save the day.

C3000: Experiments

Here’s what’s going on in this experiment:
In test tube #1: Copper sulfate solution into which we added Potassium hexacynoferrate II. A color change occurred (brown) and a precipitate fell out of the liquid to rest on the bottom of the test tube. This reaction was an indicator for the presence of metal.

In test tube #2: Ammonium iron sulfate solution into which we added Potassium hexacynoferrate II. A color change occurred (dark blue). This reaction was an indicator for the presence of metal.

Cleanup: We are going to clean everything thoroughly after we finish the lab. After cleaning with soap and water, rinse thoroughly. Chemists use the rule of “three” in cleaning glassware and tools. After washing, chemists rinse out all visible soap and then rinse three times more.

Storage: Place cleaned tools and glassware in their respective storage places.

Disposal: Liquids, after neutralization, can be washed down the drain. Solids are thrown in the trash.

Click here to go to next lesson on Characteristics and capacity of buffers

[/am4show]

This experiment is for advanced students.

In gas form, element #59 is deadly. However, when iodine is in liquid form, it helps heal cuts and scrapes. The iodine molecule occurs in pairs, not as a single atom (many halogens do this, and it's called a diatomic molecule). It's hard to find iodine in nature, though it's essential for staying healthy... too little iodine in the body takes a heavy toll on how well the brain operates.

A chunk of iodine is blackish-blue, and will sublimate (go from a solid straight to a gas). Iodine is the heaviest element needed by living things. Iodized salt is sodium chloride fortified with iodine to prevent people from not getting enough iodine in their daily diets.

Iodine is found in seaweed (kelp) and seafood as well as vegetables that are grown in dirt that has high iodine levels. People that live inland and do not eat fish often have lower iodine levels than their coastal, fish-eating neighbors. The trick is not to get too much or too little iodine in your diet, because the symptoms of deficiency and excess levels are quite similar.

Starch (like cornstarch) are used as an indicator for detecting iodine in chemistry experiments. When combined with iodine, starch forms a blue-black color in the solution. We're going to do this and many other activities in this lab, because this experiment is actually several labs rolled into one. First, we have to make iodine, store it, and then we get to use it in several experiments. Are you ready?

[am4show have='p9;p52;p91;' guest_error='Guest error message' user_error='User error message' ] Materials:
  • Goggles
  • Gloves
  • Glass jar
  • Chemistry stand
  • Test tubes
  • Test tube holder
  • Measuring spoon
  • Corn starch peanut
  • Water cup
  • 90 degree bend glass tubing
  • One-hole rubber stopper
  • Paper towels
  • Stain-free work surface
  • Solid rubber stopper
  • Denatured alcohol
  • Dark brown glass storage bottle for iodine
  • Dropper pipettes
  • Alcohol burner
  • Lighter
  • Measuring syringe
  • Water
  • Potassium iodide KI (MSDS)
  • Potassium permanganate KMnO4 (MSDS)
  • Sodium hydrogen sulfate NaHSO4 (MSDS) AKA: Sodium Bisulfate Sodium hydrogen sulfate is very toxic. Respect it, handle it carefully and responsibly. Do not take it for granted.
NOTE: Be very careful when handling the sodium hydrogen sulfate – it’s highly corrosive and dangerous when wet. Handle this chemical only with gloves, and be sure to read over the MSDS before using.

Remember that iodine is toxic paper and harmful to the environment. Safely shake test tube to homogenize chemicals using a solid rubber stopper and dispose of in the outside trash.

NOTE: Heat slowly and carefully. You don’t want your test tube in the flame. The end of the glass tubing should not extend into the alcohol. From time to time, touch the end of the glass tubing to the alcohol to rinse iodine from the tube into the alcohol, but the glass tubing shouldn’t reside in the alcohol. Conduct this experiment outdoors or in an extremely well ventilated area inside the house.

Follow cleanup instructions carefully for safety. These are very toxic substances we are working with.

As heating progresses, purple gas will form in the upper test tube. A brown color will begin to form in the alcohol. Heat until purple smoke disappears from the upper test tube.

C3000: Experiments


Here’s what’s going on in this experiment: 2KI + KMnO4 + NaSO4 + H2O--> I2 + MnO2 + KOH +KIO3 + Na2SO4

Potassium iodide and potassium permanganate and sodium sulfate and water are heated to produce free iodine gas and magnesium oxide and potassium hydroxide and potassium iodide and sodium sulfate.

All this to produce the iodine we need for the next several experiments.

Cleanup: We are going to clean everything thoroughly after we finish the lab. After cleaning with soap and water, rinse thoroughly. Chemists use the rule of “three” in cleaning glassware and tools. After washing, chemists rinse out all visible soap and then rinse three times more.

Storage: Place cleaned tools and glassware in their respective storage places.

Disposal: Liquids need to be filtered through a paper towel and washed down the drain with plenty of water. Solids are thrown in the outside trash.

Going Further

*Save all solutions you make in these experiments. You will use them in the other experiments.

Testing Iodine solution

After the drops of iodine are in the test tube with water, observe. Any solid particles in the test tube prove that our iodine is not soluble in water.

Addition with Iodine

Using the solution from the above experiment, adding KI will dissolve all the solids that were observed. Why did the solids disappear? Well, nothing dramatic was seen, but an addition compound was created.

I2 + KI --> KI I2

Sodium Thiosulfate

Sodium thiosulfate (Na2S2O3) solution is pipette drop by drop to above solution until it turns clear. The reaction that takes place turns our solution into sodium hypoiodite (NaOI)

Packing Peanut

We fill a glass jar with water and 10 drops of iodine and mix well. The water will be a pale brown. Dissolve a corn starch peanut in water. When we add starch solution to the iodine and water, the water turns clear, then blue. We have just created iodine starch!

Colorless Iodine

Sodium thiosulfate solution from an experiment above. Put a few droppers of this solution into the iodine starch and stir. Colorless! We have a colorless iodine solution….very cool!

Iodine and Heat

To set this one up, dropper one drop of iodine solution into a test tube half-filled with water. Then we regain our bright blue color by adding our starch solution to the iodine water. When we add heat, The solution turns clear! But, we’re not done. The test tube goes into a half full jar of cool water. The solution in the test tube is turning blue. If you keep doing these actions over and over again, you will keep getting the same results. Did you notice something? The reaction is ________. Think, now. (Psst! It's reversible!)

Colorless Iodine Without Heat

In this experiment we use alcohol to achieve a clear solution. We pour some iodine starch solution into some alcohol and the solution turns clear. The alcohol removed the iodine from the solution.

Click here to download Equilibrium Constants and Reaction Mechanisms.

[/am4show]

This experiment is for advanced students.


Zinc and Hydrogen are important elements for all of us. Zinc (Zn) metal is element #30 on the periodic table. Lack of zinc in our diets will delay growth of our bodies and can kill.


Hydrogen gas (H) is element #1 on the periodic table. Hydrogen was discovered in the 1500s. In a pure state, hydrogen combustion (in small quantities) is interesting. In large amounts, mixed with oxygen, the explosion can be devastating.


[am4show have=’p9;p52;’ guest_error=’Guest error message’ user_error=’User error message’ ]


We are going to perform an experiment that generates a small amount of hydrogen gas, with a correspondingly small explosion. Hydrogen is violently flammable in air, but by itself….not so much. Hydrogen is lighter than air, so has been used in airships, or blimps. The Hindenburg, a German airship filled with hydrogen, burned up quickly on May 6, 1937 while tied to a mooring mast.


Currently, hydrogen is being thought of as the “fuel of the future” for our cars and other vehicles. Most the Earth’s our hydrogen is contained in water (H2O). Most of the experimentation has been in producing hydrogen through electrolysis. That proves very expensive to produce and transport. Until a cheaper alternative appears, hydrogen (H2) is not a practical alternative.


Scientists are lately giving a lot of attention to a process that will produce hydrogen cheaply and easily. That method is to heat zinc powder in the presence of air (oxygen). It can be achieved at low temperatures, little cost, and little danger – perfect for a hydrogen fuel cell in our car. Don’t go filling your tank with it right away, though. Engineers still need to work some bugs out. It will happen soon, so be patient. (And remember, you saw it first in your chemistry set!)


Materials:


  • Gloves
  • Goggles
  • Chemistry stand
  • Zinc (Zn) powder (MSDS)
  • Measuring spoon
  • 4 test tubes
  • Test tube holder
  • Alcohol burner
  • Lighter
  • One-hole rubber stopper
  • Rubber tubing
  • 900 bend glass tubing
  • Water
  • Measuring syringe
  • Stirring rod
  • Clear pan

Important! Dispose of the Zinc (Zn) left in the test tube in the outside trash. Accidentally ingesting (and it should only be accidental) of Zinc (Zn) or Zinc Chloride (ZnCl), will harm you or animals. It will not be one of your best days. Call 911 if this happens.


After you have finished your experiment, be careful of the hot test tube containing the zinc compound. The test tube is very hot, and there will be a difference in pressure between the water tank and the test tube. Because the test tube has been heated, the pressure is less than atmospheric pressure.


As it cools, the water in the tank, which is at atmospheric pressure (the pressure of the air in the room) is higher than in the test tube. The test tube’s low pressure is looking to suck something, anything, up the glass tube. The water, sitting there at normal air pressure, notices the need. Water climbs up the tube in response to the test tube’s request.


At the conclusion of the experiment, with the heat off, the test tube starts to cool and water then donates some stuff to equalize the pressure. If allowed to , that cool water hits that hot zinc, or hot test tube, and the test tube could explode and the zinc could quickly react, blowing out the stopper and spewing hot zinc all over you.


Here is the safety information for the products in this chemical reaction:


You first put zinc powder and water together in the end of the horizontally held test tube. But why place a pile of, dry zinc, laying in the test tube near the wet zinc? We want to create a chemical reaction with zinc and water. Wet zinc powder in the end of the test tube allows the dry zinc to come in contact with water when they are both heated without the powder actually getting wet. This way the reaction occurs faster and more efficiently. We don’t have to wait any longer than necessary this way.


C3000: Experiments


Download Student Worksheet & Exercises


Here’s what’s going on in this experiment:


In this experiment we are causing a single replacement reaction to occur between zinc powder and water. In a replacement reaction, a compound breaks down into its elemental parts in the first stage of the chemical reaction. A new compound is created as the elements search about for something to bond with to satisfy their needs to gain or give up electrons.


Zn + H2O –> ZnO + H2


Zinc powder reacts with water under the influence of heat to become zinc oxide and hydrogen gas. The new compound is called zinc oxide (ZnO).


Cleanup: Clean everything thoroughly after you are finished with the lab. After cleaning with soap and water, rinse thoroughly. Chemists use the rule of “three” in cleaning glassware and tools. After washing, chemists rinse out all visible soap and then rinse three more times. Dry them before putting them away.


Storage: Place all chemicals, cleaned tools, and glassware in their respective storage places.


Disposal: Dispose of all solid waste in the outside garbage. Liquids can be washed down the drain with running water. Let the water run awhile to ensure that they have been diluted and sent downstream.


[/am4show]


WARNING!! THIS EXPERIMENT IS PARTICULARLY DANGEROUS!! (No kidding.) This experiment is for advanced students.

We've created a video that shows you how to safely do this experiment, although if you're nervous about doing this one, just watch the video and skip the actual experiment.

Bromine is a particularly nasty chemical, so be sure to very carefully follow the steps we've outlined in the video. You MUST do this experiment outdoors. We'll be making a tiny amount to show how the chemical reactions involving bromine work.

[am4show have='p9;p52;' guest_error='Guest error message' user_error='User error message' ] Isn’t it interesting how many ways we can use the same techniques and, by just changing a few chemicals, we can learn about so many different chemical reactions? This lab is similar in technique to the Generating Hydrochloric Acid lab. Using the same techniques, we will produce hydrogen bromide.

Hydrogen bromide (HBr) was used as a sedative in the late 1800s and early 1900s. Once they found out how poisonous it really was (after enough people became blind and/or dead), someone had the wonderful idea that maybe we shouldn’t use it anymore. It was also used to control epilepsy until the substitute Phenobarbital came on the scene in 1911. HBr is still used to treat epilepsy in dogs. In cats HBr causes inflammation of the lungs and makes for a very unhappy cat.

Materials:
  • Alcohol burner
  • Lighter
  • Wire screen
  • Tripod stand
  • Glass jar
  • Rubber tubing
  • 900 Glass tubing
  • One-hole rubber stopper
  • Chemistry stand
  • Test tube holder
  • Test tube
  • Potassium bromide (KBr) (MSDS)
  • Sodium hydrogen sulfate (NaHSO4) (MSDS) Sodium hydrogen sulfate is very toxic. Respect it, handle it carefully and responsibly. Do not take it for granted.
  • Burette
  • Water
  • Sodium carbonate (Na2CO3) (MSDS)
  • Silver nitrate (AgNO3) (MSDS)
NOTE: Be very careful when handling the sodium hydrogen sulfate – it’s highly corrosive and dangerous when wet. Handle this chemical only with gloves, and be sure to read over the MSDS before using. Maintain good and proper lab techniques. We are working with some nasty stuff in this lab. We need to perform this lab outdoors if possible, or indoors with lots of ventilation. The reaction advances in stages:
  • Bubbles in the burette tell us the reaction is occurring.
  • Brown streaks will appear in the water contained in the glass jar as gas collects there.
  • Brown vapor will begin to appear in the test tube. When the reaction is complete, the test tube will contain lots of brown vapor.
After we produce HBr, we will perform a number of tests to see if it is an acid or a base.
  1. Test contents of test tube with blue litmus paper. Red color change indicates an acid.
  2. Add baking soda to the HBr. Bubbles and the solution turning white. HBr is an acid in this test because it is obviously reacting with a base.
  3. If a magnesium strip placed in the HBr corrodes, or starts to dissolve, then HBr is an acid.
  4. With the addition of silver nitrate to the HBr, if a white cloudiness occurs and crystals form in the bottom of the test tube, then HBr is an acid.

C3000: Experiment


Download Student Worksheet & Exercises Here’s what’s going on in this experiment: KBr + NaHSO4 --> HBr + KNaSO4 Potassium bromide and sodium hydrogen sulfate, when heated, produce hydrogen bromide and potassium sodium sulfate. Cleanup: We are going to clean everything thoroughly after we finish the lab. After cleaning with soap and water, rinse thoroughly. Chemists use the rule of “three” in cleaning glassware and tools. After washing, chemists rinse out all visible soap and then rinse three times more. Storage: Place cleaned tools and glassware in their respective storage places. Disposal: Liquids can be washed down the drain. Solids are thrown in the trash.

Click here to download Homework Problem Set #9.

[/am4show]

WARNING!! THIS EXPERIMENT IS PARTICULARLY DANGEROUS!! (No kidding.) This experiment is for advanced students.


We’ve created a video that shows you how to safely do this experiment, although if you’re nervous about doing this one, just watch the video and skip the actual experiment.


The gas you generate with this experiment is lethal in large doses, so you MUST do this experiment outdoors. We’ll be making a tiny amount to show how the chemical reactions of chlorine and hydrogen work.


[am4show have=’p9;p52;’ guest_error=’Guest error message’ user_error=’User error message’ ]


Hydrochloric acid is a strong acid. It is highly corrosive, which means that this acid will destroy or irreversibly damage another substance it comes in contact with. Simple terms….it is pretty nasty, so take special care when working with or around it.


HCl is used in processing leather, cleaning products, and in the food industry. We are most familiar with HCl in the form of Gastric Acid. HCl is in gastric acid and is one of the main ingredients in our stomach to aid in digestion of our food. In our lab we will produce hydrogen chlorine gas and add water to turn change it into hydrochloric acid.


Materials:


  • Glass jar
  • 900 bend glass tubing
  • One-hole rubber stopper
  • Chemistry stand
  • Wire mesh
  • 2 Test tubes
  • Test tube clamp
  • Alcohol burner
  • Lighter
  • Tripod stand
  • Sodium hydrogen sulfate (MSDS) Sodium hydrogen sulfate is very toxic. Respect it, handle it carefully and responsibly. Do not take it for granted.
  • Salt
  • One-hole cork
  • Medicine dropper
  • Water
  • Solid rubber stopper

NOTE: Be very careful when handling the sodium hydrogen sulfate – it’s highly corrosive and dangerous when wet. Handle this chemical only with gloves, and be sure to read over the MSDS before using.


Perform this experiment outdoors. If that is not a possibility, and you must do it inside, open doors and windows to provide lots of ventilation. Hydrogen chlorine gas inhalation can be fatal, but we are only producing a very small amount.


There are many steps in this lab, so go slow and steady. Read the lab over several times so you are sure what is going on and what is happening next.


When we shake the sodium hydrogen sulfate and the salt together in a stoppered test tube, we are trying to produce a heterogeneous mixture. Heterogeneous is a scientific word that means substance are mixed all together to be as one. A sample taken from one spot in the mixture should be the same as a sample taken from any other spot in the mixture.


At some point in this lab, we need to point the test tube containing the reaction slightly down. This is so the hydrogen chlorine gas can flow downhill. The gas is denser than air, so it will sink to the bottom of anything air filled…..like a room or a test tube.


Hydrogen chloride gas is poisonous – DO NOT INHALE!


When the medicine dropper / cork tool is placed in the water, water will be sucked up into the test tube. The water combines with the hydrogen chlorine gas to create hydrochloric acid.


A double replacement chemical reaction will take place in this experiment. A free hydrogen ion (+) and a free sodium ion (+) will be produced. Because their charges are alike, they cannot bond, but they can take each other’s place. The spots they each left are negatively charged after the hydrogen and sodium have departed. Opposites attract, and they reorganize into a double replacement reaction.


C3000: Experiment


Download Student Worksheet & Exercises


Here’s what’s going on in this experiment:


NaCl + NaHSO4 –> HCl + Na2SO4


Salt is combined with sodium hydrogen sulfate and heated to produce hydrochloric acid and sodium sulfate


Cleanup: We are going to clean everything thoroughly after we finish the lab. After cleaning with soap and water, rinse thoroughly. Chemists use the rule of “three” in cleaning glassware and tools. After washing, chemists rinse out all visible soap and then rinse three times more.


Storage: Place cleaned tools and glassware in their respective storage places.


Disposal: Our HCl needs to be neutralized before disposal. Put a bit of baking soda into the test tube. The contents should bubble as the neutralization is taking place. After neutralization, the liquid is safe, and can be washed down the drain. Solids are thrown in the trash.


[/am4show]


Chemical Data & Safe Handling Information Sheet

What do I really need to know first? First of all, the chemicals in this set should be stored out of reach of pets and children. Grab the chemicals right now and stuff them in a safe place where accidents can’t happen. Do this NOW!


If you haven’t already done so, make sure to watch the introductory video for the Intermediate Chemistry and Advanced Chemistry lessons. They contain important information about the chemicals and lab equipment you’ll be using. When you’re done storing your chemicals out of reach, watch this video:


[am4show have=’p8;p9;p25;p52;’ guest_error=’Guest error message’ user_error=’User error message’ ]


[/am4show]


Let’s see how much you’ve picked up with these experiments and the reading – answer as best as you can. (No peeking at the answers until you’re done!) Just relax and see what jumps to mind when you read the question. You can also print these out and jot down your answers in your science notebook.


[am4show have=’p8;p9;p25;p52;’ guest_error=’Guest error message’ user_error=’User error message’ ]


1. Determine the number of moles of N2O4 needed to react completely with 2.56 mol of N2H4 for the reaction:


2 N2H4(l) + N2O4(l) ? 3 N2(g) + 4 H2O(l)


2. When the following reaction begins with 4.52 moles of N2H4, determine the number of moles of N2 produced for the reaction:
2 N2H4(l) + N2O4(l) ? 3 N2(g) + 4 H2O(l)


3. The balanced equation for the synthesis of ammonia is:
3 H2(g) + N2(g) ? 2 NH3(g).


Calculate:
a. the mass in grams of NH3 formed from the reaction of 72.0 g of N2
b. the mass in grams of N2 required for form 3.00 kg of NH3


4. What are the most dangerous chemicals in your C3000 set?


5. After mixing two chemicals together, you observe your solution bubbles, gets warm and turns litmus paper red. What do you know about the solution already?


6. If you cut an apple in half and leave it for ten minutes, it turns brown. Why?
7. Practice balancing the equations below:
a. ___KOH + ____H3PO4 –> ___K3PO4 + ___H2O
b. ___NH3 + ___O2 –>___NO + ___H2O
c. ___BF3 + ___Li2SO4 –> ___B2(SO3)3 + ___LiF


8. How many moles in 26 grams of carbon dioxide?


9. If we have 42 moles of H2SO4, how many grams is that?


10. What’s the difference between an acid-base reaction and a redox reaction?


11. If you want to speed up the rate of a reaction, what could you do?


Need answers?

[/am4show]


Let’s see how you did! If you didn’t get a few of these, don’t let it stress you out – it just means you need to play with more experiments in this area. We’re all works in progress, and we have our entire lifetime to puzzle together the mysteries of the universe!


Here’s printer-friendly versions of the exercises and answers for you to print out: Simply click here for printable questions and answers.


Answers:
[am4show have=’p8;p9;p25;p52;’ guest_error=’Guest error message’ user_error=’User error message’ ]
1. Determine the number of moles of N2O4 needed to react completely with 2.56 mol of N2H4 for the reaction


2 N2H4(l) + N2O4(l) ? 3 N2(g) + 4 H2O(l)


Find the relation between moles of N2H4 and N2O4 by using the coefficients of the balanced equation:


2 mol N2H4 is proportional to 1 mol N2O4


Therefore, the conversion factor is 1 mol N2O4/2 mol N2H4:


moles N2O4 = 2.56 mol N2H4 x 1 mol N2O4/2 mol N2H4
moles N2O4 = 1.28 mol N2O4 (answer)


2. Determine the number of moles of N2 produced for the reaction


2 N2H4(l) + N2O4(l) ? 3 N2(g) + 4 H2O(l) when the reaction begins with 4.52 moles of N2H4.


Find the relation between moles of N2H4 and N2 by using the coefficients of the balanced equation:


2 mol N2H4 is proportional to 3 mol N2 In this case, we want to go from moles of N2H4 to moles of N2, so the conversion factor is 3 mol N2/2 mol N2H4:


moles N2 = 4.52 mol N2H4 x 3 mol N2/2 mol N2H4
moles N2 = 6.78 mol N2O4 (answer)


3. The balanced equation for the synthesis of ammonia is 3 H2(g) + N2(g) ? 2 NH3(g). From the balanced equation, it is known that:


1 mol N2 ? 2 mol NH3


Use the periodic table to look of the atomic weights of the elements to calculate the weights of the reactants and products:


1 mol of N2 = 2(14.0 g) = 28.0 g
1 mol of NH3 is 14.0 g + 3(1.0 g) = 17.0 g


These relations can be combined to give the conversion factors needed to calculate the mass in grams of NH3 formed from 72.0 g of N2:


mass NH3 = 72.0 g N2 x 1 mol N2/28.0 g NH2 x 2 mol NH3/1mol NH3 x 17.0 g NH3/1 mol NH3


mass NH3 = 87.43 g NH3 (answer)


To obtain the answer to the second part of the problem, the same conversions are used, in a series of three steps:


(1) grams NH3 ? moles NH3 (1 mol NH3 = 17.0 g NH3)
(2) moles NH3 ? moles N2 (1 mol N2 ? 2 mol NH3)
(3) moles N2 ? grams N2 (1 mol N2 = 28.0 g N2)


mass N2 = 3.00 x 10³ g NH3 x 1 mol NH3/17.0 g NH3 x 1 mol N2/2 mol NH3 x 28.0 g N2/1 mol N2


mass N2 = 2.47 kg N2 (answer)


4. The most dangerous chemicals in your set are:


a. C1000 & C3000: Potassium Hexa-cyanoferrate(II) – do not release this back into the environment, as it is harmful to aquatic organisms, , so dispose of in container as directed. Do not inhale the dust, and avoid contact with skin and eyes.


b. C1000 & C3000: Hexamethyl-eneteramine – flammable, do not inhale the dust and avoid contact with skin, always wear protective gloves when handling.


c. C1000 & C3000: Copper Sulfate – wear protective gloves and glasses when handling, very poisonous to aquatic organisms, so dispose of in container as directed. Do not release into environment.


d. C3000: Calcium Hydroxide – do not inhale dust, wear protective gloves and glasses when handling, caustic.


e. C3000: Potassium Permanganate – flammable, wear protective gloves and glasses when handling, very poisonous to aquatic organisms, so dispose of in container as directed. Do not release into environment.


f. C3000: Sodium Hydrogen Sulfate – caustic, wear protective gloves and glasses when handling.


g. C3000: Hydrochloric Acid –wear protective gloves and glasses when handling. You’ll be generating a small amount of a weak solution of this with your experiments, so follow all directions carefully.


h. C3000: Sodium Hydroxide – caustic, wear protective gloves and glasses when handling. You’ll be generating this with your experiments, so follow all directions carefully.


5. After mixing two chemicals together, you observe your solution bubbles (generates a gas), gets warm (exothermic) and turns litmus paper red (acidic).


6. If you cut an apple in half and leave it for ten minutes, it turns brown because the fruit is basically rusting. An enzyme in the fruit (polyphenol oxidase) reacts with the oxygen in the air. You can add lemon juice or other acid to slow this chemical reaction down or by removing the oxygen (by vacuum sealing the fruit). If you cut the apple with a rusty knife, the reaction will occur even faster!


7. The balanced equations are below:
a. 3 KOH + H3PO4 –> K3PO4 + 3 H2O
b. 4 NH3 + 5 O2 –> 4 NO + 6 H2O
c. 2 BF3 + 3 Li2SO4 –> B2(SO3)3 + 6 LiF


8. Let’s figure out how many moles are in 26 grams of CO2. First, we peek at the periodic table and find out the atomic mass of carbon is 12, and the atomic mass for oxygen is 16. Here’s how you find the mass of CO2:


C + 2 (O) –> 12 + 2(16) = 44


So one mole of CO2 weighs 44 grams. This now becomes our conversion factor of (1 mole)/(44 grams) and we use it like this:


Number of moles of CO2 = 26g x (1 mole/44grams) = 0.59 moles


So there are 0.59 moles of CO2 in 26grams.


9. If we have 42 moles of H2SO4, how many grams is that?


First, look up H, S, and O in the periodic table to find their atomic masses: H = 1, S = 32, O = 16. So the atomic mass of H2SO4 is:


H2SO4 –> 2H + S + 4O –> 2(1) + 32 + 4(16) = 98


So one mole of H2SO4 weighs 98 grams. Now use this conversion to find the mass for 42 moles:


Grams of H2SO4 = 42 moles x (98 grams/1mole) = 4.12 kg


So there are 4.12 kg of H2SO4 in 42 moles. (That’s a lot – you’d never use that much!)


10. Redox reactions involve electron transferring between atoms. Hydrogen ions (protons) transfers are found in acid-base reactions.


11. Grind up the reactants into a fine powder, swirl them in a minimal amount of water, raise the temperature of the water, and add an appropriate catalyst.


Here’s why: Increasing the temperature will usually increase the rate of reaction, as the higher the temperature of the reactants, the more kinetic energy is in the system. Putting the reactants in a solution allows them to not only react on all sides of the substance but also allows the reactants the most amount of freedom to mingle and react with each other. A higher concentration of the reactants increases the reaction rates because the number of collisions increase. Fine powders react more quickly than large chunks because there’s more area exposed to react when a substance is in powder form, so surface area plays a role in the reaction rates as well. To speed up a reaction without altering the chemistry of the reaction involves adding a catalyst.


[/am4show]


You can go your whole life without paying any attention to the chemistry behind acids and bases. But you use acids and bases all the time! They are all around you. We identify acids and bases by measuring their pH.


Every liquid has a pH. If you pay particular attention to this lab, you will even be able to identify most acids and bases and understand why they do what they do. Acids range from very strong to very weak. The strongest acids will dissolve steel. The weakest acids are in your drink box. The strongest bases behave similarly. They can burn your skin or you can wash your hands with them.


Acid rain is one aspect of low pH that you can see every day if you look for it. This is a strange name, isn’t it? We get rained on all the time. If people were dissolving, if the rain made their skin smoke and burn, you’d think it would make headlines, wouldn’t you? The truth is acid rain is too weak to harm us except in very rare and localized conditions. But it’s hard on limestone buildings.


[am4show have=’p8;p9;p25;p52;p68;p80;’ guest_error=’Guest error message’ user_error=’User error message’ ]


Acids are liquids with a pH less than seven. A pH of seven is considered neutral. Bases are liquids with a pH greater than seven.


The combustion of fossil fuels such as oil, gasoline, and coal, create acid rain. Rain, normally at a pH of about 5.6, is always at least slightly acidic. Carbon dioxide is released into the air reacts with moisture in the air to form carbonic acid (HCO3). Sulfur dioxide and nitrogen oxides are released into the air by fossil fuel combustion. They react with the slightly acidic rain and form sulfuric acid (H2SO4) and nitric acid (HNO3).


We’re going to have fun with color changes in this experiment. We will make magic paper that changes color to tell us important things about liquids. It’s called litmus paper.


Litmus is harvested from a plant called a lichen, and bottled up as a powder. We’ll take the powder and make an acid-base indicator with it. Then we will use what we make to test solutions. And if you exercise your mind a bit, you will discover ways to use your litmus paper to discover things about the house and the world around you.


Materials:


  • Test tube rack
  • 2 Test tubes
  • Test tube stopper
  • Distilled water
  • Ruler
  • Litmus powder (MSDS)
  • Measuring spoon
  • Denatured alcohol (MSDS)
  • Pipette
  • Sodium carbonate (Na2CO3) (MSDS)
  • Sodium hydrogen sulfate (NaHSO4) (MSDS) Sodium hydrogen sulfate is very toxic. Respect it, handle it carefully and responsibly. Do not take it for granted.
  • Scissors
  • Filter paper (or paper towel or coffee filter)
  • Impervious surface

NOTE: Be very careful when handling the sodium hydrogen sulfate – it’s highly corrosive and dangerous when wet.  Handle this chemical only with gloves, and be sure to read over the MSDS before using.


We will be using a ruler to measure the amount of water in a test tube. Ordinarily, chemists use more accurate measurement tools than a ruler. For the first part of this lab, making litmus solution, all we need is an approximate volume of water.


We will also be shaking a liquid in a test tube. Ever leave the top of a blender off when the “on” button is depressed? If not, just believe that it’s not a good idea. There is a certain technique t use when shaking up a liquid. We’ll place a stopper on a test tube and shake vigorously. Remember to do that as a chemist would do.


In a laboratory, whenever a chemist stoppers a solution and shakes it, it will be done the same way no matter if it is a toxic substance or just salt and water. That way, they are in the habit of doing it one way, the right way, so a mistake is not made at any time. A mistake at the wrong time could even be fatal.


Stopper the test tube firmly. Seat it well, but don’t grind down on the stopper. A test tube is thin-walled glassware, and as we grip harder it could collapse in our hand and now we have open cuts, blood, and toxic chemical is now entering your bloodstream. Stoppered firmly, we hold the test tube in our hand and place our thumb over the stopper for added security. To top off our safety measures, point the test tube, with a thumb firmly on top, away from us or anyone else and shake to our heart’s content.


We need to be careful with our chemicals. After using a chemical, cap the container to prevent spillage and contamination. Clean everything thoroughly after you are finished with the lab, or if you are going to reuse a tool. To dip a measuring spoon into one chemical after another, contaminates the chemicals and will affect your results.


C1000: Experiments 1-10
C3000: Experiments 5-18


Download Student Worksheet & Exercises


Clean everything thoroughly after you are finished with the lab. After cleaning with soap and water, rinse thoroughly. Chemists use the rule of “three” in cleaning glassware and tools. After washing, chemists rinse out all visible soap and then rinse three times more.


Place all chemicals, cleaned tools, and glassware in their respective storage places.


Dispose of all solid waste in the garbage. Liquids can be washed down the drain with running water. Let the water run awhile to ensure that they have been diluted and sent downstream.


You can test how acidic different substances are with an acid-base indicator like litmus paper.


Using the litmus powder in the chemistry set, we will make litmus paper. Our litmus paper is going to start out blue, and will turn red when an acid is placed on it. You can turn it back to blue by placing a few drops of a basic solution on it.


Let’s look a little further into the chemistry behind acids and bases. An acid produces hydronium ions (example: H3O+) when dissolved in water. The + or – notation on a molecule tells us that after a chemical reaction creates it, the molecule is left with a net positive (electrons have been lost) or net negative charge (electrons have been added). Now, the ion could have more than just a +1 or -1 charge. Often, we will discover molecules with positive or negative charges of 2, 3, or 4.


Every liquid has a pH, and some of them may surprise you. Fruits contain citric acid, malic acid, and ascorbic acids, and the distilled white vinegar in your kitchen is a weak form of acetic acid. You’ll find carbonic acids in sodas, and lactic acid in buttermilk. And remember that acids taste sour and bases taste bitter? Don’t taste your chemicals, but the sour taste of vinegar and lemons and the bitter taste of club soda water and baking soda are familiar to people.


Generally, acids are sour in taste, change litmus paper from blue to red, react with metals to produce a metal salt and hydrogen, react with bases to produce a salt and water, and conduct electricity. Strong acids often produce a stinging feeling on mucus membranes (don’t ever taste an acid, or any chemical for that matter!).


Acids are proton donors (they produce H+ ions). Strong acids and bases all have one thing in common: they break apart (completely dissociate) into ions when placed in water.  This means that once you dunk the acid molecule in water, it splits apart and does not exist as a whole molecule in water. Strong acids form H+ and an anion, such as sulfuric acid:


H2SO4 –> H++ HSO4


There are six strong acids:


  • hydrochloric acid (HCl)
  • nitric acid (HNO3) used in fireworks and explosives
  • sulfuric acid (H2SO4) which is the acid in your car battery
  • hydrobromic acid (HBr)
  • hydroiodic acid (HI)
  • perchloric acid (HClO4)

The record-holder for the world’s strongest acid are the carborane superacids (over a million times stronger than concentrated sulfuric acid). Carborane acids are not highly corrosive even though are super-strong. Here’s the difference between acid strength and corrosiveness: the carborane acid is quick to donate protons, making it a super-strong acid.  However, it not as reactive (negatively charged) as hydrofluoric (HF) acid, which is so corrosive that it will dissolve glass, many metals, and most plastics.


What makes the HF so corrosive is the highly reactive Fl– ion. Even though HF is super-corrosive, it’s not a strong acid because it does not completely dissociate (break apart into H+ and Fl–) in water. Do you see the difference? Weak acids only partly dissociate in water, such as acetic acid (CH3COOH).


On the other hand, bases taste bitter (again, don’t even think about putting these in your mouth!), feel slippery (don’t touch bases with your bare hands!), don’t change the color of litmus paper, but can turn red litmus back to blue, conduct electricity when in a solution, and react with acids to form salts and water. Soaps and detergents are usually bases, along with house cleaning products like ammonia.


Bases are also electron pair donors (they produce OH– ions). Strong bases also completely dissociate into the OH– (hydroxide ion) and a cation. LiOH (lithium hydroxide), NaOH (sodium hydroxide), KOH (potassium hydroxide), RbOH (rubidium hydroxide), CsOH (cesium hydroxide), Ca(OH)2 (calcium hydroxide), Sr(OH)2 (strontium hydroxide), and Ba(OH)2 (barium hydroxide).  Weak bases only partly dissociate in water, such as ammonia (NH3)


pH stands for “power of hydrogen” and is a measure of how acidic a substance is.  We can make homemade indicators to test how acidic (or basic) something is by squeezing out a special kind of juice (dye) called anthocyanin. Certain flowers have anthocyanin in their petals, which can change color depending on how acidic the soil is (hibiscus, hydrangeas, and marigolds for example).  The more acidic a substance, the more red the indicator will become.


Going Further

Experiment: What household items are acidic or basic? Test various liquids to see. You may be surprised. Liquids you should be sure to test are vinegar, lemon or orange juice, baking soda, and cola. Use a dropper to place drops onto the paper instead of dunking the strip into your entire carton of orange juice. Litmus flavored orange juice is not my first choice in the morning.


Experiment: Collect soil samples from various places. Not the types of plants growing in the immediate area you are sampling from. Place about an inch of dirt in the bottom of a test tube. Fill the test tube near the top with water. Use distilled water if you have it for more accuracy. Stopper the tube and shake vigorously. Use your pipette to place drops of the water on your litmus paper and see if the soil is acidic or basic. Is there a correlation between the acidity of the soil and the plants that grow there?


Note: Litmus paper will not be able to indicate how acidic the rain in your area is, because the acid content in the water droplet is not high enough to register on the indicator. The effects of acid rain take time to develop and require more sensitive equipment to detect. [/am4show]
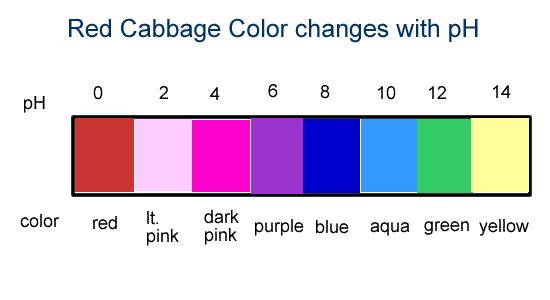

This experiment is for advanced students.


Purple and white colors, making the whitewash that Tom Sawyer used, and produce an exothermic chemical reaction…..does it get any better?


Limewater is one of the compounds we work with in this experiment. Limewater was used in the old days of America. We’re talking about the 80’s…..the 1880’s.


Traveling medicine shows sold what was called “patent medicines”. These usually had no medicinal properties at all. The man in charge, the salesman of the operation, was called a “huckster”. He would have the one of the people gathered around to listen to him blow into limewater. Their exhaled breath contains carbon dioxide, and the lime water turned cloudy, just like in our experiment.


The man would hold up the glass with the cloudy limewater in it and pour in some of his fantastic remedy. As long as the “medicine” was acidic, it would turn the cloudy limewater clear. This was proof that the remedy would cure whatever ailed the person.


[am4show have=’p9;p52;p91;’ guest_error=’Guest error message’ user_error=’User error message’ ]


Today, lime water is used in the traditional making of corn tortillas, tamales, and corn chips. People who have marine (saltwater) aquariums use lime water to assist in maintaining a healthy tank. Lime water is also used in the hide tanning process to remove hair. Parchment paper is made possible by the use of lime water as well. Here’s what you’ll need for your experiment with limewater:


Materials:


  • Granulated white sugar (MSDS)
  • Distilled water
  • Test tube rack
  • 2 test tubes
  • On-hole rubber stopper
  • Measuring spoon
  • 900 bend glass tubing
  • Test tube clamp
  • Potassium permanganate (KMnO4) (MSDS)
  • Sodium hydrogen sulfate (NaHSO4 ) (MSDS) Sodium hydrogen sulfate is very toxic. Respect it, handle it carefully and responsibly. Do not take it for granted.
  • Measuring syringe
  • Calcium hydroxide, Ca(OH)2 (MSDS) to add to H20 to make limewater (MSDS)

NOTE: Be very careful when handling the sodium hydrogen sulfate – it’s highly corrosive and dangerous when wet.  Handle this chemical only with gloves, and be sure to read over the MSDS before using.


Keep the potassium permanganate solution from entering the glass tube and being transported into the limewater.


Saturated calcium hydroxide solution has been historically called lime water Ca(OH)2 . That is what we will be bubbling our carbon dioxide into. It looks like water, but isn’t. Limewater smells like dirt and has an alkaline taste. (Don’t taste to find out. Not a safe laboratory practice.)


Saturated calcium hydroxide solution has been used as paint since the early years of the settlement of America. Ever hear of Tom Sawyer and the whitewashed fence? Whitewash is another name for limewater. We’re going to be using some pretty nasty chemicals, but you already follow all the safety precautions. Just remember to remember, and be careful.


The solution in one of your test tubes is going t undergo a chemical reaction to produce carbon dioxide. Another solution will be the indicator that CO2 has been produced.


C3000: Experiment 64


Download Student Worksheet & Exercises


Here’s what’s going on in this experiment:


When carbon dioxide is produced and bubbled into the lime water, a chemical reaction takes place.


Ca(OH)2 + CO2 –> CaCO3 + H2O


Calcium hydroxide (lime water) and carbon dioxide yields calcium carbonate and water. A milky precipitate forms that is calcium carbonate (CaCO3).


Cleanup: Clean everything thoroughly after you are finished with the lab. After cleaning with soap and water, rinse thoroughly. Chemists use the rule of “three” in cleaning glassware and tools. After washing, chemists rinse out all visible soap and then rinse three times more.


Storage: Place all chemicals, cleaned tools, and glassware in their respective storage places.


Disposal: Dispose of all solid waste in the garbage. Liquids can be washed down the drain with running water. Let the water run awhile to ensure that they have been diluted and sent downstream.


[/am4show]


This experiment is for advanced students. This is a repeat of the experiment: Can Fish Drown? but now we’re going to do this experiment again with your new chemistry glassware.


The aquarium looked normal in every way, except for the fish. They were breathing very fast and sinking head first to the bottom of the tank. They would sink a few inches, then jerk into proper movement again.


The student had to figure out what was wrong. He had set up the aquarium as an ongoing science project, and it was his responsibility to maintain the fish tank. His grade depended on it.


He went to his mom for help. She looked over the setup. “Have you tested the water?”


A quizzical look on his face, the boy said, “Everything is normal nitrates, nitrites, hardness, alkalinity, and pH. The pH was a little acidic, but not outside the proper range.”


[am4show have=’p9;p52;’ guest_error=’Guest error message’ user_error=’User error message’ ]


His mother said to him, “Show me how you would look if you were gasping for air and look in the mirror while you do it.”


He did, and he remarked, “I look like my fish.” I swear a light bulb actually appeared over his head and lit all up. He said, “They need air!” His mom was standing near the aquarium holding an air pump, vinyl tubing, and an air stone.


“Looking for this?” His mom said. He and his mom set up the air pump and soon his fish were jumping in the air and kissing him on the cheek. Well, maybe not that last part, but you get the idea. Water does not contain an inexhaustible amount of oxygen in it. It must be replenished if there is something in the water that is using it up.


The oxygen carrying capacity of water varies with conditions. Rainbow trout are found in cold water streams because the colder the water, the more oxygen it will hold. Rainbow trout need lots of oxygen in their water to survive. Other species of fish are found only in warmer water because they are adapted to a condition of less oxygen in the water. Still other fish can gulp the air from the surface if the water is severely depleted of oxygen. I have seen carp gulping air as they swim around in a pond looking for food on a hot summer day.


In this experiment we will discover that water does contain oxygen. We will subject the water to heat and we will see the oxygen for ourselves.


Materials:


  • Test tube rack
  • Test tube
  • Test tube holder
  • Rubber stopper
  • 90 degree bent glass tubing
  • Alcohol burner
  • Striker

Be careful not to let your water boil. Pressure will build up inside the test tube because only a small amount of pressure at a time can leave via the glass tubing. Pressure will build up and the stopper will fly off or the test tube will rupture. (Glass shrapnel and boiling water will get all over you. Not a pleasant thought.)


Inserting the glass tubing into and through the stopper is the most dangerous part of this lab or any other lab requiring this to be done. Most lab injuries, student or chemist, are due to cuts from broken glass. Proper technique will save you the pain of a deep cut. Lubricate the rubber stopper with glycerol if you have it. (It is a non-reactive laboratory grease that will not contaminate as badly as household or automotive oils and greases.) DO NOT use any other grease or oil. You probably don’t have any glycerol, so your second choice is just plain old water.


So, water on the tubing, gently start the glass tubing into the stopper. Don’t grip the glass with your hands, get a thick wash cloth, small towel, or work gloves and grab the tubing. Gently twist the tubing as you push gently on the tubing. Don’t pull to one side or the other, make your push a straight line. Once the tubing gets going, don’t stop unless you have to. Your second shot may be much more difficult because you have pushed a lot of the water off the tubing.


You are not going to see a chemical change. You are not going to work with chemicals. You are going to see for yourself that there is oxygen in water. That is, of course, what fish use up in the water. Unless it is replenished, fish can’t breath and they suffocate….not drown. The oxygen is replenished in the wild through various means. We can replenish the water with air pumps and water changes.


C3000: Experiment 51


Cleanup: Clean everything thoroughly after you are finished with the lab. After cleaning with soap and water, rinse thoroughly. Chemists use the rule of “three” in cleaning glassware and tools. After washing, chemists rinse out all visible soap and then rinse three times more.


Heated surfaces will be hot for awhile. Let things rest for a couple of minutes before doing your cleanup.


Your test tube probably has a blackened surface. It should wipe off easily, or will with a little soap, water, and a light touch.


Storage: Place all chemicals, cleaned tools, and glassware in their respective storage places.


Disposal: Dispose of all solid waste in the garbage. Liquids can be washed down the drain with running water. Let the water run awhile to ensure that they have been diluted and sent downstream.


The filter pump in your fish tank ‘aerates’ the water. The simple act of letting water dribble like a waterfall is usually enough to mix air back in. Which is why flowing rivers and streams are popular with fish – all that fresh air getting mixed in must feel good! The constant movement of the river replaces any air lost and the fish stay happy (and breathing). Does it make sense that fish can’t live in stagnant or boiled water?


[/am4show]


This experiment is for advanced students.


Don’t put this in your car….yet. Hydrogen generation, capture, and combustion are big deals right now. The next phase of transportation, and a move away from fossil fuels in not found in electric cars. Electric cars are waiting until hydrogen fuel cell vehicles become practical. It can be done and is being done.


Cars being powered by hydrogen are here, but not on the market yet. Engineers and chemists are always finding new ways to improve the chemical reaction that produces hydrogen and making the vehicles more efficiently use the fuel. Hydrogen fuel is not just easy to make, it is inexpensive, and the “exhaust” is water.


We will generate hydrogen in this lab. We will also see how combustible it is. Just let your imagination wander….just a bit and you will see noiseless cars and trucks zipping along the streets and interstates, carrying people and cargo. The Indianapolis 500 wouldn’t be quite the same, though. “And there they go, roaring, I mean quietly entering turn two…”


[am4show have=’p9;p52;’ guest_error=’Guest error message’ user_error=’User error message’ ]


Materials:


  • Goggles
  • Gloves
  • Measuring syringe
  • Water
  • Test tube rack
  • One-hole rubber stopper
  • Alcohol burner
  • Lighter
  • Test tube
  • Test tube holder
  • Water bath
  • Chemistry stand
  • Rubber tubing
  • 90 degree bend glass tubing
  • Zn powder (MSDS)
  • Copper sulfate CuSo4 (MSDS)
  • Sodium hydrogen sulfate NaHSO4 (MSDS)  Sodium hydrogen sulfate is very toxic. Respect it, handle it carefully and responsibly. Do not take it for granted.

NOTE: Be very careful when handling the sodium hydrogen sulfate – it’s highly corrosive and dangerous when wet.  Handle this chemical only with gloves, and be sure to read over the MSDS before using.


We will combine sodium hydrogen sulfate, water, and zinc. As soon as they are all together in our test tube, bubbles will begin forming in the solution. The bubbles will continue coming off, but we can speed up the reaction by adding a little copper sulfate. Now, instead of leisurely coming off, the gas is being given off quickly and we must act quickly ourselves to capture as much of the gas as possible. We can aid the gas movement ourselves by swirling the solution gently.


C3000: Experiment 74


Here’s what’s going on in this experiment:


NaHSO4 + H2O + Zn + CuSO4 –> H2 + NaSO4 + CuHSO4 + ZnO


Sodium hydrogen sulfate is added to water and dissolved completely. Zinc is added and hydrogen gas is generated by the chemical reaction. Copper sulfate is added as a catalyst to speed up the generation of hydrogen.


Double replacement occurs where the compounds are broken apart and the pieces realign and re-bond with different parts of the original molecules, and zinc oxide is left as a byproduct of the oxidation of the zinc powder. Hydrogen gas is freed in the reaction.


Cleanup: We are going to clean everything thoroughly after we finish the lab. After cleaning with soap and water, rinse thoroughly. Chemists use the rule of “three” in cleaning glassware and tools. After washing, chemists rinse out all visible soap and then rinse three times more.


Storage: Place cleaned tools and glassware in their respective storage places.


Disposal: Liquids must be neutralized before they can be washed down the drain. Solids are thrown in the outside trash.


[/am4show]


This experiment is for advanced students.


In industry, hydrogen peroxide is used in paper making to bleach the pulp before they form it into paper. Biologists, when preparing bones for display, use peroxide to whiten the bones.


At home, 3% peroxide combined with ammonium hydroxide is used to give dark-haired people their desired blonde moment. Peroxide is also used on wounds to clean them and remove dead tissue. Peroxide slows the flow from small blood vessels and oozing in wounds as well.


[am4show have=’p9;p52;’ guest_error=’Guest error message’ user_error=’User error message’ ]


Peroxide is a chemical produced in a Bombardier Beetle, and it squirts its irritating load into the face or onto the lips of a predator. Zebra fish produce peroxide after their skin is damaged. This action acts as a signal to produce an abundance of white cells to fight any infection and assist in the healing.


Scientists believe that healing can occur in humans in the same way. Future experiments may prove them right. It is also believed that people who have asthma have elevated levels of peroxide in their lungs, levels much higher than people without asthma.


Hydrogen peroxide can also help an animal that has eaten poison. A small amount of it can be put down the animal’s throat to induce vomiting and clear the poison out of their body as much as possible. Did your dog get too close to a skunk? There is no real “cure” other than a lot of time outside to air out, but peroxide mixed with hand soap is pretty good at removing the stink. Then, how you remove that stink from yourself…..another problem.


Materials:


  • 2 test tubes
  • Burner
  • Lighter
  • Chemistry stand
  • Test tube holder
  • Glass jar
  • Water pan
  • Water
  • Rubber tubing
  • 90o glass tubing
  • 3% Hydrogen peroxide (H2O2) (MSDS)

Hydrogen peroxide comes in a dark bottle because sunlight will slowly decompose hydrogen peroxide in the same way that we are doing with the exception that our way is much quicker.


When finished heating hydrogen peroxide, if you leave everything together, water will climb the tubing and attempt to enter the hot test tube. Cold water and hot peroxide are not safely compatible. To avoid this, remove the stopper from the test tube and set it aside while the solution cools.


Wait until all the equipment is cool enough to touch before disassembling for cleaning and storage.


When heating the test tube, be careful. Don’t heat in one place for too long. Move the flame of the burner around periodically to heat the reaction area of the test tube uniformly.


Don’t boil the peroxide too vigorously. If boiling gets too wild, remove the burner form the test tube until it calms down, then move it back to heat again.


At all times, keep the flame and peroxide apart…well apart.


Hydrogen peroxide is going to get broken down, is going to decompose, into the base elements of hydrogen and oxygen.


Download Student Worksheet & Exercises


Here’s what’s going on in this experiment:


Hydrogen peroxide (H2O2) breaks down with heat. A decomposition reaction occurs where hydrogen peroxide breaks down into its component elements, H2 and O2


2H2O2 –> 2H2O + O2


2 molecules of hydrogen peroxide are heated, creating a chemical decomposition reaction, producing 2 molecules of water and 1 molecule of oxygen.


Cleanup: Clean everything thoroughly after you are finished with the lab. After cleaning with soap and water, rinse thoroughly. Chemists use the rule of “three” in cleaning glassware and tools. After washing, chemists rinse out all visible soap and then rinse three times more.


Storage: Place cleaned tools and glassware in their respective storage places.


Disposal: Liquids can be washed down the drain


Going further: Elephant’s Toothpaste

A really fun experiment with hydrogen peroxide is making Elephant’s toothpaste. It requires an adult helper, and is fun for the kid and the adult.


Materials:


  • Empty 20 or 24 ounce plastic bottle
  • 3 % hydrogen peroxide
  • Liquid dish soap
  • Warm water
  • Food coloring
  • One packet or 2 1/2 ounces of yeast
  • One really big container to contain the big mess – laundry tub, bathtub, etc.

This video below is a demonstration of the Elephant Toothpaste experiment using much nastier chemicals than the ones I’ve mentioned above… the hot gas generated is actually oxygen. Enjoy!


Procedure:


  • Dissolve the yeast in a little warm water and stir well.  Use just enough water to make a pourable liquid.  Let it sit for about 5 minutes while you prepare the rest of the experiment.
  • Pour 1/2 cup of hydrogen peroxide, 1/4 cup of dish soap and a little bit of food coloring in the bottle.  Swirl to mix and put the bottle in the middle of your large pot, container or sink.
  • Pour the yeast solution into the bottle.  A funnel can help, but be prepared to pour fairly quickly and remove it again because the reaction will start as soon as you start pouring.
  • Stand back and watch the fun!

[/am4show]


This experiment is for advanced students.


This time we’re going to use a lot of equipment… really break out all the chemistry stuff. We’ll need all this stuff to generate oxygen with potassium permanganate (KMNO4). We will work with this toxic chemical and we will be careful…won’t we?


[am4show have=’p9;p52;p91;’ guest_error=’Guest error message’ user_error=’User error message’ ]


Oxygen is pretty important… it’s only the single most important thing that mammals need. Besides breathing, oxygen is important for so much on this world. Oxygen is used in welding, rocket fuel, and water treatment. Without oxygen, there is no oxidation and no fire. Simply put, we wouldn’t have rusty bicycles or campfires. Can your believe it?


Potassium permanganate is an important chemical in the film industry. It is used to make props like cloth, ropes, and glass, appear “old”. Some films it has been used in are “Troy”, “Indiana Jones”, and “300”. The KMnO4 stains any organic material. KMnO4 is also used as an antiseptic, and is used to treat skin ulcers and rashes. It is also used to treat foot fungus…..phew! People living in the country are sometimes plagued with an iron taste or a rotten egg smell in the water from their wells. Potassium permanganate can be used to remove the taste and smell from the water.


Materials:


  • Chemistry stand
  • Plastic tub
  • Water
  • 2 test tubes
  • Test tube clamp
  • Potassium permanganate (KMnO4) (MSDS)
  • Alcohol burner
  • Lighter
  • One-hole rubber stopper
  • Solid rubber stopper
  • 900 bend glass tube
  • Measuring spoon
  • Rubber tubing
  • Match
  • Wooden splint

Be careful inserting the glass tubing into the stopper. Wet the short end of the glass tube with water and gently push and twist the glass through the stopper. Wear work gloves and work carefully and slowly. Do not use oil or grease you have laying around the house.


When lighting the oxygen in the test tube, use a wooden splint. Wooden splints can be purchased from craft stores, or make your own by shaving thin strips from a piece of pine wood.


C3000: Experiment 58


Download Student Worksheet & Exercises


Here’s what’s going on in this experiment:


2KMnO4 + O2 –> K2MnO4 + MnO2 + O2


Potassium permanganate is heated and produces potassium manganate, manganese dioxide, and oxygen


Oxygen is generated by heating the KMnO4, and is collected in the test tubes. We will test the contents of the tubes to see if oxygen has been generated. What do you think will happen when a glowing splint is pushed up inside the test tube? Don’t know? Do the experiment and try to figure it out. Remember, in order for there to be flame, you need fuel and oxygen. If that gas was carbon dioxide, what would happen when the glowing splint was placed inside?


Cleanup: Clean everything thoroughly after you are finished with the lab. After cleaning with soap and water, rinse thoroughly. Chemists use the rule of “three” in cleaning glassware and tools. After washing, chemists rinse out all visible soap and then rinse three times more.


Storage: Place all chemicals, cleaned tools, and glassware in their respective storage places.


Disposal: Dispose of all solid waste in the garbage. Liquids can be washed down the drain with running water. Let the water run awhile to ensure that they have been diluted and sent downstream.


[/am4show]


This experiment is for advanced students.


Zinc (Zn), is a metal and it is found as element #30 on the periodic table. We need a little zinc to keep our bodies balanced, but too much is very dangerous.


Zinc is just like the common, everyday substance that we all know as di-hydrogen monoxide (which is the chemical name for water). We need water to survive, but too much will kill us.


DHMO: In chemistry, “Di” equals the number 2; hydrogen is H; mono equals the number one; and oxide is derived from oxygen, and its symbol is O. Put these together and you have Di-hydrogen (H2), and mono oxygen (O). Put them together, what do you have? Water!


[am4show have=’p9;p52;p91;’ guest_error=’Guest error message’ user_error=’User error message’ ]


Materials:


  • Goggles
  • Gloves
  • Test tube rack
  • 3 test tubes
  • Burner
  • Lighter
  • Zinc powder (Zn) (MSDS)
  • Calcium hydroxide (Ca(OH)2 (MSDS)
  • Rubber tubing
  • Measuring spoon
  • Solid rubber stopper
  • Pan
  • Water
  • Chemistry stand
  • Test tube holder
  • 90o glass tubing
  • One-hole rubber stopper
  • Evaporating dish
  • Dish soap
  • Wood splint
  • Measuring syringe

Be careful of the hot test tubes! It may not look hot, but don’t find out the hard way. If a chemist wants to know if something is hot, he places the back of his hand near the surface. If he feels heat, he concludes that it is hot. That’s the same way we test a person’s forehead for a fever. The back of your hand is more sensitive than the front.


Zinc, zinc oxide, and calcium hydroxide are dangerous chemicals. Use your safety equipment. Dispose of the residue in the test tube in the outside garbage.


We will be creating hydrogen gas by making a heterogeneous mixture of zinc powder and calcium hydroxide and heat it. The hydrogen bubbles into test tube in a water bath. When we mix our test tube of hydrogen with the air the room, the hydrogen burns…it actually explodes. Our amounts are small, but you will witness a cool, small, explosion.


In the second part of the lab we will again create hydrogen. This time, we have a tricky way to add oxygen to the hydrogen and we are able to create a ration of 2 parts hydrogen to 1 part oxygen. This is the perfect ratio to make the most explosive mixture of hydrogen and oxygen. The explosion here is very cool.


C3000: Experiment 76-78


Download Student Worksheet & Exercises


Here’s what’s going on in this experiment:


In the first part of the lab we produce hydrogen by combining two dry chemicals and heating them. Now two things will happen. Calcium hydroxide, when heated, produces water.


Ca(OH)2 –> CaO + H2O


Calcium hydroxide, when heated, produces calcium oxide and water. This is an oxidation reaction because the calcium oxidizes….combines with the oxygen and releases the other elements.


Next, Zinc will react with water created by calcium hydroxide. As the Ca(OH)2 is heated and turns to water and calcium oxide, the zinc then reacts and produces zinc oxide and hydrogen gas.


Zn + H2O –> ZnO + H2


Zinc when heated in the presence of water, produces zinc oxide and hydrogen gas. This is a single replacement reaction as oxygen kicks out hydrogen and replaces it with zinc.


Here’s the safety information for the products of the reaction:


Cleanup: Clean everything thoroughly after you are finished with the lab. After cleaning with soap and water, rinse thoroughly. Chemists use the rule of “three” in cleaning glassware and tools. After washing, chemists rinse out all visible soap and then rinse three times more. Dry all equipment.


Storage: Place all chemicals, cleaned tools, and glassware in their respective storage places.


Disposal: Dispose of all solid waste in the outside garbage. Liquids can be washed down the drain.


[/am4show]


This experiment is for advanced students.


Lewis and Clark did this same experiment when they reached the Oregon coast in 1805. Men from the expedition traveled fifteen miles south of the fort they had built at the mouth of the Columbia River to where Seaside, Oregon now thrives.


In 1805, however, it was just men from the fort and Indians. They built an oven of rocks. For six weeks, they processed 1,400 gallons of seawater, boiling the water off to gain 28 gallons of salt.


[am4show have=’p9;p52;p68;p80;p82;p84;p30;p57;’ guest_error=’Guest error message’ user_error=’User error message’ ]


Lewis and Clark National Historic Park commemorates the struggles of the expedition. (The reconstructed fort is also there to visit.) It is Fort Clatsop National Memorial, and is quite an experience to go through the fort.


Lewis and Clark went to great lengths to obtain salt. The men had been complaining that fish without salt had become something to avoid. Salt is important to us as well. It is a condiment, an addition to food that brings out the food’s natural flavor. Besides its food value, salt is used as a food preservative. It destroys bacteria in food by removing moisture from their “bodies” and killing them.


Sodium chloride, table salt, NaCl….they’re all acceptable names for salt. If NaCl is broken down into its component elements, the elements don’t act like our friend salt. Its components are sodium and chlorine.


Sodium is a highly reactive alkali metal, element #11 on the periodic table. It is exothermic in water, which means that is gives of heat as it reacts with water. Small pieces tossed into water will react with it. The sodium particles give off heat that melts them into round balls. The sodium particles bounce and scurry around the surface at a high rate of speed. If you ever get the chance to observe this, do it. The reaction continues until the sodium is gone. Sodium, as it reacts with the water, changes chemically into sodium hydroxide. These cool things that sodium does are also dangerous. Sodium and sodium hydroxide are caustic…they are so pH basic that they will burn you.


Chlorine is a halogen, group 17, element #17. Chlorine is used in bleach, disinfectants, and in swimming pool maintenance. It seems that anywhere you want to remove color or life, chlorine is your element. This property of chlorine to kill was used in war. (It would react with the mucous linings in their throat, undergoing a chemical reaction to turn into hydrochloric acid in their throats. Hydrochloric acid is a very dangerous acid, usually fatal once inside you.) Chlorine is known as bleach at home. Never, never, drink it or breathe its fumes.


Materials:


  • Goggles
  • Gloves
  • Jar or glass
  • 2 90o glass tubes
  • Chemistry stand
  • Rubber tubing
  • Test tube clamp
  • Erlenmeyer flask
  • One-hole rubber stopper
  • Wire screen
  • Alcohol burner
  • Lighter
  • Test tube
  • Water
  • Saltwater
  • Heating rod

Look out for the hot flask and other glassware. Allow everything to cool before cleaning.


When done heating, move the rubber tubing out of the water. There is a difference in pressure between the heated glassware and the water bath. That difference in pressure will cause the water to enter the tubing and cool water will flow into the hot glassware and could cause catastrophic damage to the glassware.


Never…Never!….drink the results of an experiment. Yeah, I know that plain old water is supposed to be in the test tube, but follow the experiment’s safety guidelines. You’ve had other stuff in that test tube, too.


C3000: Experiment 83


Here’s what’s going on in this experiment:


That flask of saltwater will start to boil, and water vapor will leave the flask and travel to the test tube. There is no chemical change occurring in this experiment, but a physical one. A physical change involves a change in state (melting, freezing, vaporization, condensation, sublimation). Physical changes are things like crushing a can, melting an ice cube, breaking a bottle, or boiling saltwater until there is nothing left but salt and steam.


Cleanup: Clean everything thoroughly after you are finished with the lab. After cleaning with soap and water, rinse thoroughly. Chemists use the rule of “three” in cleaning glassware and tools. After washing, chemists rinse out all visible soap and then rinse three times more.


Storage: Place cleaned tools and glassware in their respective storage places.


Disposal: Liquids can be washed down the drain


[/am4show]


This experiment is for advanced students.


Glo-sticks! Parents hang them from their trick or treaters, backpackers read with them light late at night in a tent. Glo-sticks work on the principle of chemiluminescence.  Chemiluminescence is defined as emitting light without heat as the result of a chemical reaction.


[am4show have=’p9;p52;p80;’ guest_error=’Guest error message’ user_error=’User error message’ ]


We might be tempted to mistake cold light for fluorescence. Fluorescent light is created by exciting electrons, not from a chemical reaction.


Luminol is one of out chemicals in this lab. Luminol is most famous by its use by criminal investigators when they need to locate blood. What makes this happen is that the iron in the blood reacts with the luminol to generate cold light.


Let’s have fun creating our own little version of cold light….I’ll use the term “cold light” from now on. It takes a long time to type out “chemiluminescence”.


Materials:


  • Glass jar
  • Measuring cup
  • Water
  • Test tube
  • Luminol C8H7N3O2 (MSDS)
  • Sodium hydroxide NaOH (MSDS)
  • Stir rod
  • Hydrogen peroxide H2O2 (MSDS)
  • Potassium hexacynoferrate II    K3Fe(CN)6 (MSDS)
  • Measuring spoon

The chemical reaction in this lab produces light without heat. Photons of light are emitted, but no heat. That must be cold heat. The light emitted from this lab is not as bright as a glow stick, but it still emits light. The same principle is used in the glow sticks. Our light will be seen as a low power blue-green light. The cold light effect is best viewed in a darkened room.


C3000: Experiments: 105, 110


Download Student Worksheet & Exercises


Here’s what’s going on in this experiment:


Solution #1 C8H7N3O2 + NaOH is added to Solution #2 H2O2 + K3Fe(CN)6 –> Cold Light


Cold Light is the production of light from a chemical reaction without the radiation of heat. There are three types of cold light reactions: Fluorescence, phosphorescence, and chemiluminescence. In chemiluminescence no radiation is absorbed. A chemical reaction provides the energy needed to emit light. Chemiluminescence is usually referred to as “cold light”. It rolls off the tongue much better and is easier to type. (I find that every time I type “chemiluminescence” I spell it differently.)


People used to rub their walking sticks with a luminescent jellyfish to light the path while walking. Today, light sticks from the store aren’t made from jellyfish. Modern-day light sticks involve a different reaction from the experiment you will be performing. We will have the luminal glow, but light sticks use a different reaction.


Light sticks use a di-ester of hydrogen peroxide that oxidizes in an organic solvent. The reaction is tons slower, giving a light stick a life span of hours instead of seconds or minutes. Dyes are added to produce different colors. When you break the class vial inside to activate the light stick, you mix the luminol with the other reactant, and the chemical reaction is under way.


A general chemical equation producing cold light:


A + B –> high energy intermediate à products + light


The luminol is oxidized by B. This oxidation produces cold light.


Cleanup: We are going to clean everything thoroughly after we finish the lab. After cleaning with soap and water, rinse thoroughly. Chemists use the rule of “three” in cleaning glassware and tools. After washing, chemists rinse out all visible soap and then rinse three times more.


Storage: Place cleaned tools and glassware in their respective storage places.


Disposal: Liquids can be washed down the drain. Solids are thrown in the trash.


[/am4show]


This experiment is for advanced students. This lab builds on concepts from the previous carbon dioxide lab.


Limewater….carbon dioxide…indicators. We don’t know too much about these things. Sure, we know a little. Carbon dioxide is exhaled by us and plants need it to grow. Burning fossil fuels produces carbon dioxide.


Indicators…something we observe that confirms to us that something specific is happening. Lime water turns cloudy and forms a precipitate in the presence of carbon dioxide. Blue litmus paper turns red in the presence of an acid. The dog barking at the door and dancing around indicates that you better let the dog out, and quick, to avoid….a pet spill?


[am4show have=’p9;p52;p68;p80;’ guest_error=’Guest error message’ user_error=’User error message’ ]


Materials:


  • Limewater from a previous lab (MSDS)
  • One-hole rubber stopper
  • 900 bend glass tubing
  • Test tube rack
  • 2 Test tubes
  • Sodium hydrogen sulfate (NaHSO4) (MSDS) Sodium hydrogen sulfate is very toxic. Respect it, handle it carefully and responsibly. Do not take it for granted.
  • Sodium carbonate (Na2CO3) (MSDS)

NOTE: Be very careful when handling the sodium hydrogen sulfate – it’s highly corrosive and dangerous when wet.  Handle this chemical only with gloves, and be sure to read over the MSDS before using.


When pouring our limewater into the test tube, be careful! Limewater is dangerous to your skin and your nasal passages. Pour just the limewater into the test tube, not any solids that may have gotten into the limewater container.


A chemical reaction will occur between sodium hydrogen sulfate, sodium carbonate, and water. We could have used any combination of chemicals for this lab that will produce carbon dioxide (CO2), but these chemicals are already in our kits, so……


The reaction will create a gas, that gas, we think, is carbon dioxide. If we are right, we will be bubbling CO2 gas into lime water. If we observe the limewater becoming cloudy and if a precipitate forms on the bottom of the test tube, that is a positive indicator that CO2 is present.


C3000: Experiment 31


Here’s what’s going on in this experiment:


Some combination of chemicals will produce carbon dioxide –> CO2 + ?


Notice that specific chemicals are not in the chemical equation? The actual chemistry of the chemical reaction is not our focus in this lab. We want to experience how an indicator can test for a particular compound or element.


Instead of sodium hydroxide and sodium carbonate and water, we could choose to combine vinegar and baking soda for example. Even simple household supplies can be chemicals for our experiments.


Cleanup: We are going to clean everything thoroughly after we finish the lab. After cleaning with soap and water, rinse thoroughly. Chemists use the rule of “three” in cleaning glassware and tools. After washing, chemists rinse out all visible soap and then rinse three times more.


Storage: Place cleaned tools and glassware in their respective storage places.


Disposal: Liquids can be washed down the drain. Solids are thrown in the trash.


[/am4show]


This experiment is for advanced students.


Who gets to burn something today? YOU get to burn something today!


You will be working with Zinc (Zn). Other labs in this kit allow us to burn metal, but there is a bit of a twist this time. We will be burning a powder.


Why a powder instead of a solid ribbon or foil as in the other labs?  Have you heard of surface area being a factor in a chemical reaction? The more surface area there is to burn, the more dramatic the chemical change. So, with this fact in mind, a powder should burn faster or be more likely to burn than a large solid.


[am4show have=’p9;p52;p91;’ guest_error=’Guest error message’ user_error=’User error message’ ]


Zinc (Zn) is a metallic element. It is element #30 on the periodic table. Chemically, it is similar to magnesium, another element that we use in our experiments.


Brass is an alloy of zinc and copper. Brass has been an important metal since the 10th century B.C. Alchemists in the dark ages burned zinc in air, just like we will do, to make what they called “white snow”. Their “white snow is our zinc oxide.


Zinc is an important element in our lives. Zinc deficiency causes lack of proper growth, delayed physical maturation, and susceptibility to infection. Zinc deficiency contributes to the death of 800,000 children per year. Excess zinc in our bodies can cause problems for us as well.


Materials:


  • Alcohol burner
  • Lighter
  • Measuring spoon
  • Zinc powder (MSDS)
  • Porcelain tile work surface

Remember to dispose of your zinc oxide in the outside trash, and conduct your experiment in a well ventilated area. Fumes from this experiment are irritating and a little dangerous.


C3000: Experiment 53


Download Student Worksheet & Exercises


Here’s what’s going on in this experiment:


Zinc powder will burn in the presence of oxygen, producing interesting colors. The flame from burning zinc is blue, as the zinc undergoes a chemical change to become zinc oxide. Zinc oxide is thermochromic. That means that it changes colors depending on the temperature. When cool, ZnO is white. When heated, zinc oxide turns yellow, and as it cools, returns to become a white powder again. The color changes are caused by a small loss of oxygen at high temperatures, and a small gain of oxygen as it cools in air.


2Zn + O2 –> 2ZnO


Zinc powder burned in air reacts with the oxygen and turns into zinc oxide. Zinc oxide is used in sunscreen and to treat burns, cuts, and diaper rash.


Cleanup: Clean everything thoroughly after you are finished with the lab. After cleaning with soap and water, rinse thoroughly. Chemists use the rule of “three” in cleaning tools. After washing, chemists rinse out all visible soap and then rinse three times more.


Storage: Place all chemicals and cleaned tools, and glassware in their respective storage places.


Disposal: Dispose of all solid waste in the garbage.


[/am4show]


Magnesium is one of the most common elements in the Earth’s crust. This alkaline earth metal is silvery white, and soft. As you perform this lab, think about why magnesium is used in emergency flares and fireworks. Farmers use it in fertilizers, pharmacists use it in laxatives and antacids, and engineers mix it with aluminum to create the BMW N52 6-cylinder magnesium engine block. Photographers used to use magnesium powder in the camera’s flash before xenon bulbs were available.


Most folks, however, equate magnesium with a burning white flame. Magnesium fires burn too hot to be extinguished using water, so most firefighters use sand or graphite.


We’re going to learn how to (safely) ignite a piece of magnesium in the first experiment, and next how to get energy from it by using it in a battery in the second experiment. Are you ready?


[am4show have=’p8;p9;p25;p52;p80;p91;’ guest_error=’Guest error message’ user_error=’User error message’ ]


Materials:


  • magnesium strip (MSDS)
  • matches with adult help
  • tile or concrete surface (something non-flammable)
  • gloves, goggles

Burning magnesium produces ultraviolet light. This isn’t good for your eyes, and the brightness of the flame is another danger for your eyes. Avoid looking directly into the flame.


Burning magnesium is so hot that if it gets on your skin it will burn to it and not come off. As difficult as burning magnesium is to put out, avoid letting the burning metal come in contact with you or anything else that might catch fire.


As explained later in this lab, magnesium burns in carbon dioxide. Therefore, a CO2 fire extinguisher won’t work to put it out. Water won’t work, CO2 won’t work. It takes a dry chemical fire extinguisher to put it out, or just wait for it to burn up completely on its own.


Magnesium is a metal, and in this experiment, you’ll find that some metals can burn. The magnesium in this first experiment combines with the oxygen in the air to produce a highly exothermic reaction (gives off heat and light). The ash left from this experiment is magnesium oxide:


2Mg (s) + O2 (g) –> 2Mg O (s)


Not all the magnesium from this experiment turned directly into the ash on the table – some of it transformed into the smoke that escaped into the air.


Caution: Do NOT look directly at the white flame (which also contains UV), and do NOT inhale the smoke from this experiment!


C3000: Experiment 52


Download Student Worksheet & Exercises


Here’s what’s going on in this experiment:


As you burn your magnesium, you will get your very own fireworks show….a little one, but still cool.


2Mg + O2 –> 2MgO


Magnesium burned in oxygen yields magnesium oxide. Because the temperature of burning magnesium is so high, small amounts of magnesium react with nitrogen in the air and produce magnesium nitride.


3Mg + N2 –> 2Mg3N2


Magnesium plus nitrogen yield magnesium nitride.  Magnesium will also burn in a beaker of dry ice instead of in air (oxygen).


2Mg + CO2 –> 2MgO + C


Magnesium burned in carbon dioxide yields magnesium oxide and carbon (ash, charcoal, etc.)


Cleanup: Rinse off and pat dry the rest of the magnesium strip.


Storage: Place everything back in its proper place in your chemistry set.


Disposal: Dispose of all solid waste in the garbage.


Magnesium Battery

Now let’s see how to make a battery using magnesium, table salt, copper wire, and sodium hydrogen sulfate (AKA sodium bisulfate).


Materials:


  • magnesium strip
  • test tube and rack
  • light bulb (from a flashlight)
  • 2 pieces of wire
  • measuring cup of water
  • salt (sodium chloride)
  • copper wire (no insulation, solid core)
  • measuring spoon
  • sodium hydrogen sulfate (NaHSO4) (MSDS) Sodium hydrogen sulfate is very toxic. Respect it, handle it carefully and responsibly. Do not take it for granted.
  • gloves, goggles

NOTE: Be very careful when handling the sodium hydrogen sulfate – it’s highly corrosive and dangerous when wet.  Handle this chemical only with gloves, and be sure to read over the MSDS before using.

C1000: Experiment 75
C3000: Experiment 295


We’re going to do another electrolysis experiment, but this time using magnesium instead of zinc. In the previous electrolysis experiment, we used electrical energy to start a chemical reaction, but this time we’re going to use chemical energy to generate electricity.  Using two electrodes, magnesium and copper, we can create a voltaic cell.


TIP: Use sandpaper to scuff up the surfaces of the copper and magnesium so they are fresh and oxide-free for this experiment.  And do this experiment in a DARK room.


How cool is it to generate electricity from a few strips of metal and salt water? Pretty neat! This is the way carbon-core batteries work (the super-cheap brands labeled ‘Heavy Duty’ are carbon-zinc or ‘dry cell’ batteries). However, in dry cell batteries scientists use a crumbly paste instead of a watery solution (hence the name) by mixing in additives.


In this chemical reaction, when the magnesium metal enters into the solution, it leaves 2 electrons behind and turns into a magnesium ion:


Oxidation: Mg (s) –> Mg2+(aq) + 2e–


The magnesium strip takes on a negative charge (cathode), and the copper strip takes on a positive charge (anode).  The copper strip snatches up the electrons:


Reduction: Cu2+(aq) + 2e– –> Cu (s)


and you have a flow of electrons that run through the wire from surplus (cathode) to shortage (anode), which lights up the bulb.


Note: You can substitute a zinc strip or aluminum strip for the magnesium strip and a carbon rod (from a pencil) for the copper wire.


Going further: You can expand on this experiment by substituting copper sulfate and a salt bridge to make a voltaic cell from two half-cells in Experiment 16.5 of the Illustrated Guide to Home Chemistry Experiments.


[/am4show]


This experiment is for advanced students.


Brimstone is another name for sulfur, and if you’ve ever smelled it burn…..whoa….I’m telling you ….you will see for yourself in this lab. It is quite a smell, for sure. Sulfur is element #6 on the periodic table. Sulfur is used in fertilizer, black powder, matches, and insecticides. In pioneer times sulfur was put into patent medicines and used as a laxative.


To further the evil reputation of sulfur, or brimstone, when sulfur is burned in a coal fired power plant, sulfur dioxide is produced. The sulfur is spewed into the air, where it is reacts with moisture in the air to form sulfuric acid. The clouds get full and need to let go of this sulfuric acid. Down comes the acid rain to wreak havoc on the masonry and plant life below.


[am4show have=’p9;p52;p91;’ guest_error=’Guest error message’ user_error=’User error message’ ]


Materials:


  • Goggles
  • Gloves
  • Measuring spoon
  • Sulfur (MSDS)
  • Alcohol burner
  • Lighter
  • Test tube of O2

Be careful when bending the ends of your measuring spoon. Bend them where you need them and leave them alone. Continuing to bend, straighten, and re-bend will weaken the metal and cause your measuring spoon to break. We will do this experiment to compare the flames produced by burning sulfur in air and oxygen


C3000: Experiments: 36,60


Download Student Worksheet & Exercises


Here’s what’s going on in this experiment:


S + O2 –> SO2


Sulfur and oxygen are heated and sulfur dioxide is produced. This is a synthesis reaction because the sulfur and the oxygen react and form a new substance, sulfur dioxide. We see the flame of sulfur dioxide burn in air. Small flame, little smoke. When the flame is left lit and placed in the oxygen, the flame flares up and lots of white smoke is generated. It appears that sulfur’s flame burns brighter and stronger in pure oxygen.


Cleanup: We are going to clean everything thoroughly after we finish the lab. After cleaning with soap and water, rinse thoroughly. Chemists use the rule of “three” in cleaning glassware and tools. After washing, chemists rinse out all visible soap and then rinse three times more.


Storage: Place cleaned tools and glassware in their respective storage places.


Disposal: Liquids can be washed down the drain. Solids are thrown in the trash.


[/am4show]


In this lab, we’re going to investigate the wonders of electrochemistry. Electrochemistry became a new branch of chemistry in 1832, founded by Michael Faraday. Michael Faraday is considered the “father of electrochemistry”. The knowledge gained from his work has filtered down to this lab. YOU will be like Michael Faraday. I imagined he would have been overjoyed to do this lab and see the results. You are soooo lucky to be able to take an active part in this experiment. Here’s what you’re going to do…


You will be “creating” metallic copper from a solution of copper sulfate and water, and depositing it on a negative electrode. Copper is one of our more interesting elements. Copper is a metal, and element 29 on your periodic table. It conducts heat and electricity very well.


Many things around you are made of copper. Copper wire is used in electrical wiring. It has been used for centuries in the form of pipes to distribute water and other fluids in homes and in industry. The Statue of Liberty is a wonderful example of how beautiful 180,000 pounds of copper can be. Yes, it is made of copper, and no, it doesn’t look like a penny…..on the surface. The green color is copper oxide, which forms on the surface of copper exposed to air and water. The oxide is formed on the surface and does not attack the bulk of the copper. You could say that copper oxide protects the copper.


[am4show have=’p8;p9;p25;p52;’ guest_error=’Guest error message’ user_error=’User error message’ ]


Our bodies use copper to our advantage, but in a proper form that is not toxic. Too much copper will make you sick and could kill you. Remember…don’t eat your chemistry set!


Materials:


  • Carbon rod (MSDS)
  • Copper sulfate (CuSo4) (MSDS)
  • Aluminum foil
  • 9V battery with clip
  • 2 wires
  • Disposable cup
  • Water

You are going to make a saturated solution of copper sulfate (CuSO4) in water. Pour a measuring spoon of granulated copper sulfate in the measuring cup of water. Stir well. Continue adding a spoonful and stirring until no more crystals will go into solution. The solution is saturated when no more crystals will dissolve and there are undissolved crystals at the bottom of the container.


C1000: Experiment 74

C3000: Experiment 121, 289


Download Student Worksheet & Exercises


Here’s what’s going on in this experiment:


CuSO4 + H2O (Copper sulfate is added to water)


CuSO4 + H2O à Cu2+ + SO42- (Copper sulfate plus water yields positively charged carbon ion and negatively charged sulfate ion)


When mixed with water, copper sulfate dissociates into copper and sulfate ions. Notice that the ions, now separated, take on negative and positive charges.


Next, 9V of electricity is passed through the solution with an electrode of carbon and an electrode of aluminum foil inserted into the solution. As electricity flows from one electrode to another, the copper ions, being positively charged, are attracted to the negative electrode. You can confirm this in two ways. One, if litmus paper, held close to an electrode, turns blue, that is the negative electrode. The other way is to just follow the negative lead from the battery to the negative electrode.


As the process moves along, the negative electrode gains copper ions. Evidence of this is seen on the surface of the electrode.


Here’s the breakdown of the entire process:

When the copper sulfate (CuSO4) mixed with water (H2O), the copper sulfate dissociated:


CuSO4 –> Cu2+ + SO42-


When power is added to the solution, the copper ions move toward the negative cathode (carbon rod) and take electrons from it, forming solid copper right on the electrode:


Cu2++ 2e– –> Cu(s)


On the positive anode (the aluminum foil), you’ll see bubbles instead of a solid forming. The anode attracted electrons from the water molecule to form oxygen bubbles:


6H2O –> O2 + 4H3O+ + 4e–


Let’s put these two reactions together to get the overall reaction of:


2Cu2+ + 6H2O –> 2Cu + O2 + 4H3O+


Note the difference between galvanic cells and electrolytic cells: galvanic use spontaneous chemical reactions (like in a car battery) to generate electricity, and electrolytic cells use electricity to make the chemical reaction to occur and move electrons to move in a way they would go on their own (like in this experiment).


Clean up: Clean everything thoroughly after you are finished with the lab. After cleaning with soap and water, rinse thoroughly. Chemists use the rule of “three” in cleaning glassware and tools. Rinse three times, wash with soap, rinse three times.


Wipe off the carbon rod to remove the copper. The aluminum goes in the trash, but the solution and solids at the bottom cannot. The liquid contains copper, a toxic heavy metal that needs proper disposal and safety precautions. Another chemical reaction needs to be performed to remove the heavy metal from the copper sulfate.  Add a thumb sized piece of steel wool to the solution. The chemical reaction will pull out the copper out of the solution. The liquid can be washed down the drain. The solids cannot be washed down the drain, but they can be put in the trash. Use a little water to rinse the container free of the solids.


Place all chemicals, cleaned tools, and glassware in their respective storage places.


Dispose of all solid waste in the garbage. Liquids can be washed down the drain with running water. Let the water run awhile to ensure that they have been diluted and sent downstream.


Going Further

Here is a link to information about making your own geode (crystal lined rock) of copper sulfate crystals:


http://chemistry.about.com/od/growingcrystals/ht/geode.htm


[/am4show]


If we don’t have salt, we die. It’s that simple. The chemical formula for salt is NaCl. Broken down, we have Na (sodium) and Cl (chlorine). Either one of these can be fatal in sufficient quantities. When chemically combined, these two deadly elements become table salt. What once could kill now keeps us alive. Isn’t chemistry awesome?


Chlorine, element 17, is called a halogen as are all the elements in the 17th row. All halogens have similar chemical properties. They are highly reactive nonmetals, and react easily with most metals. Sodium is a metal, and is bonded with sodium in the table salt used in this lab. Besides being found in salt, chlorine has many uses in our world such as killing bacteria in our water, making plastic, cleaning products, and the list goes on. A very useful chemical, and is among the top ten chemicals produced in the United States. Ever since its discovery in 1774, chlorine has been very useful. It is found in nature in sodium chloride, but in very small concentrations. Seawater, the most abundant source of chlorine, has a concentration of only 19g of chlorine per liter.


[am4show have=’p8;p9;p25;p52;p91;’ guest_error=’Guest error message’ user_error=’User error message’ ]
Although chlorine is abundant in nature (about 2% of the mass of the ocean is chloride ions), scientists have developed a safe way to make chlorine. Chlorine has been manufactured for a hundred years through different processes: Membrane Cell, Diaphragm Cell, and Mercury Cell processes. In the first two processes, salt water (NaCl + H2O) and caustic soda (NaOH) are used along with a power supply to generate chlorine and hydrogen gas.


Molecules that contain chlorine that find their way into the upper atmosphere can destroy the ozone layer. The ozone-oxygen cycle is a chemical process that transforms the harmful UV light (240-310nm) from the sun into heat. The oxygen and ozone molecules are constantly being switched back and forth as the sun’s UV breaks down the ozone and the oxygen molecules reacts with other oxygen atoms.


This reaction converts UV radiation into thermal energy which heats up the atmosphere (this reaction happens slowly):


O3 –> O2 + O


If two free oxygen atoms meet, they form a new oxygen molecule:


2O –> O2


If this new molecule meets another free oxygen, it creates another ozone molecule:


O2 + O –> O3


If an ozone and an oxygen molecule meet, they form two oxygen, and this process removes ozone from the atmosphere. This process is very slow, however, so the naturally occurring reaction of:


O3 + O –> 2O2


is nothing to worry about. It’s when this reaction gets sped up by catalysts that we have to pay close attention. There are many catalysts that can speed up the removal of ozone, such as chlorine, bromine, and nitric oxide (NO3). And since they are catalysts in the reaction (meaning they simply speed up the reaction without getting used), they can do this over and over again before they move out of the atmosphere completely. One chlorine atom can speed up (catalyze) tens of thousands of ozone removal reactions before it moves out of the stratosphere. Scary, huh?


CFCs (chlorofluorocarbons) such as aerosols, refrigerants (R-12), and solvents have been banned because of their damaging effect on the atmosphere. When sunlight hits a CFC, it splits off a chlorine ion:


CCl3F –> CCl2F– + Cl–


This free chlorine ion catalyzes the ozone into oxygen:


O3 + O– + Cl– –> 2 O2 + Cl–


The chlorine we’re going to generate in our experiment is a minuscule amount. Even so, it is still a good idea to perform this experiment in an area with good ventilation or outdoors.


Remember to wear your gloves and goggles. True, the amount of chlorine produced is small and pretty harmless. But there are several factors that make it prudent to wear your protection. Not everyone has the same sensitivity to chemicals. Even in this lab, a person could get their skin irritated to some degree. Eyes are very sensitive organs, and I know I don’t want any amount of chlorine contacting my eyes.


Here’s what you’re going to need to do this experiment:


Materials:


  • 9V battery clip
  • carbon rod
  • wires
  • disposable cup
  • salt
  • water
  • aluminum foil
  • gloves, goggles

We will be observing a decomposition reaction. A decomposition reaction separates a substance into two or more substances that may differ from each other and from the original substance.


ZcQr –> Zc + Qr


When separated, the free elements to the right of the equation become ions, one positively charged and one negatively charged.


A very important concept to learn in this lab is that charged particles (ions) will move toward either a positive or negative electrode. The ions that move toward the anode (positive terminal) are anions, and the ones that move toward the cathode (negative) are cations.


Decomposition of any kind is the breaking down of the whole into smaller parts that were once part of the whole.


Download Student Worksheet & Exercises


Here’s what’s going on in this experiment:


An electrical charge is passing through a saturated solution of salt (NaCl). It will sit there and just be salt unless that electrical charge is imposed on it. The electrical charge excites the molecules, and causes the molecules of salt to decompose, to pull apart, to break into simpler parts. These ions are negatively and positively charged. Negatively charges particles have more electrons than protons and seek a balance. In order to have an electric current, you need to have positive and negative electrodes. Opposites attract, so the negative ions move to the positive electrode and the positive ions are attracted to the negative electrode.


NaCl –> Na+ + Cl–


Sodium chloride decomposes into sodium and chlorine ions.


The anode (positive, carbon rod) soaks up free electrons, which get pumped to the cathode (negative, aluminum foil) and released into the solution. If you press litmus paper against the aluminum strip, you’ll find it’s blue (basic), and red when pressed to the anode (carbon rod). The bubbles on the carbon rod are made of chlorine. The chlorine ions in the solution are attracted to the positive pole (carbon rod) and quickly combine to form chlorine gas:


2Cl– –> Cl2


The sodium ions move toward the aluminum foil and split the water molecule into ions:


H2O –> H+ + OH–


The hydrogen ions are converted into hydrogen gas:


2H+ –> H2


The sodium ions (Na+) that remain in the solution combine with the OH- ions to create sodium hydroxide which turns the litmus paper blue:


Na+ + OH– –> NaOH


The main concept I want you to understand with this experiment is that charged particles (ions) will move toward either a positive or negative electrode. The ions that move toward the anode (positive terminal) are anions, and the ones that move toward the cathode (negative) are cations.


Before you dispose of the solution, try this variation on the experiment: remove the foil and hold a salt-water filled test tube (filled to the top with salt water and capped with a gloved thumb and submerged into the solution). Place the cathode wire into the tube and you’ll see bubbles rising up into the tube. What type of gas is it? (Hint: wait until the tube is nearly full before removing it and using a match to test.)


For C3000 Students: Use this experiment as the basis for Experiment 123.


Cleanup: Clean everything thoroughly after you are finished with the lab. After cleaning with soap and water, rinse thoroughly. Chemists use the rule of “three” in cleaning glassware and tools. After washing, chemists rinse out all visible soap and then rinse three times more.


Storage: Place all chemicals, cleaned tools, and glassware in their respective storage places.


Disposal: Dispose of all solid waste in the garbage. Liquids can be washed down the drain with running water. Let the water run awhile to ensure that they have been diluted and sent downstream.


[/am4show]


Electricity. Chemistry. Nothing in common, have nothing to do with each other. Wrong! Electrochemistry has been a fact since 1774. Once electricity was applied to particular solutions, changes occurred that scientists of the time did not expect.


In this lab, we will discover some of the same things that Farraday found over 300 years ago. We will be there as things tear apart, particles rush about, and the power of attraction is very strong. We’re not talking about dancing, we’re talking about something much more important and interesting….we’re talking about ELECTROCHEMISTRY!


[am4show have=’p8;p9;p25;p52;p91;’ guest_error=’Guest error message’ user_error=’User error message’ ]


Materials:


  • Test tube rack
  • 9V battery clip
  • 9V battery
  • Flashlight lamp
  • Gloves
  • Electrical wires
  • Aluminum foil
  • Water
  • Sugar
  • Salt
  • Sodium carbonate (MSDS)
  • Measuring spoon

When the salt sodium chloride (NaCl) mixes with water, it separates into its positively (Na+) and negatively (Cl-) charged particles (ions). When a substance mixes with water and separates into its positive and negative parts, it’s called a ‘salt’.


Salts can be any color of the rainbow, from the deep orange of potassium dichromate to the vivid purple of potassium permanganate to the inky black of manganese dioxide. Did you know that MSG (monosodium glutamate) is a salt? Most salts are not consumable, as in the lead poisoning you’d get if you ingested lead diacetate.


If you pass a current through the solution of salt and water, opposites attract: the positive ions are attracted tot he negative pole and the negative ions go toward the positive pole. These migrations ions allow electricity to flow, which is why ‘salt’ solutions conduct electricity.


C1000: Experiments 66-70


Download Student Worksheet & Exercises


Here’s what’s going on in this experiment:


Our experiment uses a saturated solution of table salt that is just sitting in a container minding its own business. That just won’t do! We must intervene. Our 9V battery pushes its voltage through the saltwater. That electric current tears the sodium from the chlorine. These positively and negatively charged ions rush about, looking for something they are attracted to. Opposites attract, so positively charged sodium ions find spending time with the negative electrode a treat. They are very happy together. Negatively charged chlorine ions are attracted to the positive electrode. The match is wonderful, and the negativity and the positivity somehow enjoy the time spent with each other.


NaCl –> Na+ + Cl–


Sodium chloride decomposes into sodium and chlorine ions


Cleanup: Clean everything thoroughly after you are finished with the lab. After cleaning with soap and water, rinse thoroughly. Chemists use the rule of “three” in cleaning glassware and tools. After washing, chemists rinse out all visible soap and then rinse three times more.


Storage: Place all chemicals, cleaned tools, and glassware in their respective storage places.


Disposal: Dispose of all solid waste in the garbage. Liquids can be washed down the drain with running water. Let the water run awhile to ensure that they have been diluted and sent downstream.


[/am4show]


Ammonia has been used by doctors, farmers, chemists, alchemists, weightlifters, and our families since Roman times. Doctors revive unconscious patients, farmers use it in fertilizer, alchemists tried to use it to make gold, weightlifters sniff it into their lungs to invigorate their respiratory system and clear their heads prior to lifting tremendous loads. At home, ammonia is used to clean up the ketchup you spilled on the floor and never cleaned up.


The ammonia molecule (NH3) is a colorless gas with a strong odor – it’s the smell of freshly cleaned floors and windows. Mom is not cleaning with straight ammonia (it’s gas at room temperature because it boils at -28oF, so the stuff she cleans with is actually ammonium hydroxide, a solution of ammonia and water).  Ammonia is found when plans and animals decompose, and it’s also in rainwater, volcanoes, your kidneys (to neutralize excess acid), in the ocean, some fertilizers, in  Jupiter’s lower cloud decks, and trace amounts are found in our own atmosphere (it’s lighter than air).


[am4show have=’p8;p9;p25;p52;’ guest_error=’Guest error message’ user_error=’User error message’ ]


Ammonia is a strong base – it combines with acids to form salts:


NH3 + HCl –> NH4Cl


But ammonia also can act as a weak acid. Remember, an acid is a proton donor, as in this reaction with lithium, where the ammonia molecule donated one hydrogen atom:


2 Li + 2 NH3 –> 2 LiNH2 + H2


In this experiment, we make a stink and then we see something that will make us go ooooooh… and aaaaw. How fun is that? But you need to follow the instructions carefully and perform your experiment safely. Promise?


Ammonia will be generated by the combination of ammonium chloride and sodium carbonate. The amount of ammonia generated in this experiment is not a large amount. However, you really should experience this particular stink.


Materials:


  • 3 test tubes and rack
  • sodium carbonate (MSDS)
  • ammonium chloride (MSDS)
  • copper sulfate (MSDS)
  • sodium hydrogen sulfate (NaHSO4) (MSDS) Sodium hydrogen sulfate is very toxic. Respect it, handle it carefully and responsibly. Do not take it for granted.
  • water
  • test tube stopper
  • measuring spoon
  • gloves, goggles

NOTE: Be very careful when handling the sodium hydrogen sulfate – it’s highly corrosive and dangerous when wet.  Handle this chemical only with gloves, and be sure to read over the MSDS before using.


A chemical reaction is going to occur when the ammonium chloride, sodium chloride, and another chemical reaction is going to occur when the copper sulfate is added. These compounds are the reactants in our chemical reaction, and the blue liquid, CuCl (copper chloride), at the end of the experiment, will be our product. This experiment displays two types of reactions, a decomposition reaction when we combine ammonium chloride and sodium chloride, and a double replacement reaction when we add copper sulfate to the mixture.


C1000: Experiments 19-21


Download Student Worksheet & Exercises


When we combine ammonium chloride and sodium carbonate, ammonia will be produced. We will add copper sulfate to that mixture, producing two chemical compounds with totally different properties from those exhibited by the original chemicals.


Two chemical reactions will occur in this experiment:


(1)   When you add ammonium chloride and sodium chloride to the water, a decomposition reaction will occur that produces ammonia gas, carbon dioxide gas, and sodium chloride dissolved in water. It is identified as a decomposition reaction because the reactants breakdown into elements or simpler compounds.


NaHCO3 + 2NH4Cl –> NH3 + CO2 + NaCl + 2H2O


sodium carbonate + ammonium chloride –> ammonia + carbon dioxide + sodium chloride + water


(2)   The next reaction takes place when copper sulfate is added to the sodium chloride and water. The products of this reaction are sodium sulfate and copper chloride (the blue color). This reaction is identified as a double replacement reaction due to the fact that the two reactants break apart and recombine, the reactants trading parts, recombining to form two other different compounds with properties completely different than those of the reactants.


NaCl + CuSO4 –> NaSO4 + CuCl


sodium chloride + copper sulfate –> sodium sulfate + copper chloride


Big suggestion here: All chemical vapors are best experienced by “wafting”, a procedure that brings the vapor to you, instead of sticking your nose in the test tube, bringing you to the vapors. Please get in the habit of smelling properly. If ammonia vapors can bring unconscious people back to consciousness, you should probably make sure you are sniffing safely.


Reminder: Always wash your hands or gloves, and your chemistry tools, when switching from one chemical to another to avoid contamination that could affect the experiment adversely.


Store: Put all chemicals away in their proper places to keep them organized and ready to be used again. All tools should be put away as well, but make sure hat they have been cleaned and dried before storing them. A rule of thumb in chemistry is always wash something three times.


Disposal: Pour liquids down the drain using plenty of water. Throw solid waste into the outside garbage to prevent filling the house with bad smells.


[/am4show]


This experiment is for advanced students.


ACID!!! The word causes fear to creep in and get our attention.


BASIC!!! The word causes nothing to stir in most of us.


The truth is, a strong acid (pH 0-1) is dangerous, but a strong basic (pH 13-14) is just as dangerous. In this lab, we will get comfortable with the basics of bases and the acidity of acids along with how you can use both and tell the difference between them.


[am4show have=’p9;p52;p68;p80;’ guest_error=’Guest error message’ user_error=’User error message’ ]


Familiar acidic solutions:


  • pH 1: Stomach acid
  • pH 2: Lemon juice
  • pH 3: Vinegar
  • pH 4: Soda pop
  • pH 5: Rainwater (serious acid rain could have a pH of 2-4)
  • pH 6: Milk
  • pH 7: Distilled water
  • pH 8: Egg whites
  • pH 9: Baking soda
  • pH 10: Antacid
  • pH 11: Ammonia
  • pH 12: Limewater
  • pH 13: Drano
  • pH 14: Sodium hydroxide (NaOH)

Materials:


  • Lemon
  • Apple
  • Blue litmus paper
  • White vinegar
  • Clear glass cup
  • Tartaric acid (C4H6O6)
  • Measuring spoon
  • Measuring syringe
  • Water
  • Test tube rack
  • Test tube
  • Cool water
  • Sodium hydroxide (NaOH) (MSDS)
  • Dropper pipette
  • Calcium hydroxide (CaOH) (MSDS)
  • Erlenmeyer flask
  • Solid rubber stopper
  • Storage bottle
  • Stick-on label
  • Permanent marker

Acids usually taste sour and turn blue litmus paper red. There are exceptions. One exception to this is with apples. They contain malic acid. Malic acid does in fact taste sour by itself, but apples produce so much sugar that the sour taste of the acid is overpowered with sweetness. Making lemonade is a good example as well.


NaOH – Be very careful working with sodium hydroxide (NaOH). It isn’t an acid, so it shouldn’t be very harmful, right? WRONG! A strong base is just as dangerous as a strong acid. Please be careful when using them.


Don’t get confused and don’t forget what litmus paper indications mean. Acids turn blue litmus paper red, and bases turn red litmus paper blue. If you are testing a substance and the paper doesn’t change color, try the other type. The substance might not be neutral, but an acid or base that you used the wrong color litmus paper.


When testing with litmus paper, don’t dip the litmus paper into the chemical bottle. Use a clean dropper to transfer the chemical to the paper. Dipping into the chemical can and will, eventually, contaminate the chemical.


When shaking a liquid in a test tube or flask, put a solid rubber stopper on top. If you just start shaking from there, your stopper may fly across the room and scare your dog unnecessarily. The hot, or acidic, or basic contents of the container will find a place on the salad waiting to be served. The paramedics will be puzzled when they find the entire family, heads down, lettuce hanging from their mouths. With the stopper firmly inserted, wrap your hand around the container with your thumb over the stopper, pushing down to hold it in place while you shake.


After we finish the experiment, don’t discard the contents of the Erlenmeyer flask. It now contains limewater, a substance that we want to save for later experiments. Carefully pour the liquid into a storage bottle and discard the solids in the trash. Place a sticker on the bottle and/or use a permanent marker to label the bottle for future use. Keep the storage bottle out of direct sunlight when storing it.


We will explore for ourselves some of the properties of acids and bases. If we consider the acid-base theory discussed below, it will help us to further understand what we are experiencing in our lab.


C3000: Experiments 5-18


Download Student Worksheet & Exercises


Cleanup: We must clean everything thoroughly after we finish with the lab. After cleaning with soap and water, we need to rinse everything thoroughly. Chemists use the rule of “three” in cleaning glassware and tools. After washing, chemists rinse out all visible soap and then rinse three times more.


Storage: Place cleaned tools and glassware in their respective storage places.


Disposal: Liquids can be washed down the drain, and solids put in the trash.


[/am4show]


This experiment is for advanced students.


Ever use soap? Sodium hydroxide (NaOH) is the main component in lye soap. NaOH is mixed with some type of fat (vegetable, pig, cow, etc).  Scent can be added for the ‘pretty’ factor and pumice or sand can be added for the manly “You’re coming off my hands and I’ll take no guff” factor. Lots of people still make their own soap and they enjoy doing it.


[am4show have=’p9;p52;’ guest_error=’Guest error message’ user_error=’User error message’ ]


One of the coolest uses for sodium hydroxide is in tissue digestion. By “tissue” we mean meat, bone, sinew…..meaning bodies! People who pick up dead animal (road kills) for the county dump their catch in barrels containing sodium hydroxide. The NaOH eats everything up and then the “sludge” is dumped in the landfill. They used NaOH to make them decompose. So this stuff is nasty and should never be touched with your bare hands!!


Materials:


  • Erlenmeyer flask
  • Alcohol burner
  • Lighter
  • Heating rod
  • Sodium carbonate (Na2CO3) (MSDS)
  • Calcium hydroxide (Ca(OH)2) (MSDS)
  • Measuring spoon
  • Water
  • Tripod stand
  • Wire screen
  • Chemistry stand
  • Test tube holder
  • Test tube rack
  • Test tube
  • Filter paper
  • Funnel
  • Stock bottle for NaOH storage (MSDS)

Don’t inhale any fumes from reactions or powder welling out of chemical containers, especially calcium hydroxide dust. We want to test our product to see if it is NaOH. It should turn red litmus blue.


We will perform a bunch of operations in this lab.


  1. Heating our calcium hydroxide / sodium carbonate mixture to create calcium carbonate and sodium hydroxide.
  2. Filter out the calcium carbonate to collect the sodium hydroxide.
  3. Test our sodium hydroxide product for the properties of NaOH.

C3000: Experiments 172-173


Download Student Worksheet & Exercises


Here’s what’s going on in this experiment:


Ca (OH)2 +     Na2CO3 –>  2NaOH     +     CaCO3


Calcium hydroxide and sodium carbonate are combined in water and heated to produce sodium hydroxide and calcium carbonate


This is a double replacement reaction because the calcium ion and the sodium ion have swapped places


Cleanup: We are going to clean everything thoroughly after we finish the lab. After cleaning with soap and water, rinse thoroughly. Chemists use the rule of “three” in cleaning glassware and tools. After washing, chemists rinse out all visible soap and then rinse three times more.


Storage: Place cleaned tools and glassware in their respective storage places.


Disposal: Liquids must be neutralized with vinegar, if a base, or baking soda, if an acid, before washing them down the drain. Before actually washing them down the drain check again with litmus paper to ensure that they have been neutralized. Solids are thrown in the trash.


[/am4show]


This experiment is for advanced students.


Potassium permanganate (KMnO4) in water turns an intense, deep, purple. It is important in the film industry for aging props and clothing to make them look much older than they are.


Also, artists use it in bone carving. People who carve antlers and bone use KMnO4 to darken the surface of the bone to make it look aged. They make the carving, soak it in potassium permanganate, then carve more, and repeat. The end result is a carving that has a light golden brown color. More dipping will darken the carving even more.


Potassium permanganate is going to undergo a chemical change with this activity. In this experiment, we will be able to witness several indicators of chemical change. Color changes, bubbles from gas generation, temperature change, and color disappearance are all indicators of chemical changes.


[am4show have=’p9;p52;’ guest_error=’Guest error message’ user_error=’User error message’ ]


Examples of chemical color changes we might be familiar with are autumn leaves changing color and a half eaten apple quickly turning brown.


Physical changes can mimic the indicators of chemical change, so we will need to always think through what we observe and then decide whether it is a physical or chemical change. Physical changes that mimic chemical changes can be color and temperature. The key is that physical changes are changes in state (solid, liquid, gas, sublimation) or changes in the condition of the material. In our pursuit of science knowledge, we will observe many physical and chemical changes. We need to be able to identify them accurately to really understand what is happening in an experiment.


Materials:


  • 3% Hydrogen peroxide (KMnO4) (MSDS)
  • Test tube rack
  • 2 test tubes
  • Potassium permanganate (KMnO4) (MSDS)
  • Sodium hydrogen sulfate (NaHSO4) (MSDS) Sodium hydrogen sulfate is very toxic. Respect it, handle it carefully and responsibly. Do not take it for granted.
  • Measuring syringe
  • Water
  • Measuring spoon
  • Solid rubber stopper

NOTE: Be very careful when handling the sodium hydrogen sulfate – it’s highly corrosive and dangerous when wet.  Handle this chemical only with gloves, and be sure to read over the MSDS before using.


Always cap your chemicals after use and set them aside where they won’t get in the way. Your lab area should always be clear, clean, and uncluttered. Water and a fire extinguisher should be within arm’s reach. Always clean equipment before using any of it on another chemical.


Potassium permanganate is going to undergo a chemical reaction that will turn the deep violet or purple solution clear. It is a very cool experiment and looks like a lot of fun.


C3000: Experiment 102


Download Student Worksheet & Exercises


Here’s what’s going on in this experiment:


KMnO4 + NaHSO4 + H2O2 = MnSO4 + O2 + NaOH + KOH


Potassium permanganate is added to sodium hydroxide, and then hydrogen peroxide is added and quickly capped.


MnSO4 + O2 + NaOH + KOH


The product of the reaction is manganese sulfate, oxygen, sodium hydroxide, and potassium hydroxide. The remaining chemicals are all clear, so the desired result is obtained.


Cleanup: Clean everything thoroughly after you are finished with the lab. After cleaning with soap and water, rinse thoroughly. Chemists use the rule of “three” in cleaning glassware and tools. After washing, chemists rinse out all visible soap and then rinse three times more.


Storage: Place cleaned tools and glassware in their respective storage places.


Disposal: Liquids can be washed down the drain


[/am4show]


This experiment is for advanced students.


How do you know if your brother is stealing your candy? Unwrap a wrapped hard candy that he likes a lot. Roll the candy around in the powdered food dye that matches the candy. (Push the powder into the candy so it “disappears”.) Re-wrap the candy. Set the candy in the place where it usually disappears from. Wait ten minutes after the candy disappears. Find your brother. He will be sporting a new color on his hands and mouth. Dye is hard to remove. It will have to be worn every day at school until it fades away as the skin cells slough off. The dye he now wears is in indicator that he has been taking your candy.


[am4show have=’p9;p52;’ guest_error=’Guest error message’ user_error=’User error message’ ]


Did you guess that this lab is about indicators? A reagent is chemical compound that creates a reaction in another substance; the product of that chemical reaction is an indicator of the presence, absence, or concentration of another substance.


Your brother’s situation is not a chemical reaction, but a reaction will be observed in his looks and his mood.


We are going to prepare copper sulfate and ammonium iron sulfate solutions and test them to see if our reagent, potassium hexacynoferrate II will cause chemical changes that indicate that copper is present in one, and iron is present in the other.


I’m sure your brother will stay far away from your candy from now on. I know this is obvious, but don’t eat anything in this lab or use it to coat candy… that was just an example to illustrate what an indicator is and how to use it.


Materials:


  • Erlenmeyer  flask
  • Water
  • Potassium hexacynoferrate II    K4Fe(CN)6 (MSDS)
  • Copper sulfate   CuSO4 (MSDS)
  • Measuring spoon
  • Solid rubber stopper
  • Test tube rack
  • 3 Test tubes
  • Measuring syringe
  • Small labeled container for NaOH
  • Dropper pipette
  • Ammonium iron sulfate   NH4Fe(SO4)2 (MSDS)
  • Sodium hydroxide   NaOH (MSDS)

We need to remember to only make as much Potassium hexacynoferrate II as we need. Label test tubes with contents information clearly visible. Always remember that when the term “reagent” is used in chemistry it is referring to an indicator chemical.


We will put together two solutions with metallic chemicals dissolved in water in each. Let’s pretend we have no idea if they are metallic or not. Many times as a chemist, when analyzing a customer’s of a production chemical, we are looking for metal in a solution as an indicator of something good or something bad. If one of the factory’s systems contains a corrosive liquid flowing through its veins, it would be good to know if some metal somewhere is corroding, being dissolved, by the fluid. Our tests could confirm a problem or set the boss’s mind to rest….and get us a big bonus if we save the day.


C3000: Experiments 260-264


Here’s what’s going on in this experiment:


In test tube #1: Copper sulfate solution into which we added Potassium hexacynoferrate II. A color change occurred (brown) and a precipitate fell out of the liquid to rest on the bottom of the test tube. This reaction was an indicator for the presence of metal.


In test tube #2: Ammonium iron sulfate solution into which we added Potassium hexacynoferrate II. A color change occurred (dark blue). This reaction was an indicator for the presence of metal.


Cleanup: We are going to clean everything thoroughly after we finish the lab. After cleaning with soap and water, rinse thoroughly. Chemists use the rule of “three” in cleaning glassware and tools. After washing, chemists rinse out all visible soap and then rinse three times more.


Storage: Place cleaned tools and glassware in their respective storage places.


Disposal: Liquids, after neutralization, can be washed down the drain. Solids are thrown in the trash.


[/am4show]


This experiment is for advanced students.


Sparks flying off in all directions…that’s fun. In this lab, we will show how easy it is to produce those shooting sparks. In a sparkler you buy at the store, the filings used are either iron or aluminum.


The filings are placed in a mixture that, when dry, adheres to the metal rod or stick that is used in making the sparkler. The different colors are created by adding different powdered chemicals to the mixture before it dries. When they burn, we get red, blue, white, and green.


[am4show have=’p9;p52;p91;’ guest_error=’Guest error message’ user_error=’User error message’ ]


Materials:


  • Card stock
  • Alcohol burner
  • Iron filings
  • Gloves

It’s tempting to use a handful of filings to produce a literal shower of sparks. The effect is actually better with small amounts. To accomplish anything with a large pile of filings would require you to blow REALLY hard to make a filing cloud that will combust well. A larger reaction means more sparks flying around. The amount of filings recommended in the lab is a safe amount. Increasing the amount used increases the danger. You could take an interesting, fun, and safe lab and transform it into something that burns the hair off your arms. Besides, burning hair doesn’t smell good.


Here’s what’s going on in this experiment:


Iron + Oxygen –> Iron Oxide


Iron and Oxygen are burned to produce Iron Oxide


This is the balanced chemical equation: 2Fe + O2 –> 2FeO


C3000: Experiment 54


Download Student Worksheet & Exercises


Handling iron filings is not dangerous. Minor things that can occur, such as: Iron filings can stain your skin gray; if there is a large filing in your container, rubbing your finger against it could give you a painful splinter.


Return unused filings to your container. Any surface these filings touch turns gray, so keep your filings corralled. Cleaning your work surface with a wet paper towel is the easiest way to clean up.


Discard any unburned iron powder that is coating the area around your alcohol burner into a trash container outside. It is not toxic, but still….don’t use chemicals or experiment residue as a snack. Never a good idea.


What is going on here? When you build a campfire at the campground, why doesn’t the grill spark and burn up? The grill is iron, the filings are iron, and there is always oxygen available in the air. What’s the deal here? Combustion needs two things, fuel and fire. Not enough of either and nothing will burn. But a woodstove is made up of a lot more iron by weight than that little scoop of filings. It has to do with surface area. Take an equal weight of solid iron and iron filings. Put a match to the solid iron and all it gets is hot. Blow the same weight of iron filings into the flame and POOF! The key is surface area. Surface area can affect the way a chemical reaction occurs, and in this case, whether or not it occurs at all.


To better understand the effect of surface area, eat some candy! Put a whole Lifesaver candy in your mouth. Suck, move your tongue all over it, swish it back and forth in your mouth. You are not allowed to bite or swallow it. How long does it take to completely dissolve? Do the same thing with another Lifesaver broken into pieces. Which dissolved faster? The same thing happens with the iron. The smaller the pieces, the easier it is for the iron to burn. When you blew iron filings into the air above the flame, you increased the surface area even more by increasing the air space between the particles. An increase in surface area always makes things happen faster. Granulated sugar dissolves faster than sugar cubes, and a piece of wood burns faster after you chop it into kindling. Pay attention and you will notice other situations where increasing surface area speeds up physical changes and chemical reaction times.


An additional experiment that you can try on your own is burning steel wool. Properly prepared ahead of time, steel wool will spark as it burns up. A great emergency fire starter is a 9V battery and steel wool. Fluff up the steel wool and touch a portion of it across the terminals of the battery. The steel wool will burn just like it did with a match.


Steel wool is just a ball of really long iron filings. If you fluff out the steel wool and light it, it burns easily. If you do try this, do it outside over the lawn or an area of dirt. At some point in the combustion you will want/need to drop the steel wool or get your fingers singed.


[/am4show]


This experiment is for advanced students.


In gas form, element #59 is deadly. However, when iodine is in  liquid form, it helps heal cuts and scrapes. The iodine molecule occurs in pairs, not as a single atom (many halogens do this, and it’s called a diatomic molecule). It’s hard to find iodine in nature, though it’s essential for staying healthy… too little iodine in the body takes a heavy toll on how well the brain operates.


A chunk of iodine is blackish-blue, and will sublimate (go from a solid straight to a gas, as seen in the photo here).  Iodine is the heaviest element needed by living things. Iodized salt is sodium chloride fortified with iodine to prevent people from not getting enough iodine in their daily diets.


Iodine is found in seaweed (kelp) and seafood as well as vegetables that are grown in dirt that has high iodine levels. People that live inland and do not eat fish often have lower iodine levels than their coastal, fish-eating neighbors. The trick is not to get too much or too little iodine in your diet, because the symptoms of deficiency and excess levels are quite similar.


Starch (like cornstarch) are used as an indicator for detecting iodine in chemistry experiments. When combined with iodine, starch forms a blue-black color in the solution. We’re going to do this and many other activities in this lab, because this experiment is actually several labs rolled into one. First, we have to make iodine, store it, and then we get to use it in several experiments. Are you ready?


[am4show have=’p9;p52;’ guest_error=’Guest error message’ user_error=’User error message’ ]


Materials:


  • Goggles
  • Gloves
  • Glass jar
  • Chemistry stand
  • Test tubes
  • Test tube holder
  • Measuring spoon
  • Corn starch peanut
  • Water cup
  • 90 degree bend glass tubing
  • One-hole rubber stopper
  • Paper towels
  • Stain-free work surface
  • Solid rubber stopper
  • Denatured alcohol
  • Dark brown glass storage bottle for iodine
  • Dropper pipettes
  • Alcohol burner
  • Lighter
  • Measuring syringe
  • Water
  • Potassium iodide KI (MSDS)
  • Potassium permanganate KMnO4 (MSDS)
  • Sodium hydrogen sulfate NaHSO4 (MSDS) AKA: Sodium Bisulfate Sodium hydrogen sulfate is very toxic. Respect it, handle it carefully and responsibly. Do not take it for granted.

NOTE: Be very careful when handling the sodium hydrogen sulfate – it’s highly corrosive and dangerous when wet.  Handle this chemical only with gloves, and be sure to read over the MSDS before using.


Remember that iodine is toxic paper and harmful to the environment.
Safely shake test tube to homogenize chemicals using a solid rubber stopper and dispose of in the outside trash.


NOTE: Heat slowly and carefully. You don’t want your test tube in the flame. The end of the glass tubing should not extend into the alcohol. From time to time, touch the end of the glass tubing to the alcohol to rinse iodine from the tube into the alcohol, but the glass tubing shouldn’t reside in the alcohol. Conduct this experiment outdoors or in an extremely well ventilated area inside the house.


Follow cleanup instructions carefully for safety. These are very toxic substances we are working with.

As heating progresses, purple gas will form in the upper test tube. A brown color will begin to form in the alcohol. Heat until purple smoke disappears from the upper test tube.


C3000: Experiments 139-149


Here’s what’s going on in this experiment:


2KI + KMnO4 + NaSO4 + H2O–> I2 + MnO2 + KOH +KIO3 + Na2SO4


Potassium iodide and potassium permanganate and sodium sulfate and water are heated to produce free iodine gas and magnesium oxide and potassium hydroxide and potassium iodide and sodium sulfate.


All this to produce the iodine we need for the next several experiments.


Cleanup: We are going to clean everything thoroughly after we finish the lab. After cleaning with soap and water, rinse thoroughly. Chemists use the rule of “three” in cleaning glassware and tools. After washing, chemists rinse out all visible soap and then rinse three times more.


Storage: Place cleaned tools and glassware in their respective storage places.


Disposal: Liquids need to be filtered through a paper towel and washed down the drain with plenty of water. Solids are thrown in the outside trash.


Going Further

*Save all solutions you make in these experiments. You will use them in the other experiments.


Testing Iodine solution

After the drops of iodine are in the test tube with water, observe. Any solid particles in the test tube prove that our iodine is not soluble in water.


Addition with Iodine

Using the solution from the above experiment, adding KI will dissolve all the solids that were observed. Why did the solids disappear? Well, nothing dramatic was seen, but an addition compound was created.


I2 + KI  –>  KI I2


Sodium Thiosulfate

Sodium thiosulfate (Na2S2O3) solution is pipette drop by drop to above solution until it turns clear. The reaction that takes place turns our solution into sodium hypoiodite (NaOI)


Packing Peanut

We fill a glass jar with water and 10 drops of iodine and mix well. The water will be a pale brown. Dissolve a corn starch peanut in water. When we add starch solution to the iodine and water, the water turns clear, then blue. We have just created iodine starch!


Colorless Iodine

Sodium thiosulfate solution from an experiment above. Put a few droppers of this solution into the iodine starch and stir. Colorless! We have a colorless iodine solution….very cool!


Iodine and Heat

To set this one up, dropper one drop of iodine solution into a test tube half-filled with water. Then we regain our bright blue color by adding our starch solution to the iodine water.


When we add heat, The solution turns clear! But, we’re not done. The test tube goes into a half full jar of cool water. The solution in the test tube is turning blue. If you keep doing these actions over and over again, you will keep getting the same results.


Did you notice something? The reaction is ________. Think, now.
(Psst! It’s reversible!)


Colorless Iodine Without Heat

In this experiment we use alcohol to achieve a clear solution. We pour some iodine starch solution into some alcohol and the solution turns clear. The alcohol removed the iodine from the solution.


[/am4show]


This experiment is for advanced students.


Zinc and Hydrogen are important elements for all of us. Zinc (Zn) metal is element #30 on the periodic table. Lack of zinc in our diets will delay growth of our bodies and can kill.


Hydrogen gas (H) is element #1 on the periodic table. Hydrogen was discovered in the 1500s. In a pure state, hydrogen combustion (in small quantities) is interesting. In large amounts, mixed with oxygen, the explosion can be devastating.


[am4show have=’p9;p52;p91;’ guest_error=’Guest error message’ user_error=’User error message’ ]


We are going to perform an experiment that generates a small amount of hydrogen gas, with a correspondingly small explosion. Hydrogen is violently flammable in air, but by itself….not so much. Hydrogen is lighter than air, so has been used in airships, or blimps. The Hindenburg, a German airship filled with hydrogen, burned up quickly on May 6, 1937 while tied to a mooring mast.


Currently, hydrogen is being thought of as the “fuel of the future” for our cars and other vehicles. Most the Earth’s our hydrogen is contained in water (H2O). Most of the experimentation has been in producing hydrogen through electrolysis. That proves very expensive to produce and transport. Until a cheaper alternative appears, hydrogen (H2) is not a practical alternative.


Scientists are lately giving a lot of attention to a process that will produce hydrogen cheaply and easily.  That method is to heat zinc powder in the presence of air (oxygen). It can be achieved at low temperatures, little cost, and little danger – perfect for a hydrogen fuel cell in our car. Don’t go filling your tank with it right away, though. Engineers still need to work some bugs out. It will happen soon, so be patient. (And remember, you saw it first in your chemistry set!)


Materials:


  • Gloves
  • Goggles
  • Chemistry stand
  • Zinc (Zn) powder (MSDS)
  • Measuring spoon
  • 4 test tubes
  • Test tube holder
  • Alcohol burner
  • Lighter
  • One-hole rubber stopper
  • Rubber tubing
  • 900 bend glass tubing
  • Water
  • Measuring syringe
  • Stirring rod
  • Clear pan

Important! Dispose of the Zinc (Zn) left in the test tube in the outside trash. Accidentally ingesting (and it should only be accidental) of Zinc (Zn) or Zinc Chloride (ZnCl), will harm you or animals. It will not be one of your best days. Call 911 if this happens.


After you have finished your experiment, be careful of the hot test tube containing the zinc compound. The test tube is very hot, and there will be a difference in pressure between the water tank and the test tube. Because the test tube has been heated, the pressure is less than atmospheric pressure.


As it cools, the water in the tank, which is at atmospheric pressure (the pressure of the air in the room) is higher than in the test tube. The test tube’s low pressure is looking to suck something, anything, up the glass tube. The water, sitting there at normal air pressure, notices the need. Water climbs up the tube  in response to the test tube’s request.


At the conclusion of the experiment, with the heat off, the test tube starts to cool and water then donates some stuff to equalize the pressure. If allowed to , that cool water hits that hot zinc, or hot test tube, and the test tube could explode and the zinc could quickly react, blowing out the stopper and spewing hot zinc all over you.


Here is the safety information for the products in this chemical reaction:


You first put zinc powder and water together in the end of the horizontally held test tube. But why place a pile of, dry zinc, laying in the test tube near the wet zinc? We want to create a chemical reaction with zinc and water. Wet zinc powder in the end of the test tube allows the dry zinc to come in contact with water when they are both heated without the powder actually getting wet. This way the reaction occurs faster and more efficiently. We don’t have to wait any longer than necessary this way.


C3000: Experiments 67-69


Download Student Worksheet & Exercises


Here’s what’s going on in this experiment:


In this experiment we are causing a single replacement reaction to occur between zinc powder and water. In a replacement reaction, a compound breaks down into its elemental parts in the first stage of the chemical reaction. A new compound is created as the elements search about for something to bond with to satisfy their needs to gain or give up electrons.


Zn + H2O –> ZnO + H2


Zinc powder reacts with water under the influence of heat to become zinc oxide and hydrogen gas. The new compound is called zinc oxide (ZnO).


Cleanup: Clean everything thoroughly after you are finished with the lab. After cleaning with soap and water, rinse thoroughly. Chemists use the rule of “three” in cleaning glassware and tools. After washing, chemists rinse out all visible soap and then rinse three more times. Dry them before putting them away.


Storage: Place all chemicals, cleaned tools, and glassware in their respective storage places.


Disposal: Dispose of all solid waste in the outside garbage. Liquids can be washed down the drain with running water. Let the water run awhile to ensure that they have been diluted and sent downstream.


[/am4show]


WARNING!! THIS EXPERIMENT IS PARTICULARLY DANGEROUS!! (No kidding.) This experiment is for advanced students.


We’ve created a video that shows you how to safely do this experiment, although if you’re nervous about doing this one, just watch the video and skip the actual experiment.


Bromine is a particularly nasty chemical, so be sure to very carefully follow the steps we’ve outlined in the video. You MUST do this experiment outdoors. We’ll be making a tiny amount to show how the chemical reactions involving bromine work.


[am4show have=’p9;p52;p91;’ guest_error=’Guest error message’ user_error=’User error message’ ]


Isn’t it interesting how many ways we can use the same techniques and, by just changing a few chemicals, we can learn about so many different chemical reactions? This lab is similar in technique to the Generating Hydrochloric Acid lab. Using the same techniques, we will produce hydrogen bromide.


Hydrogen bromide (HBr) was used as a sedative in the late 1800s and early 1900s. Once they found out how poisonous it really was  (after enough people became blind and/or dead), someone had the wonderful idea that maybe we shouldn’t use it anymore. It was also used to control epilepsy until the substitute Phenobarbital came on the scene in 1911. HBr is still used to treat epilepsy in dogs. In cats HBr causes inflammation of the lungs and makes for a very unhappy cat.


Materials:


  • Alcohol burner
  • Lighter
  • Wire screen
  • Tripod stand
  • Glass jar
  • Rubber tubing
  • 900 Glass tubing
  • One-hole rubber stopper
  • Chemistry stand
  • Test tube holder
  • Test tube
  • Potassium bromide (KBr) (MSDS)
  • Sodium hydrogen sulfate (NaHSO4) (MSDS) Sodium hydrogen sulfate is very toxic. Respect it, handle it carefully and responsibly. Do not take it for granted.
  • Burette
  • Water
  • Sodium carbonate (Na2CO3) (MSDS)
  • Silver nitrate (AgNO3) (MSDS)

NOTE: Be very careful when handling the sodium hydrogen sulfate – it’s highly corrosive and dangerous when wet.  Handle this chemical only with gloves, and be sure to read over the MSDS before using.


Maintain good and proper lab techniques. We are working with some nasty stuff in this lab. We need to perform this lab outdoors if possible, or indoors with lots of ventilation. The reaction advances in stages:


  • Bubbles in the burette tell us the reaction is occurring.
  • Brown streaks will appear in the water contained in the glass jar as gas collects there.
  • Brown vapor will begin to appear in the test tube. When the reaction is complete, the test tube will contain lots of brown vapor.

After we produce HBr, we will perform a number of tests to see if it is an acid or a base.


  1. Test contents of test tube with blue litmus paper. Red color change indicates an acid.
  2. Add baking soda to the HBr. Bubbles and the solution turning white. HBr is an acid in this test because it is obviously reacting with a base.
  3. If a magnesium strip placed in the HBr corrodes, or starts to dissolve, then HBr is an acid.
  4. With the addition of silver nitrate to the HBr, if a white cloudiness occurs and crystals form in the bottom of the test tube, then HBr is an acid.

C3000: Experiments 134-138


Download Student Worksheet & Exercises


Here’s what’s going on in this experiment:


KBr    +    NaHSO4 –>    HBr    +    KNaSO4


Potassium bromide and sodium hydrogen sulfate, when heated, produce hydrogen bromide and potassium sodium sulfate.


Cleanup: We are going to clean everything thoroughly after we finish the lab. After cleaning with soap and water, rinse thoroughly. Chemists use the rule of “three” in cleaning glassware and tools. After washing, chemists rinse out all visible soap and then rinse three times more.


Storage: Place cleaned tools and glassware in their respective storage places.


Disposal: Liquids can be washed down the drain. Solids are thrown in the trash.


[/am4show]


WARNING!! THIS EXPERIMENT IS PARTICULARLY DANGEROUS!! (No kidding.) This experiment is for advanced students.


We’ve created a video that shows you how to safely do this experiment, although if you’re nervous about doing this one, just watch the video and skip the actual experiment.


The gas you generate with this experiment is lethal in large doses, so you MUST do this experiment outdoors.  We’ll be making a tiny amount to show how the chemical reactions of chlorine and hydrogen work.


[am4show have=’p9;p52;’ guest_error=’Guest error message’ user_error=’User error message’ ]


Hydrochloric acid is a strong acid. It is highly corrosive, which means that this acid will destroy or irreversibly damage another substance it comes in contact with. Simple terms….it is pretty nasty, so take special care when working with or around it.


HCl is used in processing leather, cleaning products, and in the food industry. We are most familiar with HCl in the form of Gastric Acid. HCl is in gastric acid and is one of the main ingredients in our stomach to aid in digestion of our food. In our lab we will produce hydrogen chlorine gas and add water to turn change it into hydrochloric acid.


Materials:


  • Glass jar
  • 900 bend glass tubing
  • One-hole rubber stopper
  • Chemistry stand
  • Wire mesh
  • 2 Test tubes
  • Test tube clamp
  • Alcohol burner
  • Lighter
  • Tripod stand
  • Sodium hydrogen sulfate (MSDS) Sodium hydrogen sulfate is very toxic. Respect it, handle it carefully and responsibly. Do not take it for granted.
  • Salt
  • One-hole cork
  • Medicine dropper
  • Water
  • Solid rubber stopper

NOTE: Be very careful when handling the sodium hydrogen sulfate – it’s highly corrosive and dangerous when wet.  Handle this chemical only with gloves, and be sure to read over the MSDS before using.


Perform this experiment outdoors. If that is not a possibility, and you must do it inside, open doors and windows to provide lots of ventilation. Hydrogen chlorine gas inhalation can be fatal, but we are only producing a very small amount.


There are many steps in this lab, so go slow and steady. Read the lab over several times so you are sure what is going on and what is happening next.


When we shake the sodium hydrogen sulfate and the salt together in a stoppered test tube, we are trying to produce a heterogeneous mixture. Heterogeneous is a scientific word that means substance are mixed all together to be as one. A sample taken from one spot in the mixture should be the same as a sample taken from any other spot in the mixture.


At some point in this lab, we need to point the test tube containing the reaction slightly down. This is so the hydrogen chlorine gas can flow downhill. The gas is denser than air, so it will sink to the bottom of anything air filled…..like a room or a test tube.


Hydrogen chloride gas is poisonous – DO NOT INHALE!


When the medicine dropper / cork tool is placed in the water, water will be sucked up into the test tube. The water combines with the hydrogen chlorine gas to create hydrochloric acid.


A double replacement chemical reaction will take place in this experiment. A free hydrogen ion (+) and a free sodium ion (+) will be produced. Because their charges are alike, they cannot bond, but they can take each other’s place. The spots they each left are negatively charged after the hydrogen and sodium have departed. Opposites attract, and they reorganize into a double replacement reaction.


C3000: Experiment 112


Download Student Worksheet & Exercises


Here’s what’s going on in this experiment:


NaCl  +  NaHSO4 –>  HCl  +  Na2SO4


Salt is combined with sodium hydrogen sulfate and heated to produce hydrochloric acid and sodium sulfate


Cleanup: We are going to clean everything thoroughly after we finish the lab. After cleaning with soap and water, rinse thoroughly. Chemists use the rule of “three” in cleaning glassware and tools. After washing, chemists rinse out all visible soap and then rinse three times more.


Storage: Place cleaned tools and glassware in their respective storage places.


Disposal: Our HCl needs to be neutralized before disposal. Put a bit of baking soda into the test tube. The contents should bubble as the neutralization is taking place. After neutralization, the liquid is safe, and can be washed down the drain. Solids are thrown in the trash.


[/am4show]


In this unit, you will learn how to build your own home chemistry lab safely under the direction of professionals. We’ll show you how to do real chemistry experiments, provide chemical storage information, give guidelines on proper chemical disposal when you’re finished, highlight lab tips and tricks, and warn you about things to watch out for. This is real chemistry for real kids.


This video picks up where the intermediate chemistry video leaves off so you’ll want to be sure you have completed that one first. The C3000 contains three trays, the first of which is the C1000 (which is covered in the intermediate chemistry lesson). So if you’ve completed the first part and are ready for more, here we go!


[am4show have=’p8;p9;p25;p52;’ guest_error=’Guest error message’ user_error=’User error message’ ]


NOTE:For the Alcohol Burner Wick: Tape tightly around one end, making the end small and tapered. You can also put glue (white glue or rubber cement work great) into the fibers at one end. As the glue hardens, form the end into a smaller and tapered end. It will slide through easily, and cut the end off and your ready to go.


How do I use this information? You have two options, depending on your comfort level and ultimate educational goals. You can just watch the videos and talk about what’s going on with your child, or you can watch the videos and then perform the experiment with your child.


This unit includes the instructional videos for Chemistry, and is meant to be used in conjunction with the experiments in the Thames and Cosmos C1000 and/orC3000 chemistry lab kits.  The manual included in the C1000 and 3000 has complete safety information and many more experiments for you to complete after you finish this unit.


All experiments presented here at AT YOUR OWN RISK. You are fully responsible for your own safety and those around you. (No building nuclear reactors in your garage.)


To put it simply, don’t eat anything in your chemistry lab, keep children and pets away from your lab, lock up your chemicals safely, learn how to store your chemicals safely, and don’t create large quantities of anything explosive, corrosive, or toxic. Always wear safety equipment and do your experiments in a spot what has plenty of air for ventilation, water and a drain, and a phone.


In all seriousness, be safe, have fun, play with the kids, and if you run across anything that boggles the mind, let us know and we’ll try to help you out.


[/am4show]
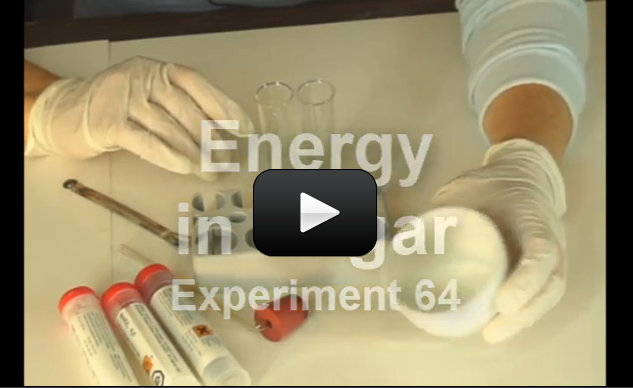

Always have a FIRE EXTINGUISHER and ADULT HELP handy when performing fire experiments. NO EXCEPTIONS.

This video will show you how to transform the color of your flames. For a campfire, simply sprinkle the solids into your flames (make sure they are ground into a fine powder first) and you’ll see a color change. DO NOT do this experiment inside your house – the fumes given off by the chemicals are not something you want in your home!


One of the tricks to fire safety is to limit your fuel. The three elements you need for a flame are: oxygen, spark, and fuel.  To extinguish your flames, you’ll have to either wait for the fuel to run out or smother the flames to cut off the oxygen. When you limit your fuel, you add an extra level of safety to your activities and a higher rate of success to your eyebrows.


Here’s what we’re going to do: first, make your spectrometer: you can make the simple spectrometer or the more-advanced calibrated spectrometer. Next, get your chemicals together and build your campfire. Finally, use your spectrometer to view your flames.


[am4show have=’p8;p9;p25;p52;p91;p101;’ guest_error=’Guest error message’ user_error=’User error message’ ]


Download Student Worksheet & Exercises


This experiment is at your own risk!  You MUST get an experienced adult to help you with this activity.

  • Boric Acid or placing a copper pipe directly in the fire will give you GREEN flames
  • Borax (sodium tetraborate) gives a YELLOW-GREEN flame
  • Epsom salts (magnesium sulfate) will give you WHITE-PURPLE flames
  • Table salt (sodium chloride) will give you YELLOW flames
  • Washing soda (sodium carbonate) will give you YELLOW-GREEN flames
  • Calcium Chloride (Ice Melt, Dri-Ez) will give an ORANGE flame (make sure it says ‘Calcium Chloride’ – there are a lot of other types of molecules used to melt ice!)
  • Potassium Chloride (Nu Salt) will give you RAINBOW flames
  • RED flames are made with strontium, which isn’t something you want kids to be playing with.

How to Tell Which Elements are Burning

Once you’ve got the hang of how to make colored flames, your next step is to create a spectroscope.  When you aim your nifty little device at the flames, you’ll be able to split the light into its spectra and see which elements are burning.  For example, if you were to view hydrogen burning with your spectroscope, you’d see the bottom appear in your spectrometer:


Notice how one fits into the other, like a puzzle.  When you put the two together, you’ve got the entire spectrum.


What’s the difference between the two? The upper picture (absorption spectrum of hydrogen) is what astronomers see when they use their spectrometers on distant stars when looking through the earth’s atmosphere (a cloud of gas particles). The lower picture (emission spectrum of hydrogen) is what you’d see if you were looking directly at the source itself.


Note – Do NOT use your spectrometer to look at the sun! When astronomers look at stars, they have computers look for them – they aren’t putting their eye on the end of a tube.


What about other elements?

Each element has it’s own special ‘signature’, unique as a fingerprint, it leaves behind when it burns. This is how we can tell what’s on fire in a campfire. For example, here’s what you’d see for the following elements:


Just get the feel for how the signature changes depending on what you’re looking at.  For example, a green campfire is going to look a lot different from a regular campfire, as you’re burning several elements in addition to just carbon. When you look at your campfire with your spectroscope, you’re going to see all the signatures at the same time.  Imagine superimposing all four sets of spectral lines above (carbon, neon, magnesium, and nitrogen) into one single spectrum… it’s going to look like a mess!  It takes a lot of hard work to untangle it and figure out which lines belong to which element.  Thankfully these days, computers are more than happy to chug away and figure most of it out for us.


Here’s the giant rainbow of absorption lines astronomers see when they point their instruments at the sun:


Do you see all the black lines? Those are called emission lines, and since astronomers have to look through a lot of atmosphere to view the sun, there’s a lot of the spectrum missing (shown by the black lines), especially corresponding to water vapor. The water absorbs certain wavelengths of light, which corresponds to the black lines.


[/am4show]
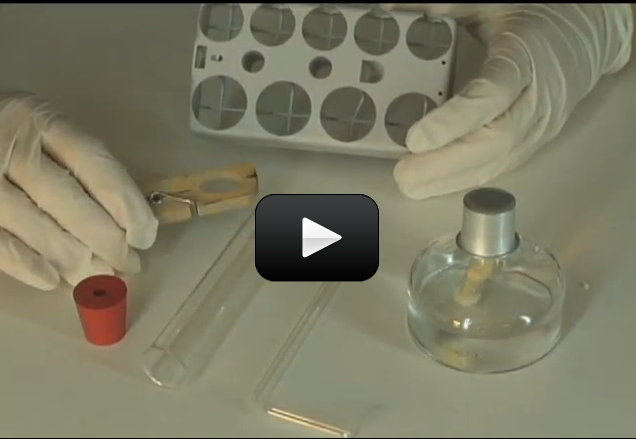

Ever play with a prism? When sunlight strikes the prism, it gets split into a rainbow of colors. Prisms un-mix the light into its different wavelengths (which you see as different colors). Diffraction gratings are tiny prisms stacked together.

When light passes through a diffraction grating, it splits (diffracts) the light into several beams traveling at different directions. If you’ve ever seen the ‘iridescence’ of a soap bubble, an insect shell, or on a pearl, you’ve seen nature’s diffraction gratings.

Scientist use these things to split incoming light so they can figure out what fuels a distant star is burning. When hydrogen burns, it gives off light, but not in all the colors of the rainbow, only very specific colors in red and blue. It’s like hydrogen’s own personal fingerprint, or light signature.

While this spectrometer isn't powerful enough to split starlight, it's perfect for using with the lights in your house, and even with an outdoor campfire.  Next time you're out on the town after dark, bring this with you to peek different types of lights - you'll be amazed how different they really are. You can use this spectrometer with your Colored Campfire Experiment also.

SPECIAL NOTE: This instrument is NOT for looking at the sun. Do NOT look directly at the sun. But you can point the tube at a sheet of paper that has the the sun’s reflected light on it.

Here's what you do:

[am4show have='p8;p9;p25;p52;p105;p91;p101;' guest_error='Guest error message' user_error='User error message' ]

Download Student Worksheet & Exercises

You will need:

  • cardboard box (ours is 10" x 5" x 5", but anything close to this will work fine)
  • linear diffraction grating (you can order one here)
  • 2 razor blades (with adult help)
  • masking tape
  • ruler
  • photocopy of a ruler (or sketch a line with 1 through 10 cm markings on it, about 4cm wide)

1. Using a small box, measure 4.5 cm from the edge of the box. Starting here, cut a hole for the double-razor slit that is 1.5 cm wide 3 cm long.

2. From the other edge (on the same side), cut a hole to hold your scale that is 11 cm wide and 4 cm tall.

3. Print out the scale and attach it to the edge of the box.

4. Very carefully line up the two razors, edge-to-edge to make a slit and secure into place with tape.

5. On the opposite side of the box, measure over 3 cm and cut a hole for the diffraction grating that is 4 cm wide and 3 cm tall.

5. Tape your diffraction grating over the hole.

Aim the razor slit at a light source such as a fluorescent light, neon sign, sunset, light bulb, computer screen, television, night light, candle, fireplace… any light source you can find. Put the diffraction grating up to your eye and look at the inner scale.  Move the spectrometer around until you can get the rainbow to be on the scale inside the box.

How to Calibrate the Spectrometer with the Scale Inside your box is a scale in centimeters. Point your slit to a fluorescent bulb, and you'll see three lines appear (a blue, a green, and a yellow-orange line). The lines you see in the fluorescent bulb are due to mercury superimposed on a rainbow continuous spectrum due to the coating. Each of the lines you see is due to a particular electron transition in the visible region of Hg (mercury). The blue line (435 nm), the green line (546 nm), and the yellow orange line (579 nm). (If you look at a sodium vapor street light you'll see a yellow line (actually 2 closely spaced) at 589 nm.)

Step 1. Line the razor slits along the length of the fluorescent tube to get the most intense lines. Move the box laterally (the lines will move due to parallax shift).

Step 2. Take scale readings at the extreme of the these movements and take the average for the scale reading. For instance, if the blue line averages to the 8.8 cm value, this corresponds to the 435 nm wavelength. Do this for the other 2 lines.

Step 3. On graph paper, plot the cm ( the ruler scale values) on the vertical axis and the wavelength (run this from 400-700 nm) on the horizontal axis. Draw the best straight lines thru the 3 points (4 lines if you use the Na (sodium) street lamp). You've just calibrated the spectrometer.

Step 4. Line the razor slits up with another light source.  Notice which lines appear and where they are on your scale.  Find the value on your graph paper. For example, if you see a line appear at 5.5 cm, use your finger to follow along to the 5.5 cm until you hit the best-fit line, and then read the corresponding value on the wavelength axis. You now have the wavelength for the line you've just seen!

Notes on Calibration and Construction: If you swap out different diffraction gratings, you will have to re-calibrate. If you make a new spectrometer, you will have to re-calibrate to the Hg (mercury) lines for each new spectrometer. If you do remake the box, use a scale that is translucent so you can see the numbers. If you use a clear plastic ruler, it may let in too much light from the outside making it difficult to read the emission line.

What other light sources work? Use your spectrometer to look at computer screens, laptops, night lights, neon lights, candles, campfires, fluorescent lights, incandescent lights, LEDs, stoplights, street lights, and any other light sources you can find. When you walk down town at night and look at various "neon" signs. Ne (neon) is a real burner! Do this with a friend who is willing to vouch for your sanity.

Question: What happens when you aim a laser through a diffraction grating? (See picture above - can you find the two dots on either side of the main later dot?)

[/am4show]
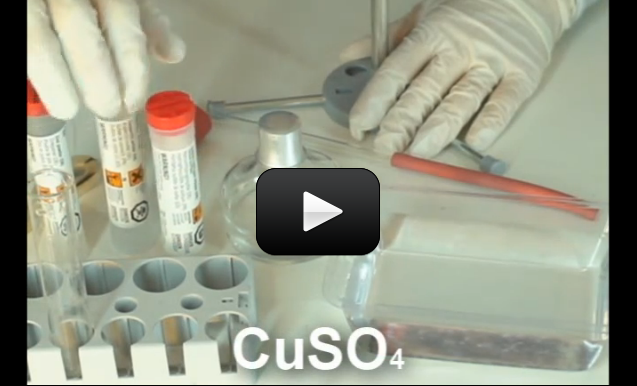

This experiment is for advanced students.


One of my best teaching tools for science developed from a brain freeze one afternoon in class. I went to the board to draw the chlorophyll wheel and drew a complete blank.


“Let’s say I forgot how to draw the wheel.” I turned to the class, marker in hand, and scanned the room. Puzzled faces, the blank faces I expected, but, what was that? A few smiles scattered about the room.


As I pulled out and some volunteered info, we got into that wheel. They also found that it was easier to know what to do next than to have me tell them to find it in their book and be prepared…I was coming back to them. Students frantically finding the wheel in their biology books so they were armed when I came to them.


It was a great experience, and my lectures were a lot more fun and interactive from then on.


[am4show have=’p9;p52;’ guest_error=’Guest error message’ user_error=’User error message’ ]


Next, I started designing labs that way. Pre-reading was suggested, but they never read for homework…everybody knows that. But they soon found out why they should start reading ahead.


They came in for their lab.


There were a lot of lab supplies out on the counter. I had put all the supplies they would need on the counter. In addition, I put an equal number of supplies out that had nothing to do with the experiment. A problem was written at the top of the board such as, “We need to extract chlorophyll from the leaves on the counter.” And that was it. No lab book, they were on their own.


I gave a short lecture to bait their brains into remembering something and turned them loose. It took a couple of weeks, but I gained so much with them. Many more were reading at home to prepare for the lab, because they didn’t want to sit around trying to figure things out from scratch. They already had an idea on how to do the lab when they came on lab day. If they did not finish in the class time allotted, it was too bad. They could make up the lab later, but most just took the bad grade.


Many more students were motivated beyond my wildest expectations. Many students that were working hard to stay on the bottom started to feel a little peer pressure to help out. Students enjoyed the discovery…..they enjoyed the labs. No more cookie cutter labs for us.


Perhaps some labs in your curriculum could be designed to work this way as a way to provide more advanced learning in the sciences?


[/am4show]
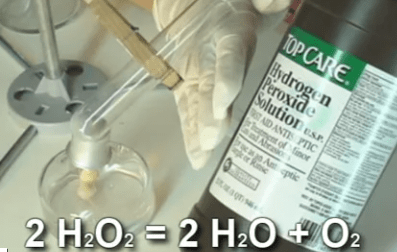

This experiment is just for advanced students. If you guessed that this has to do with electricity and chemistry, you’re right! But you might wonder how they work together. Back in 1800, William Nicholson and Johann Ritter were the first ones to split water into hydrogen and oxygen using electrolysis. (Soon afterward, Ritter went on to figure out electroplating.) They added energy in the form of an electric current into a cup of water and captured the bubbles forming into two separate cups, one for hydrogen and other for oxygen.

This experiment is not an easy one, so feel free to skip it if you need to. You don’t need to do this to get the concepts of this lesson but it’s such a neat and classical experiment (my students love it) so you can give it a try if you want to. The reason I like this is because what you are really doing in this experiment is ripping molecules apart and then later crashing them back together.

Have fun and please follow the directions carefully. This could be dangerous if you’re not careful. The image shown here is using graphite from two pencils sharpened on both ends, but the instructions below use wire.  Feel free to try both to see which types of electrodes provide the best results.

[am4show have='p8;p9;p11;p38;p92;p40;p76;p91;p58;' guest_error='Guest error message' user_error='User error message' ]
You will need:

  • 2 test tubes or thin glass or plastic something closed at one end. I do not recommend anything wider than a half inch in diameter.
  • 2 two wires, one needs to be copper, at least 12 inches long. Both wires need to have bare ends.
  • 1 cup
  • sodium sulfate OR salt
  • Water
  • One 9 volt battery
  • Long match or a long thin piece of wood (like a popsicle stick) and a match
  • Rubber bands
  • Masking tape

Download Student Worksheet & Exercises
1. Fill the cup with water.

2. Put a tablespoon of salt or sodium sulfate into the water and stir it up. (The salt allows the electricity to flow better through the water.)

2. Put one wire into the test tube and rubber band it to the test tube so that it won’t come out (see picture).

3. Use the masking tape to attach both wires to the battery. Make sure the wire that is in the test tube is connected to the negative (-) pole of the battery and that the other is connected to the positive (+) pole. Don’t let the bare parts of the different wires touch. They could get very hot if they do.

4. Fill the test tube to the brim with the salt water.

5. This is the tricky part. Put your finger over the test tube, turn it over and put the test tube, open side down, into the cup of water. (See picture.)

6. Now put the other wire into the water. Be careful not to let the bare parts of the wires touch.

7. You should see bubbles rising into the test tube. If you don’t see bubbles, check the other wire. If bubbles are coming from the other wire either switch the wires on the battery connections or put the wire that is bubbling into the test tube and remove the other. If you see no bubbles check the connections on the battery.

8. When the test tube is half full of gas (half empty of salt water depending on how you look at it) light the long match or the wooden stick. Then take the test tube out of the water and let the water drain out. Holding the test tube with the open end down, wait for five seconds and put the burning stick deep into the test tube (the flame will probably go out but that’s okay). You should hear an instant pop and see a flash of light. If you don’t, light the stick again and try it another time. For some reason, it rarely works the first time but usually does the second or third.

A water molecule, as you saw before, is two hydrogen atoms and one oxygen atom. The electricity encouraged the oxygen to react with the copper wire leaving the hydrogen atoms with no oxygen atom to hang onto. The bubbles you saw were caused by the newly released hydrogen atoms floating through the test tube in the form of hydrogen gas. Eventually that test tube was part way filled with nothing but pure hydrogen gas.

But how do you know which bubbles are which? You can tell the difference between the two by the way they ignite (don’t’ worry – you’re only making a tiny bit of each one, so this experiment is completely safe to do with a grown up).

It takes energy to split a water molecule. (On the flip side, when you combine oxygen and hydrogen together, it makes water and a puff of energy. That’s what a fuel cell does.) Back to splitting the water molecule - as the electricity zips through your wires, the water molecule breaks apart into smaller pieces: hydrogen ions (positively charged hydrogen) and oxygen ions (negatively charged oxygen). Remember that a battery has a plus and a minus charge to it, and that positive and negative attract each other.

So, the positive hydrogen ions zip over to the negative terminal and form tiny bubbles right on the wire. Same thing happens on the positive battery wire. After a bit of time, the ions form a larger gas bubble. If you stick a cup over each wire, you can capture the bubbles and when you’re ready, ignite each to verify which is which.

If the match burns brighter, the gas is oxygen. If you hear a POP!, the gas is hydrogen. Oxygen itself is not flammable, so you need a fuel in addition to the oxygen for a flame. In one case, the fuel is hydrogen, and hence you hear a pop as it ignites. In the other case, the fuel is the match itself, and the flame glows brighter with the addition of more oxygen.

When you put the match to it, the energy of the heat causes the hydrogen to react with the oxygen in the air and “POP”, hydrogen and oxygen combine to form what? That’s right, more water. You have destroyed and created water! (It’s a very small amount of water so you probably won’t see much change in the test tube.)

The chemical equations going on during this electrolysis process look like this:

A reduction reaction is happening at the negatively charged cathode. Electrons from the cathode are sticking to the hydrogen cations to form hydrogen gas:

2 H+(aq) + 2e- --> H2(g)

2 H2O(l) + 2e- --> H2(g) + 2 OH-(aq)

The oxidation reaction is occurring at the positively charged anode as oxygen is being generated:

2 H2O(l)  --> O2(g) + 4 H+(aq) + 4e-

4 OH-(aq) --> O2(g) + 2 H2O(l) + 4 e-

Overall reaction:

2 H2O(l)  --> 2 H2(g) + O2(g)

Note that this reaction creates twice the amount of hydrogen than oxygen molecules. If the temperature and pressure for both are the same, you can expect to get twice the volume of hydrogen to oxygen gas (This relationship between pressure, temperature, and volume is the Ideal Gas Law principle.)

This is the idea behind vehicles that run on sunlight and water.  They use a solar panel (instead of a 9V battery) to break apart the hydrogen and oxygen and store them in separate tanks, then run them both back together through a fuel cell, which captures the energy (released when the hydrogen and oxygen recombine into water) and turns the car's motor. Cool, isn't it?

Note: We're going to focus on Alternative Energy in Unit 12 and create all sorts of various energy sources including how to make your own solar battery, heat engine, solar & fuel cell vehicles (as described above), and more!

Exercises

  1. Why are bubbles forming?
  2. Did bubbles form at both wires, or only one? What kind of bubbles are they?
  3. What would happen if you did this experiment with plain water? Would it work? Why or why not?
  4. Which terminal (positive or negative) produced the hydrogen gas?
  5. Did the reaction create more hydrogen or more oxygen?

[/am4show]