You’ve got to know where your kids are headed in order to make sure they get there, even if it’s as simple as “learning to appreciate the world around you”. Supporting your child’s interest in science isn’t as expensive as you think, especially when you consider how much they will be earning with their science degree!
There are four engineering majors that make up over 2/3 of all engineering jobs in the US workforce, and if your kids are interested in one of these, their chances of getting hired and staying employed are much higher!
Do you know who your child views as a role model? Most folks don’t give a second thought to who their child is picking up information from, whether it’s a teacher, a textbook, or a babysitter. It’s our job as parents to understand both perspectives and guide your child.
The trouble with picking up a textbook to select your topic and doing a project listed is that they are usually finished projects – meaning that everyone knows not only the experiment but what’s going to happen. No scientist in their right mind would do a experiment if they knew the ending! You’ve got to take a different approach.
Imagine your teacher just strode into class and announced that it’s nearly time for the Science Fair, and projects are due next week. You scope out the room and find Brian Brainiac inventing a new addition to the International Space Station… Corey Comet discovering a new species of octopus… and Darlene Dazzler built a transporter. Your head begins to spin like hamster wheel as you try to hit on the Ultimate Science Project that would make Einstein gape with awe.
The truth is, science fair projects don’t have to be glitzy, glamorous, or even work quite right… they just have to be yours. And they need to be science experiments, not jazzed-up science reports masquerading as projects.
A science experiment is a simple question you want an answer to, such as:
• “Do later bedtimes really make you sleep better?”
• “Does eating high-sugar foods before bedtime make your dreams more wild?”
• “How many balloons will lift a kid into the air?”
• “What kind of grass needs to be mowed the least?”
A science report are questions that don’t require any real testing on your part – all you have to do is research to get the answer. Topics like: What is acid rain? What is the sun made of? How does a power plant work? How does the human body work? Is overeating bad for you? We’ve seen reports win local school science fairs, but they don’t make it into the big time regional or national competition. And they aren’t nearly as much fun as doing your own experiment.
Here is the basic recipe for science fair projects across the globe:
The Scientific Method:
1. Ask a question/Think of an idea
2. Do background research (if possible)
3. Construct hypothesis/Plan your experiment
4. Test with an experiment (This is the fun part, and you can do steps 4 & 5 together)
5. Gather, collect, and record your data and analyze the results
6. Does the hypothesis and results match? If not, go back to step 3.
7. Reach a conclusion
Tips and Tricks for Great Experiments:
1. Repeat good results. If you get the result you’re after, then do the experiment again to make sure you can duplicate what happened. And again. And again.
2. Remove yourself. After you’ve listened to music during a test, ask your friends to do the same thing. This checks to make sure this idea you’re testing can work for everyone.
3. End with recommendations. This is a personal favorite, not a requirement, but I always like to report on the things I would do if I were to continue experimenting. You can easily make three, four, or even five future experiments that you would consider doing that would further refine your conclusion by drawing on the results you found and the experience you gained.
If you can produce consistent results for not just yourself, but for the whole class, and not only that but plans for future areas of study and relate it back to why this was important enough to study in the first place, now you’ve got an experiment worthy of a blue ribbon.
These are the key areas you need to cover for an outstanding science fair project. Remember, you don’t need a Nobel-prize winning project to make headlines at a science fair, nor do you need to sell your car to afford the necessary equipment. Keep it simple, and stick to what you know you can handle so you can do it right and have a lot of fun along the way.
Gravity pulls on all things equally, and the rate things fall isn’t dependent on mass but rather on the shape of the object. Here’s an easy way to get your kids curious about physics and understand the fundamentals right from the start.
Go here if you want more free science classes from a real scientist: www.SuperchargedScience.com/ocean
You can download my free science guide from my website here: www.SuperchargedScience.com/homeschool
Go here to sign up for my next free online science class! www.SuperchargedScience.com/ocean
Even if you can’t make it to the class, sign up anyway so you’re on my list to get a personal invite to future classes in physics, chemistry, astronomy, earth science, biology and more!
Classes are for kids K-12, totally fun and your kids will have a blast learning real hands-on science!
Do some of my favorite, quick and easy science experiments you can do with your kids using highlighter, tumeric (in your spice drawer), and a UV light (use sunlight if you don’t have a UV flashlight). Watch the video for more details! (Sorry for the wobbly audio!! Ignore it and just focus on the message if you can make it out. It was originally a facebook live and it might be better sound quality at the original source on by facebook page.)
It’s easy to get lost in the array of science kits, chemistry experiment labs, and specialty project boxes you can buy nowadays. How can you use these as a tool to work your way towards your own personal educational goals for your child without getting lost in the shuffle?
If you want your kids to really learn hands-on science in a way that is sustainable and lasts for a lifetime, try my program for $1 for the first month. If you like it, stay with us. If not, just request a refund, and there’s nothing to send back – it’s easy and hassle free.
If you want your kids to learn real hands on science and get my 30-day $1 Trial for my online Homeschool Science Curriculum, go here: www.SuperchargedScience.com/easy
If you want your kids to do more chemistry experiments like this, go to: www.SuperchargedScience.com/easy
Today’s science class is how to do real CHEMISTRY! We’re going to be mixing up dinosaur toothpaste, doing experiments with catalysts, discovering the 5 states of matter, and building your own chemistry lab station as we cover chemical kinetics, phase shifts, the states of matter, atoms, molecules, elements, chemical reactions, and much more. We’re also going to turn liquid polymers into glowing putty so you can amaze your friends when it totally glows in the dark. AND make liquids freeze by heating them up (no kidding) using a scientific principle called supercooling, and more.
A lot of people just don’t want to bother with experiments when teaching science, they say it’s too messy, too expensive, takes too much time… but thankfully there is a better way! That’s why the way I teach science keep the magic of discovery without costing a fortune. Now you shouldn’t need to spend a fortune in order to learn science. I mean, the stuff on the shopping list for today was stuff you can get at the grocery store if you don’t already have it around the house.
Today’s class is FULL of experiments, because that’s what science IS. We’ll be talking for a bit and then doing an experiment, and then talk more and do more experiments throughout the class, so make sure you’ve got those materials out and ready. If you don’t have any materials, don’t worry. You can still participate. Just follow along so that you know exactly what to do when you do get your materials.
I’ll show you how to take simple compounds to create polymers and substances that kids can learn real hands-on science from. Because we don’t want kids mixing up random chemicals together haphazardly, it’s really important that with chemistry, you have a qualified instructor that shows them safe and best practices so they learn the right way, right form the start.
If you found this helpful and you find yourself thinking, “Hey, you know, I want this person to teach my kids science for me, and to create my curriculum and lessons…” then we can do just that.
Go to www.SuperchargedScience.com
When you get there, you’ll see a video that shows you the science curriculum that I developed and teach.
If you like what you see on that website, just fill in the form below the video and your kids can get started today doing real hands-on science with everyday materials.
Thanks for watching! Aurora Supercharged Science Homeschool Science Curriculum
P.S. By the way, if you know anybody that might find this content useful or helpful, please share it! Thanks so much!!
P.P.S. You can connect with me on: Facebook: https://facebook.com/superchargedsci YouTube: https://www.youtube.com/user/auroram42 Podcast: https://podcast.superchargedscience.com/ Instagram: http://instagram.com/auroralipper/ Twitter: https://twitter.com/aurora_lipper
How do you know what kind of microscope or telescope to get if you don't know how to work it? They're usually really expensive, so how can you be sure not to get ripped off?
Ask a real scientist who uses them both in the field and also when they teach kids!
A lot out there on the market is junk, and what's left is usually too hard and frustrating for kids to learn on. And that's the stuff most folks buy, because they either don't know how to tell a good instrument from junk or they can't afford a good instrument. Both of these usually frustrate the kids to the point of turning them off from science completely, the exact opposite of what well-meaning parents are trying to do.
So - let me show you what I use when I teach kids.
Microscope:
You’ll need to make sure it’s a compound microscope with a mechanical stage and three lenses on a rotating piece (4X, 10X and 40X) and a 10X at the eyepiece (the place you put your eye up to). Make sure it's metal, not plastic, and that the pieces are removeable and easy to clean. (Get one with a mirror (no electrical cord) if you plan to use it primarily outdoors in nature.)
I have used many microscopes with kids over the years, and the ones that were easiest to use and latest the longest were AmScopes and GreatScopes.
Telescope:
The kind of telescope most people want to get is not the one I’d get for my kids because it’s frustrating to use and there are so many cheap ones that it seems like a good deal... but it isn't.
What is BETTER than a Telescope? A pair of good BINOCULARS! Telescopes are useless if you don’t know where to point them, so instead, get a good set of binoculars (either 10x50 or 7x50), like this $35 pair from Celestron and a good star gazing app, like:
Stellarium (my favorite)
SkyView
Sky Safari
If you're ready for a telescope, I would go to your local astronomy star gazing event (called a "star party") and try out as many of these as you can, asking questions from your local astronomers. The kind of telescope you get will depend on what you want to look at, where you live, and what your "seeing conditions" usually are.
Beginner telescopes:
For kids and adults: 8” Dobsonian Telescope (easy to use, good all-around scope for deep sky objects, planets, moon)
For adults: (it’s going to depend what you want to look at)
8" Schmidt-Cassegrain (more compact, good all-around scope for planets, galaxies, nebulae, astrophotography)
90mm Refractor (harder to use, best for planets and moon observing)
The best piece of equipment, whether it's a microscope, telescope or binoculars, is the one you will actually use.
If you want your kids to do an award winning science fair project without headache or hassle, go to: www.SuperchargedScience.com/easy
You’ll find a video that shows you my homeschool online science program, and included is my complete set of eight science fair projects, including how to measure the speed of light with a chocolate bar, how to make a gauss accelerator, build solar vehicles, construct an underwater remote controlled vehicle, rockets, and so much more!
The trouble with picking up a textbook to select your topic and doing a project listed is that they are usually finished projects – meaning that everyone knows not only the experiment but what’s going to happen. No scientist in their right mind would do a experiment if they knew the ending! You’ve got to take a different approach.
Imagine your teacher just strode into class and announced that it’s nearly time for the Science Fair, and projects are due next week. You scope out the room and find Brian Brainiac inventing a new addition to the International Space Station… Corey Comet discovering a new species of octopus… and Darlene Dazzler built a transporter. Your head begins to spin like hamster wheel as you try to hit on the Ultimate Science Project that would make Einstein gape with awe.
The truth is, science fair projects don’t have to be glitzy, glamorous, or even work quite right… they just have to be yours. And they need to be science experiments, not jazzed-up science reports masquerading as projects.
A science experiment is a simple question you want an answer to, such as:
• “Do later bedtimes really make you sleep better?”
• “Does eating high-sugar foods before bedtime make your dreams more wild?”
• “How many balloons will lift a kid into the air?”
• “What kind of grass needs to be mowed the least?”
A science report are questions that don’t require any real testing on your part – all you have to do is research to get the answer. Topics like: What is acid rain? What is the sun made of? How does a power plant work? How does the human body work? Is overeating bad for you? We’ve seen reports win local school science fairs, but they don’t make it into the big time regional or national competition. And they aren’t nearly as much fun as doing your own experiment.
Here is the basic recipe for science fair projects across the globe:
The Scientific Method:
1. Ask a question/Think of an idea
2. Do background research (if possible)
3. Construct hypothesis/Plan your experiment
4. Test with an experiment (This is the fun part, and you can do steps 4 & 5 together)
5. Gather, collect, and record your data and analyze the results
6. Does the hypothesis and results match? If not, go back to step 3.
7. Reach a conclusion
Tips and Tricks for Great Experiments:
1. Repeat good results. If you get the result you’re after, then do the experiment again to make sure you can duplicate what happened. And again. And again.
2. Remove yourself. After you’ve listened to music during a test, ask your friends to do the same thing. This checks to make sure this idea you’re testing can work for everyone.
3. End with recommendations. This is a personal favorite, not a requirement, but I always like to report on the things I would do if I were to continue experimenting. You can easily make three, four, or even five future experiments that you would consider doing that would further refine your conclusion by drawing on the results you found and the experience you gained.
If you can produce consistent results for not just yourself, but for the whole class, and not only that but plans for future areas of study and relate it back to why this was important enough to study in the first place, now you’ve got an experiment worthy of a blue ribbon.
These are the key areas you need to cover for an outstanding science fair project. Remember, you don’t need a Nobel-prize winning project to make headlines at a science fair, nor do you need to sell your car to afford the necessary equipment. Keep it simple, and stick to what you know you can handle so you can do it right and have a lot of fun along the way.
If you want your kids to keep a rock-solid science journal this year, go to: https://www.superchargedscience.com/how-to-keep-a-science-journal/ to learn the three simple steps on how to do it!
Doing science experiments is fun, exciting, and full of big ideas!
Why bother with writing when you could be mixing up chemicals, blasting rockets, or spinning laser beams?
Because all your “great ideas” are worth nothing if you can’t tell others about what you’re doing.
Scientists write in journals to let others know the latest news with their experiments, announce their new discoveries, or to simply keep track of their progress.
Keeping a science journal doesn’t have to be flashy or fancy, just accurate. I’m going to show you the three easy steps to keeping a journal.
You don’t have to write a novel – just keep track of what you’re doing along with any questions that come up. It’s a lot easier to do a couple pages a day for a month rather than trying to pound out a hundred pages in a day! This is something you’re going to use throughout the program doing just a little bit at a time, At the end of the month or year, you’ll be surprised to see how much science you’ve covered!
Here’s a quick and easy way to handle the documentation issue minimal fuss and hassle. This method will even score you points toward your science curriculum requirements along with setting up a life-long habit, which will serve your child even greater in the future, which is really what we’re after.
If you want your kids to get inspired and excited about learning science from someone who’s passionate and experienced, go to: www.SuperchargedScience.com/easy
You can soar, zoom, fly, twirl, and gyrate with these amazing hands-on classes which investigate the world of flight. Your Homeschool students create flying contraptions from paper airplanes and hang gliders to multi-cell kites. This is a recording from a live class that I did with a big class of homeschoolers in my online classes.
If you want your kids to learn science from a real scientist, and you want them to be totally engaged and excited about what they are learning, but you don’t feel you have the time or the know-how to teach it, I can help.
Go to www.SuperchargedScience.com
When you get there, you’ll see a video that shows you the science curriculum that I developed and teach.
If you like what you see on that website, just fill in the form below the video and your kids can get started today doing real hands-on science today. Like right now.
If you want your kids to learn how to do real chemistry, go here: www.SuperchargedScience.com/ChemClass
A lot of folks get nervous around chemistry. You can’t always ‘see’ what’s going on (are there toxic gases generated from that reaction?), and many people have a certain level of fear around chemicals in general. Many of these fears came about by watching demonstrations where things went awry or hearing about accidents. This kind of exposure to chemistry are the ones forever burned in the memory of the audience, who are now fearful and have made the generalization that chemicals are dangerous and their effects are bad. In fact, every chemical is potentially harmful if not handled properly. That is why I’ve prepared a special set of chemistry experiments that include step-by-step demonstrations on how to properly handle the chemicals, use them in the experiment, and dispose of them when you’re finished.
Chemistry is predictable, just as dropping a ball from a height always hits the floor. Every time you add 1 teaspoon of baking soda to 1 cup of vinegar, you get the same reaction. It doesn’t simply stop working one time and explode the next. I’m going to walk you through every step of the way, and leave you to observe the reactions and write down what you notice. At first, it’s going to seem like a lot of disjointed ideas floating around, but after awhile, you’ll start to see patterns in the way chemicals interact with each other. It’s just like anything else that you try for the first time – you’re not very good when you’re new at it. Keep working at Chemistry and eventually it will click into place. And if there’s an experiment you don’t want to do, just skip it (or just watch the video).
You’ve got to know where your kids are headed in order to make sure they get there, even if it’s as simple as “learning to appreciate the world around you”.
Supporting your child’s interest in science isn’t as expensive as you think, especially when you consider how much they will be earning with their science degree!
Discover easy and simple science experiments you can do with your kids, even if you don’t have fancy equipment right at home! I’ll also share with you the most important things I do when teaching kids real hands-on science.
If you found this helpful and you find yourself thinking, “Hey, you know, I want this person to teach my kids science for me, and to create my curriculum and lessons…” then we can do just that.
Go to www.SuperchargedScience.com
When you get there, you’ll see a video that shows you the science curriculum that I developed and teach.
If you like what you see on that website, just fill in the form below the video and your kids can get started today doing real hands-on science with everyday materials.
Thanks for watching! Aurora Supercharged Science Homeschool Science Curriculum
P.S. By the way, if you know anybody that might find this content useful or helpful, please share it! Thanks so much!!
P.P.S. You can connect with me on: Facebook: https://facebook.com/superchargedsci YouTube: https://www.youtube.com/user/auroram42 Podcast: https://podcast.superchargedscience.com/ Instagram: http://instagram.com/auroralipper/ Twitter: https://twitter.com/aurora_lipper
Did you have a teacher that really had an impact on you? Remember the excitement? Or the thrill you felt when you taught something to someone else and they really got it?
First, let me thank you for your commitment to education – a value that is high enough for you that you are either homeschooling your child or considering it.
In this video, I am going to share with you the seven keys you need to unlocking your child’s fullest potential. Once you know, you can then focus on solutions. Perhaps you’ll find that you are already on track, and this may reaffirm that you are headed in the right direction.
If you found this helpful and you find yourself thinking, “Hey, you know, I want this person to teach my kids science for me, and to create my curriculum lessons for me…” then we can do just that.
Go to:
http://www.SuperchargedScience.com/easy
When you get there, you’ll see a video that shows you the science curriculum that I developed and teach.
If you like what you see on that website, just fill in the form below the video and your kids can get started today doing real hands-on science with everyday materials.
Thanks for watching!
Aurora
Supercharged Science
Homeschool Science Curriculum
P.S. By the way, if you know anybody that might find this content useful or helpful, please share it! Thanks so much!!
Ever wonder why some kids are so excited to learn new things and others drag their feet? I’ve spent a lot of time igniting kids interests and passion about science, and here are my best tips for you – I hope they are helpful!
If you found this helpful and you want help teaching your kids science, we can do that.
Go to www.SuperchargedScience.com
When you get there, you’ll see a video that shows you the science curriculum that I developed and teach.
If you like what you see on that website, just fill in the form below the video and your kids can get started today doing real hands-on science with everyday materials.
Did you have a teacher that really had an impact on you? Remember the excitement? Or the thrill you felt when you taught something to someone else and they really got it?
It’s that connection that we’re after between teacher and student. The great news is that as a homeschool parent, you have access to this opportunity constantly throughout the day. The bad news is – you have this option all day, every day. And it can feel overwhelming and exhausting to answer hundreds and hundreds of questions every day from a seemingly non-stop flow from your child.
Here’s a couple of ideas to keep in mind as you go through your day with your child to keep you from getting burned out. It’s simple and easy – and here it goes!
1. Teaching (both homeschoolers and educators) is not a job or a career, it’s a LIFESTYLE. At least, that’s the way I think about it in order to keep myself feeling fulfilled and happy. It’s my way of going through life, sharing it with my kids, and helping them understand the world. It’s showing your kids “how you DO life” and teaching them by modeling and experiences.
2. Teaching is a TEAM SPORT. You are not alone, and you do not have to reinvent that wheel. I get the most mileage by making effective use of the passion and expertise of others. This means I’m finding experiences for my kids that I couldn’t otherwise from surfing lessons to foreign language… I am constantly looking for new opportunities to enhance their world.
3. Focus on CONNECTION, not perfection. If I am more worried about if I am doing things right to the point of not being connected with my kids, I am focusing too much on myself and not trusting myself enough. It is more important to me to stay connected with my kids and understand their world, and trust my intuition to come up with ideas to try out.
4. Know that i’s going to be BUMPY, especially if you’re just starting out. How many times does a baby bump back to the ground when they first learn to walk? Lots! It’s ridiculous to have such high expectations and not allow yourself to enjoy the process of learning how to do something new, and this includes learning how to best educate your child. There’s no one-size-fits-all, so get to know your child and expect it to be a little bumpy along the way.
5. Get a MENTOR. Find someone that has already done what you want to do (homeschooling your child, etc…) and get them on your team as a guide and a resource. I mean, you wouldn’t learn how to play tennis with someone worse than you, right? Some goes for anything new you’re trying to figure out. When I am facing a new challenge with my kids, I thank them for it first, saying “I’ve never been here before – thanks for bringing this opportunity to me.” I find it really diffuses an otherwise intense moment.
If you found this helpful and you find yourself thinking, “Hey, you know, I want this person to teach my kids science for me, and to create my curriculum lessons for me…” then we can do just that.
When you get there, you’ll see a video that shows you the science curriculum that I developed and teach.
If you like what you see on that website, just fill in the form below the video and your kids can get started today doing real hands-on science with everyday materials.
This is a recording from a live online class in Electricity! In this original class, kids learned how to spark together electric motors, build homemade burglar alarms, wire up circuits and build robots! Kids in this class created their own whizzing, hopping, dancing, screeching, swimming, crawling, wheeling, robot by the end of this class to take home. Topics: electricity, magnetism, electrical charges, chassis construction, sensors.
If you want your kids to learn science from a real scientist, and you want them to be totally engaged and excited about what they are learning, but you don’t feel you have the time or the know-how to teach it, I can help.
Go to www.SuperchargedScience.com
When you get there, you’ll see a video that shows you the science curriculum that I developed and teach.
If you like what you see on that website, just fill in the form below the video and your kids can get started today doing real hands-on science today. Like right now.
Science is more than a classroom – it’s actually pretty difficult to define. Science is not about what we know, but rather about how we face what we don’t know. It’s not a textbook of principles, set of rules, or collection of factoids. It’s a process, a thing you do. Science is what happens when you ask questions, get back answers, and try to figure and make sense of it all.
Science gives you a way to ask questions and get back answers. There are many different ways to do this, the Scientific Method being only one of the ways of sorting and sifting through the information as you go along. We’ll be teaching about several different methods as we go along in our eScience program and highlighting which methods are most used by real scientists and engineers. (Guess what?? It’s not the scientific method!)
Believe it or not, there’s a straightforward method to doing science. You can’t just sit around and argue about how things work, but you actually have to do experiments and be able to measure your results. And other people have to get be able to get those same results on their own, too! While this sounds basic, it wasn’t until the 1500s when Tycho Brahe suggested that people do experiments to figure things out instead of discussing (and arguing) about the way things should be.
What we don’t know is just as important as what we do know. But how do we fit all of these things together? We can break science down into three basic questions:
What IS it? What is it made of, look like, act like? (This is where you describe it.)
How does it work? Why is it that way? What are the physics behind it?
How does it move through time? How did it start, develop through time, and end? What are the laws of physics that determine how things unfold in time?
Most things in science do not yet have answers to all three of these questions! Sometimes parts of learning is unlearning some of the things you think you know. Things that you’re pretty sure are right! Scientists have struggled with this for When you really think about it, a lot of science is actually unlearning. Science challenges you to rethink what you think you already know:
“It ain’t what you don’t know that gets you into trouble. It’s what you know for sure that just ain’t so.” ~Mark Twain
Sometimes unlearning the ‘absolute truths’ that have stood for thousands of years is part of the science process. Here are a few examples: the Sun revolving around the Earth; the ocean was bottomless; there’s no life in Antarctica; the Earth is flat… just to name a few.
So how do we establish what we do and don’t know? One of the most surprising things we’ve learned is that although the Universe is incredibly vast but still able to be understood.
“The most incomprehensible thing about the universe is that it is comprehensible.” ~Albert Einstein
When you first start out doing real science, it may seem awkward, disjointed, difficult, and even a bit weird. But that’s just because you’re new at it. People aren’t instant experts at new stuff, and you shouldn’t expect to master something in a heartbeat that is going to last you a lifetime.
“It will seem difficult at first, but everything is difficult at first.” ~Naomoto Musashi
Some of this will be new to you, unfamiliar, even counter-intuitive. But just stick with it and I guarantee that it will pay off. You’ll notice this when things start to ’snap’ into place as your child gains an amazing understanding of not only the ways of the universe, but how to think and question new stuff that comes their way.
If you found this article helpful and you find yourself thinking, “Hey, you know, I want this person to teach my kids science for me, and to create my curriculum lessons for me…” then we can do just that.
When you get there, you’ll see a video that shows you the science curriculum that I developed and teach.
If you like what you see on that website, just fill in the form below the video and your kids can get started today doing real hands-on science with everyday materials, igniting their curiosity and engaging in new and inspiring ways with their world.
Stargazing with your Homeschool Kids! All you need are kids, a dark sky, and this video! A pair of binoculars are helpful also!
If you found this helpful and you find yourself thinking, “Hey, you know, I want this person to teach my kids science for me, and to create my curriculum and lessons…” then we can do just that.
Go to www.SuperchargedScience.com
When you get there, you’ll see a video that shows you the science curriculum that I developed and teach.
If you like what you see on that website, just fill in the form below the video and your kids can get started today doing real hands-on science with everyday materials.
Thanks for watching! Aurora Supercharged Science Homeschool Science Curriculum
P.S. By the way, if you know anybody that might find this content useful or helpful, please share it! Thanks so much!!
P.P.S. You can connect with me on: Facebook: https://facebook.com/superchargedsci YouTube: https://www.youtube.com/user/auroram42 Podcast: https://podcast.superchargedscience.com/ Instagram: http://instagram.com/auroralipper/ Twitter: https://twitter.com/aurora_lipper
Science is more than a classroom – it’s actually pretty difficult to define. Science is not about what we know, but rather about how we face what we don’t know. It’s not a textbook of principles, set of rules, or collection of factoids. It’s a process, a thing you do. Science is what happens when you ask questions, get back answers, and try to figure and make sense of it all.
Science gives you a way to ask questions and get back answers. There are many different ways to do this, the Scientific Method being only one of the ways of sorting and sifting through the information as you go along. We’ll be teaching about several different methods as we go along in our eScience program and highlighting which methods are most used by real scientists and engineers. (Guess what?? It’s not the scientific method!)
Believe it or not, there’s a straightforward method to doing science. You can’t just sit around and argue about how things work, but you actually have to do experiments and be able to measure your results. And other people have to get be able to get those same results on their own, too! While this sounds basic, it wasn’t until the 1500s when Tycho Brahe suggested that people do experiments to figure things out instead of discussing (and arguing) about the way things should be.
What we don’t know is just as important as what we do know. But how do we fit all of these things together? We can break science down into three basic questions:
What IS it? What is it made of, look like, act like? (This is where you describe it.)
How does it work? Why is it that way? What are the physics behind it?
How does it move through time? How did it start, develop through time, and end? What are the laws of physics that determine how things unfold in time?
Most things in science do not yet have answers to all three of these questions! Sometimes parts of learning is unlearning some of the things you think you know. Things that you’re pretty sure are right! Scientists have struggled with this for When you really think about it, a lot of science is actually unlearning. Science challenges you to rethink what you think you already know:
“It ain’t what you don’t know that gets you into trouble. It’s what you know for sure that just ain’t so.” ~Mark Twain
Sometimes unlearning the ‘absolute truths’ that have stood for thousands of years is part of the science process. Here are a few examples: the Sun revolving around the Earth; the ocean was bottomless; there’s no life in Antarctica; the Earth is flat… just to name a few.
So how do we establish what we do and don’t know? One of the most surprising things we’ve learned is that although the Universe is incredibly vast but still able to be understood.
“The most incomprehensible thing about the universe is that it is comprehensible.”
~Albert Einstein
When you first start out doing real science, it may seem awkward, disjointed, difficult, and even a bit weird. But that’s just because you’re new at it. People aren’t instant experts at new stuff, and you shouldn’t expect to master something in a heartbeat that is going to last you a lifetime.
“It will seem difficult at first, but everything is difficult at first.”
~Naomoto Musashi
Some of this will be new to you, unfamiliar, even counter-intuitive. But just stick with it and I guarantee that it will pay off. You’ll notice this when things start to ’snap’ into place as your child gains an amazing understanding of not only the ways of the universe, but how to think and question new stuff that comes their way.
If you found this article helpful and you find yourself thinking, “Hey, you know, I want this person to teach my kids science for me, and to create my curriculum lessons for me…” then we can do just that.
When you get there, you’ll see a video that shows you the science curriculum that I developed and teach.
If you like what you see on that website, just fill in the form below the video and your kids can get started today doing real hands-on science with everyday materials, igniting their curiosity and engaging in new and inspiring ways with their world.
1. Be consistent – what you do today, do tomorrow, and the next day. It’s important to have a rhythm and routine for your kids. If you have a walk after lunch one day, continue this rhythm daily so it becomes part of your time together with your child. Kids thrive on consistency, from one-on-one special time to discipline to family rituals and traditions.
2. Slow and Stead Winds the Race! Be a turtle – don’t eat the whole enchilada at once! Spread out the things you want to do throughout the year so you have time in between for more inspired experiences and activities. Most people will take on too much and choke at the start. You want to show your kids how make a goal, map out steps to get there, and consistently work toward that goal every day.
3. Start Simple! Work toward your educational goals in stages. Babies learn to sit up, then wiggle and roll, then crawl, walk then run. There’s a definite purpose to the order and sequence! You want the same for your kids’ educational experience. Most people will start out with a huge amount to do, and then get overloaded and quit. You see this with diet and exercise, people starting up their own business, and in many other areas of life. This skill of starting slow and adding things incrementally will spread to multiple areas of your child’s life.
4. When you say YES to one thing, you say NO to something else. If I say YES to soccer activities, I am saying NO to having Saturday morning snuggles, hiking, and farmer’s markets that I love taking my kids to. Evaluate if the YES is going to fulfill your goals in ways that are positive and sustainable.
5. Minimize Distractions – Does your child’s study space allow them to focus and be inspired? Where do they gravitate to when they are doing their logical learning, their creative play, and their imaginative dreaming? Understand how the learning spaces you set up best support your child’s educational experiences.
6. Collaborate – don’t go it alone! There’s a vollage of folks out there that are passionate about their work and love kids! Those are the ones you need to connect and engage with!
If you found this helpful and you find yourself thinking, “Hey, you know, I want this person to teach my kids science for me, and to create my curriculum lessons for me…” then we can do just that.
Go to www.SuperchargedScience.com
When you get there, you’ll see a video that shows you the science curriculum that I developed and teach.
If you like what you see on that website, just fill in the form below the video and your kids can get started today doing real hands-on science with everyday materials.
Thanks for watching! Aurora Supercharged Science Homeschool Science Curriculum
P.S. By the way, if you know anybody that might find this content useful or helpful, please share it! Thanks so much!!
How can you make sure you can “Ring the Bell” at the end of your homeschooling year? Said another way, how can make sure you’ve covered your bases, made positive progress toward your educational goals, and had a great time with your kids during your school year?
Here’s my top tips for when you make your plans and do your day together…
1. Be consistent – what you do today, do tomorrow, and the next day. It’s important to have a rhythm and routine for your kids. If you have a walk after lunch one day, continue this rhythm daily so it becomes part of your time together with your child. Kids thrive on consistency, from one-on-one special time to discipline to family rituals and traditions.
2. Slow and Stead Winds the Race! Be a turtle – don’t eat the whole enchilada at once! Spread out the things you want to do throughout the year so you have time in between for more inspired experiences and activities. Most people will take on too much and choke at the start. You want to show your kids how make a goal, map out steps to get there, and consistently work toward that goal every day.
3. Start Simple! Work toward your educational goals in stages. Babies learn to sit up, then wiggle and roll, then crawl, walk then run. There’s a definite purpose to the order and sequence! You want the same for your kids’ educational experience. Most people will start out with a huge amount to do, and then get overloaded and quit. You see this with diet and exercise, people starting up their own business, and in many other areas of life. This skill of starting slow and adding things incrementally will spread to multiple areas of your child’s life.
4. When you say YES to one thing, you say NO to something else. If I say YES to soccer activities, I am saying NO to having Saturday morning snuggles, hiking, and farmer’s markets that I love taking my kids to. Evaluate if the YES is going to fulfill your goals in ways that are positive and sustainable.
5. Minimize Distractions – Does your child’s study space allow them to focus and be inspired? Where do they gravitate to when they are doing their logical learning, their creative play, and their imaginative dreaming? Understand how the learning spaces you set up best support your child’s educational experiences.
6. Collaborate – don’t go it alone! There’s a vollage of folks out there that are passionate about their work and love kids! Those are the ones you need to connect and engage with!
If you found this helpful and you find yourself thinking, “Hey, you know, I want this person to teach my kids science for me, and to create my curriculum lessons for me…” then we can do just that.
Go to www.SuperchargedScience.com
When you get there, you’ll see a video that shows you the science curriculum that I developed and teach.
If you like what you see on that website, just fill in the form below the video and your kids can get started today doing real hands-on science with everyday materials.
Thanks for watching!
Aurora
Supercharged Science
Homeschool Science Curriculum
P.S. By the way, if you know anybody that might find this content useful or helpful, please share it! Thanks so much!!
Tips Getting Started with Homeschooling for both newbies veterans! Here’s a couple of things to keep in mind when you start back up (or to give your year-round homeschool experience a boost of inspiration):
TIP #1: Kids love stories! “If you want your children to be intelligent, read them fairy tales. If you want them to be more intelligent, read them more fairy tales.” ~Albert Einstein Look for opportunities that you can share the world and your life lessons in the form of stores to help children connect and link up new ideas. It’s better if you can tell the stories (or read them aloud) rather than handing kids a book.
TIP #2: Get in nature! Most kids have huge smiles and rosy cheeks within a few minutes of active, outdoor play. And oddly enough, they’re also more calm and centered when they have regular outdoor exploration and creative time. Even if you have a tiny backyard or a park on the corner, get outside and enjoy nature in your own special way.
TIP#3: Art! Art! Art! I know this sounds strange coming from a science teacher, but art is just as important! Make sure your kids have enough unstructured moments when they can creatively use their imagination and develop their skills in expression.
TIP #4: Childhood is NOT a race! This is a hard one for parents to understand, especially in our technology-driven society where everyone has access to everything all the time. Remember that kids are MORE different on the inside as they appear to be on the outside. What that also means is that you have to be able to identify the specific needs of your children individually and meet them where they are at.
TIP #5: Be a Role Model! You can teach your kids how to play by sharing in their world. Show them how you do things so they can model you. They’re paying more attention to your actions than your words, so don’t bother talking nearly as much as DOING. (Babies learn to walk and talk without an instruction manual or formal curriculum lessons, right?)
The biggest problem we’re seeing today with kids is that they are hanging around other kids more than ever, with little to no adults around to model how they are to be. In fact, their role models are now coming from social media, the internet, and entertainment like movies and video games. Are the things you are exposing your child to – the things that your child is actively observing – the type of behavior and character you want to them to imitate?
TIP #6: Get Your Routine Down! Kids thrive on boundaries and routines. Meal times, bed times, snuggle and reading times, individual one-on-one times – these are so important to your child’s sense of security and well-being. They need to know what they can count on in order to feel safe exploring and discovering their world.
TIP #7: Get Help and Take Care of Yourself! I cringed today when someone called me “super mom”. That’s no how I see myself. Sure, I do a lot, but at the end of the day, I’m just a gal that loves her family. I see myself as most of the time giving, serving and helping others, both inside my family and in the community, and I also have regular down-time for taking care of myself so I have more to give and grow. I outsource what I can, ask for help, and streamline the rest (thank goodness for washing machines and dishwashers! How did our pioneering ancestors do it?!)
I hope this is helpful! Please add your own helpful tips in the comments below and share this post to help out the “homeschool parent next door”!
If you want your kids to learn science from a real scientist, and you want them to be totally engaged and excited about what they are learning, but you don’t feel you have the time or the know-how to teach it, I can help.
Go to www.SuperchargedScience.com
When you get there, you’ll see a video that shows you the science curriculum that I developed and teach.
If you like what you see on that website, just fill in the form below the video and your kids can get started today doing real hands-on science today. Like right now.
Tips Getting Started with Homeschooling for both newbies veterans! Here’s a couple of things to keep in mind when you start back up (or to give your year-round homeschool experience a boost of inspiration):
TIP #1: Kids love stories! “If you want your children to be intelligent, read them fairy tales. If you want them to be more intelligent, read them more fairy tales.” ~Albert Einstein Look for opportunities that you can share the world and your life lessons in the form of stores to help children connect and link up new ideas. It’s better if you can tell the stories (or read them aloud) rather than handing kids a book.
TIP #2: Get in nature! Most kids have huge smiles and rosy cheeks within a few minutes of active, outdoor play. And oddly enough, they’re also more calm and centered when they have regular outdoor exploration and creative time. Even if you have a tiny backyard or a park on the corner, get outside and enjoy nature in your own special way.
TIP#3: Art! Art! Art! I know this sounds strange coming from a science teacher, but art is just as important! Make sure your kids have enough unstructured moments when they can creatively use their imagination and develop their skills in expression.
TIP #4: Childhood is NOT a race! This is a hard one for parents to understand, especially in our technology-driven society where everyone has access to everything all the time. Remember that kids are MORE different on the inside as they appear to be on the outside. What that also means is that you have to be able to identify the specific needs of your children individually and meet them where they are at.
TIP #5: Be a Role Model! You can teach your kids how to play by sharing in their world. Show them how you do things so they can model you. They’re paying more attention to your actions than your words, so don’t bother talking nearly as much as DOING. (Babies learn to walk and talk without an instruction manual or formal curriculum lessons, right?)
The biggest problem we’re seeing today with kids is that they are hanging around other kids more than ever, with little to no adults around to model how they are to be. In fact, their role models are now coming from social media, the internet, and entertainment like movies and video games. Are the things you are exposing your child to – the things that your child is actively observing – the type of behavior and character you want to them to imitate?
TIP #6: Get Your Routine Down! Kids thrive on boundaries and routines. Meal times, bed times, snuggle and reading times, individual one-on-one times – these are so important to your child’s sense of security and well-being. They need to know what they can count on in order to feel safe exploring and discovering their world.
TIP #7: Get Help and Take Care of Yourself! I cringed today when someone called me “super mom”. That’s no how I see myself. Sure, I do a lot, but at the end of the day, I’m just a gal that loves her family. I see myself as most of the time giving, serving and helping others, both inside my family and in the community, and I also have regular down-time for taking care of myself so I have more to give and grow. I outsource what I can, ask for help, and streamline the rest (thank goodness for washing machines and dishwashers! How did our pioneering ancestors do it?!)
I hope this is helpful! Please add your own helpful tips in the comments below and share this post to help out the “homeschool parent next door”!
Did you set up your “real life learning” homeschool classroom yet? Here’s a couple of tips for getting the most out of your space – and it’s easy!
If you want your kids to learn science from a real scientist, and you want them to be totally engaged and excited about what they are learning, but you don’t feel you have the time or the know-how to teach it, I can help.
Go to www.SuperchargedScience.com
When you get there, you’ll see a video that shows you the science curriculum that I developed and teach.
If you like what you see on that website, just fill in the form below the video and your kids can get started today doing real hands-on science today. Like right now.
Learn how to mix up a supersaturated solid solution by using salt, sugar (yum!), or laundry soap (don’t eat that!!) to grow your own crystal farm!
If you found this helpful and you find yourself thinking, “Hey, you know, I want this person to teach my kids science for me, and to create my curriculum and lessons…” then we can do just that.
Go to www.SuperchargedScience.com
When you get there, you’ll see a video that shows you the science curriculum that I developed and teach.
If you like what you see on that website, just fill in the form below the video and your kids can get started today doing real hands-on science with everyday materials.
Thanks for watching! Aurora Supercharged Science Homeschool Science Curriculum
P.S. By the way, if you know anybody that might find this content useful or helpful, please share it! Thanks so much!!
P.P.S. You can connect with me on: Facebook: https://facebook.com/superchargedsci YouTube: https://www.youtube.com/user/auroram42 Podcast: https://podcast.superchargedscience.com/ Instagram: http://instagram.com/auroralipper/ Twitter: https://twitter.com/aurora_lipper
Discover the fascinating world of flight, space, and aeronautics by making your own flying machines from simple office supplies like paper, tape and paper clips! We’ll also talk about the most important topics you need to cover with your kids.
If you found this helpful and you find yourself thinking, “Hey, you know, I want this person to teach my kids science for me, and to create my curriculum and lessons…” then we can do just that.
Go to www.SuperchargedScience.com
When you get there, you’ll see a video that shows you the science curriculum that I developed and teach.
If you like what you see on that website, just fill in the form below the video and your kids can get started today doing real hands-on science with everyday materials.
Thanks for watching! Aurora Supercharged Science Homeschool Science Curriculum
P.S. By the way, if you know anybody that might find this content useful or helpful, please share it! Thanks so much!!
P.P.S. You can connect with me on: Facebook: https://facebook.com/superchargedsci YouTube: https://www.youtube.com/user/auroram42 Podcast: https://podcast.superchargedscience.com/ Instagram: http://instagram.com/auroralipper/ Twitter: https://twitter.com/aurora_lipper
This is a steel roller coaster and the only ride that inverts passengers in a loop. Although it reaches a top speed of 55mph, it feels a lot faster because it goes from 0 to 55 in under 4 seconds!
It’s the longest looping roller coaster in the world at over a mile long. It uses 5,000 hp linear induction motors instead of the traditional chain to launch the train up the first hill and also midway through the ride. It has safety sensors all over the track, and will automatically stop the train if a backpack or purse falls onto the track from a passenger (both of which has happened).
We’re going to build a height gauge and a roller coaster ourselves! That way, you can really tell how high that first drop is. Here’s the first video you need to watch to build the height gauge:
Once you’ve built a height gauge, it’s time to make your own roller coaster! Note, you don’t have to build the height gauge in order to make the roller coaster, it’s two separate projects.
Roller coasters are a prime example of energy transfer: You start at the top of a big hill at low speeds (high gravitational potential energy), then race down a slope at break-neck speed (potential transforming into kinetic) until you bottom out and enter a loop (highest kinetic energy, lowest potential energy). At the top of the loop, your speed slows (increasing your potential energy), but then you speed up again and you zoom near the bottom exit of the loop (increasing your kinetic energy), and you’re off again!
To make the roller coasters, you’ll need foam pipe insulation, which is sold by the six-foot increments at the hardware store. You’ll be slicing them in half lengthwise, so each piece makes twelve feet of track. It comes in all sizes, so bring your marbles when you select the size.
The ¾” size fits most marbles, but if you’re using ball bearings or shooter marbles, try those out at the store. (At the very least you’ll get smiles and interest from the hardware store sales people.)
Cut most of the track lengthwise (the hard way) with scissors. You’ll find it is already sliced on one side, so this makes your task easier. Leave a few pieces uncut to become “tunnels” for later roller coasters.
Here’s the video you need:
This last video I am including only because I am also a musician, and I thought it was really cool to see how Disney orchestrates (pun intended!) its special music into the ride:
If you want your kids to make more projects like this, and if you found this helpful and you find yourself thinking, “Hey, you know, I want this person to teach my kids science for me, and to create my curriculum lessons for me…” then we can do just that.
Go to www.SuperchargedScience.com
When you get there, you’ll see a video that shows you the science curriculum that I developed and teach.
If you like what you see on that website, just fill in the form below the video and your kids can get started today doing real hands-on science with everyday materials.
P.S. By the way, if you know anybody that might find this content useful or helpful, please share it! Thanks so much!!
P.P.S. You can connect with me on:
Facebook: https://facebook.com/superchargedsci
YouTube: https://www.youtube.com/user/auroram42
Podcast: https://podcast.superchargedscience.com/
Instagram: http://instagram.com/auroralipper/
Twitter: https://twitter.com/aurora_lipper
The Haunted Mansion at Disneyland uses a special effect in the Ballroom scene that is so perfect, it’s still one of the most impressive special effects you can see right in front of you. It was created in the 1960s, but the original effect was discovered in the 1800s, called Pepper’s Ghost.
The main idea is that there are two things you want the audience to see – one is a lit stage, and the other is the ghost that you want to appear and disappear on command.
Image Source: Comsol.com
If you’ve ever noticed how on a dark night, you can see through a window into someone’s dining room, but when the lights are out you can’t, you’ve noticed how windows can reflect light and also allow light to transmit through depending on where the light is coming from and where you’re standing.
For example, if you are standing outside on a dark night and inside the house is light, you can see in. If it’s light outside but dark inside, the window will reflect back and you’ll see your own reflection. This happens on the smooth surface of a lake.
We’re going to use this idea along with a piece of glass, some cardboard and a couple of other things from the hardware store to create a jaw-dropping Pepper’s Ghost illusion you can use to amaze your friends.
In the Haunted Mansion, the props in the room are real, like the organ, the table and chandelier. The ghosts are the reflected images of the actual ghosts that are under the track that the guests ride in. The Hitchhiking Ghosts at the end of the ride is also similar to Pepper’s Ghost, but this time the ghosts are behind the class and it’s the guests that are reflected in the mirror.
If you want your kids to make more projects like this, and if you found this helpful and you find yourself thinking, “Hey, you know, I want this person to teach my kids science for me, and to create my curriculum lessons for me…” then we can do just that.
Go to www.SuperchargedScience.com
When you get there, you’ll see a video that shows you the science curriculum that I developed and teach.
If you like what you see on that website, just fill in the form below the video and your kids can get started today doing real hands-on science with everyday materials.
P.S. By the way, if you know anybody that might find this content useful or helpful, please share it! Thanks so much!!
P.P.S. You can connect with me on:
Facebook: https://facebook.com/superchargedsci
YouTube: https://www.youtube.com/user/auroram42
Podcast: https://podcast.superchargedscience.com/
Instagram: http://instagram.com/auroralipper/
Twitter: https://twitter.com/aurora_lipper
The Mad Tea Party is in nearly all of Disney’s theme parks, and while you may think it’s a kiddie ride, the rides goes fast enough that it causes most adults to hesitate before stepping on. We’re going to build a couple of accelerometers you can take with you on your next trip to an amusement park. You can use them not only at amusement parks, but also in the car or your next spin in the office chair.
You only need a couple of simple hardware-store supplies, like water, string, a tube, hot glue gun, a bottle… and so forth. Watch the videos below for complete instructions and materials list.
You’ll also need the step-by-step videos that will walk you through each step so you can make it in less than 5 minutes. These will be able to measure the g-force, or the acceleration, of an object.
Once you’ve completed the cork accelerometer, you’ll want to make one that is calibrated so you know how many g’s you’re pulling in a turn:
Once you’ve built these, you can now experiment with them! Go for a ride in the car, an office chair, or just spin in circles to see how many g’s you can pull. Fun!
Back to the Mad Party Teacup Ride at Disneyland… No, the purple cup isn’t the fastest. The cups are actually on one of three small turntables that rotate clockwise, and each small turntable holds six cups. These three small turntables are all on one large turntable, which rotates counter-clockwise.
You can imagine a solar system with three planet, and each planet has six moons. Each planet has six moons orbiting all in one direction, and the three planets orbit a central sun in the opposite direction. You are on one of the moons in this ride – how does it feel?
If you want your kids to make more projects like this, and if you found this helpful and you find yourself thinking, “Hey, you know, I want this person to teach my kids science for me, and to create my curriculum lessons for me…” then we can do just that.
Go to www.SuperchargedScience.com
When you get there, you’ll see a video that shows you the science curriculum that I developed and teach.
If you like what you see on that website, just fill in the form below the video and your kids can get started today doing real hands-on science with everyday materials.
P.S. By the way, if you know anybody that might find this content useful or helpful, please share it! Thanks so much!!
P.P.S. You can connect with me on:
Facebook: https://facebook.com/superchargedsci
YouTube: https://www.youtube.com/user/auroram42
Podcast: https://podcast.superchargedscience.com/
Instagram: http://instagram.com/auroralipper/
Twitter: https://twitter.com/aurora_lipper
This ride is a 13-story elevator drop ride that first opened in 1994 in Florida, and it was such an impressive engineering achievement. It’s now in four different parks, including Anaheim Disneyland.
What’s really unique about this ride is that you can experience instances of microgravity, something that scientists use when they do their research and experiments on for future spaceflights.
Gravity is something that everything, whether natural or man-made, experiences on our planet, whether its distributing water down a mountain, positioning the growing of flowers, or influencing the way living organisms do their thing.
Scientists are wondering how microgravity will affect human health, especially when we start flying people around in space. By doing experiments in microgravity environments, they can better understand its effects on the human body and also on the spaceships themselves.
Before you get on this ride at Disneyland, you’ll want to attach a small ball to a bracelet on your wrist, with about a one-foot string length attached.
If you’re sitting down, you can also put a penny on your knee and see if it’s there when you’re done with the ride. Resisting the urge to jump when you start to freefall down is always the challenge, but if you do it right, the penny should hover in midair during your freefall.
Now, let’s talk more about the ride itself.
This ride is 200 feet tall and holds two separate elevator shafts 158 feet tall where the riders ride up and down during the 2 minute ride. There’s a large mechanical room above the elevator shafts that mouse the motors and mechanics.
There are also four elevator shafts located at the back of the ride that connect to the main drop shafts in the front. When you first get on the ride, you enter through one of the four back shafts, and it appears that the elevator car you’re in is the ride vehicle itself. But you’re actually getting on a vehicle that drives into the elevator shaft, like a car driving into an elevator.
The wheels lock to the elevator so the car itself doesn’t move, and then it’s transported horizontally to one of the two main elevator shafts to being the ride. They go to one of four show scenes first. The original version of this ride, Tower of Terror, used forced perspective to make the hallway scene with the ghosts appear much longer than actually it was (the walls, ceiling and floor that guests looked at all sloped inward to make the room appear longer). They also used the famous Pepper’s Ghost Illusion, which had a glass panel at a 45 degree diagonal so they could make images appear in the middle of the corridor, and it is same effect for the ballroom scene in the Haunted Mansion.
The starfield that guests saw was made of fiber optic cables behind a gauze cloth that appears opaque until it’s lit from behind, like a one-way mirror. When the set goes dark, the lights from the star field are lit up and also reflected in the glass so it appears 3D.
When the vehicle reaches the 5th floor (about halfway up the tower), the automated guided vehicles (“wire-guided” ADV’s) drive the passengers to the drop shafts similar to how a line-tracking robot follows a line drawn on the floor. There are wires on the ground that tell the vehicle where and how to go.
The radio signals from the main control room control the speed, direction and orientation of the vehicle so it takes the right path. If something goes wrong, or falls on one of the wires in the wire-guided path, or the system loses power, the vehicle is programmed to stop dead in its tracks. It’s actually one of the primary down-time causes of the ride since it is so sensitive.
The vehicle now drives the guests into an elevator in one of the two main drop shafts, locking itself to the elevator so it doesn’t move once in place within the elevator. The ride selects at random the drop sequence the guests get to experience. Each sequence includes a number of different drops and launches, with one full drop from a height of 130 feet (about 13 stories). The drop shafts actually have 17 feet above that isn’t used, and braking starts at 40 feet above the ground, so riders only get to fall for 90 feet.
The elevators in the ride is a traction elevator design by Otis Elevator Company, and is very similar to elevators that you’d find in high rise buildings. It uses two giant induction motors to accelerate riders up and down (max speed is 40 mph).
One motor sits on top of each shaft in the mechanical room, each one weighing 60 metric tons and generates 2000 hp. Each motor is connected to two cable drums in series and there’s four solenoid brakes per motor.
The elevator has a steel cables attached at the top and bottom, and also rails that connect it firmly to the sides of the shaft.
Even though a single cable is more than enough to support a fully loaded vehicle plus an automobile, two cables are used for safety.
The second drum is attached to a counterweight that weighs as much as the elevator loaded with an empty vehicle, so the motor only has to supply enough power to raise and lower the weight of just the passengers.
The cables also connect to the bottom of the elevator, so that the motors can pull the elevator down faster than it would normally go if it were freefalling. When the motor spins in one direction, the riders go up, and when the motor goes the other direction, the riders go down. It’s unique because one minute the riders are feeling weightless, and the next minute they are pushed into their seats.
One of the questions people have is “How safe is it?”
There are many safety features on this ride, but one of the most important is the solenoid braking system. There are friction pads that contact the motor shaft to bring it to a stop, much like the hand brakes on a bicycle rim.
The special deal with these brakes is that they are electrical, meaning that they release when they have an electrical signal, and tighten when there’s no signal, which means that their default position is locked on, keeping the elevator vehicle safe if anything goes wrong. In a power failure, the solenoids move the brakes to closed position, stopping the ride.
If these were to fail, there’s an emergency friction brake on the elevator rail. These clamp onto the elevator guide rails, so both the elevator vehicle and the counterweight both come to a stop (they each have their own emergency rail brakes).
If the cable were to snap and break, then there are other emergency brakes that would initiate, stopping the car. If everything failed, the car would create a cushion of pressurized air as it drops, slowing the vehicle before they hit the shock absorbers at the bottom of the shaft.
If you want your kids to make more projects like this, and if you found this helpful and you find yourself thinking, “Hey, you know, I want this person to teach my kids science for me, and to create my curriculum lessons for me…” then we can do just that.
Go to www.SuperchargedScience.com
When you get there, you’ll see a video that shows you the science curriculum that I developed and teach.
If you like what you see on that website, just fill in the form below the video and your kids can get started today doing real hands-on science with everyday materials.
Thanks for watching!
Aurora
Supercharged Science
Homeschool Science Curriculum
P.S. By the way, if you know anybody that might find this content useful or helpful, please share it! Thanks so much!!
P.P.S. You can connect with me on:
Facebook: https://facebook.com/superchargedsci
YouTube: https://www.youtube.com/user/auroram42
Podcast: https://podcast.superchargedscience.com/
Instagram: http://instagram.com/auroralipper/
Twitter: https://twitter.com/aurora_lipper
The original Submarine Voyage was loosely based on the USS Nautilus, the first nuclear powered submarine that voyaged to the North Pole in 1958. It was going to be closed permanently and dismantled, but after several attempts, the engineers at Disney (Imagineers) managed to re-theme it so it matched a successful movie in theaters.
The ride uses 8 submarines that have vertical rollers attached to each end and roll the sub through a guide channel. Originally powered by diesel engines, the electric battery units are charged at the loading dock by contact-free inductive coils, so there’s no fuel to spill. The subs don’t actually submerge, but you can peek out the windows for the entire ride. The bubbles are created to simulate diving.
One of the issues with the windows was fogging, so they now blow fresh dehumidified air across the glass so it stays clear. The helmsan uses a joystick to control the forward and back movement as well as speed. They guide the sub through a network of lasers that trigger a different scene for the show.
There’s a lot you can do with this type of ride. The first thing is to start by taking my Marine Biology class, which is free and you can sign up for it here:
If you love whales, aquariums, and underwater volcanoes, and you also love to watch everything that swims, crawls, or moves in the sea, then this is the area of science for you.
This online class is not only going to teach your kids about underwater life and the physical ocean elements, but also provide your kids with a hands-on experience of what it’s really like to be a marine biologist.
Kids learn how to study the creatures that live in the sea in their natural environment by building scientific instruments that marine biologists use in the field, including a live-cell microscope and underwater ROV robot in addition to exploring erupting chemical volcanoes, and so much more! Sign up at this link for this free class:
How do I set goals that really matter?? It’s not a wish or dream we’re talking about here…you’re mapping out a plan to educate your child.
Every great teacher has a lesson plan, even if it’s just in their head. Goals that matter are: Specific, Achievable, Measureable, Realistic (you’re going for improvement and progress, not perfection), and within a certain Time Frame (you can complete it within a reasonable amount of time).
If you found this helpful and you find yourself thinking, “Hey, you know, I want this person to teach my kids science for me, and to create my curriculum lessons for me…” then we can do just that.
When you get there, you’ll see a video that shows you the science curriculum that I developed and teach.
If you like what you see on that website, just fill in the form below the video and your kids can get started today doing real hands-on science with everyday materials.
I am going to pack my kids up in the car along with a few science gadgets (hint: string, rubber bouncy ball, water bottle, tube with food coloring, and fluorescent fingernail polish) and take a science road trip to Disneyland, and you’re invited!
Why bother with writing when you could be mixing up chemicals, blasting rockets, or spinning laser beams? Doing science experiments is fun, exciting, and full of big ideas! Because all your “great ideas” are worth nothing if you can’t tell others about what you’re doing.
Scientists write in journals to let others know the latest news with their experiments, announce their new discoveries, or to simply keep track of their progress. Keeping a science journal doesn’t have to be flashy or fancy, just accurate. I’m going to show you the three easy steps to keeping a journal.
If you found this helpful and you want to check out the entire article, go to:
When you get there, you’ll see a video that shows you the science curriculum that I developed and teach.
If you like what you see on that website, just fill in the form below the video and your kids can get started today doing real hands-on science with everyday materials.
I’ll show you how to take regular dish soap, rubbing alcohol, and fruit from the fridge to visibly be able to see DNA in shimmery, ghostly thread-like strands!
If you found this helpful and you find yourself thinking, “Hey, you know, I want this person to teach my kids science for me, and to create my curriculum and lessons…” then we can do just that.
Go to www.SuperchargedScience.com
When you get there, you’ll see a video that shows you the science curriculum that I developed and teach.
If you like what you see on that website, just fill in the form below the video and your kids can get started today doing real hands-on science with everyday materials.
Thanks for watching! Aurora Supercharged Science Homeschool Science Curriculum
P.S. By the way, if you know anybody that might find this content useful or helpful, please share it! Thanks so much!!
P.P.S. You can connect with me on: Facebook: https://facebook.com/superchargedsci YouTube: https://www.youtube.com/user/auroram42 Podcast: https://podcast.superchargedscience.com/ Instagram: http://instagram.com/auroralipper/ Twitter: https://twitter.com/aurora_lipper
Most people have a blank stare when I ask them what their educational goals are for their child. It’s not that they don’t have them, it’s that they haven’t formally figured out where they are headed, so the chances of reaching those goals in their head are small.
You’ll first want to set your educational goals/intentions for your kids. This will help you figure out how you’ll spend your time when you homeschool and also help you figure out the best homeschool program for your family.
The goals we usually hear about for kids are something along the lines of “I want my kids to love learning” or “I want my kids to be interested in science’ or “I want to expose my kids to different science areas”. Depending on how you answer this first question, you can pick the homeschool program that will best fit your kids and your goals.
In this video, we’ll outline three simple steps – results, purpose, and actions. Let’s go!
If you found this helpful and you find yourself thinking, “Hey, you know, I want this person to teach my kids science for me, and to create my curriculum lessons for me…” then we can do just that.
Go to www.SuperchargedScience.com
When you get there, you’ll see a video that shows you the science curriculum that I developed and teach.
If you like what you see on that website, just fill in the form below the video and your kids can get started today doing real hands-on science with everyday materials.
Most people have a blank stare when I ask them what their educational goals are for their child. It’s not that they don’t have them, it’s that they haven’t formally figured out where they are headed, so the chances of reaching those goals in their head are small.
You’ll first want to set your educational goals/intentions for your kids. This will help you figure out how you’ll spend your time when you homeschool and also help you figure out the best homeschool program for your family.
The goals we usually hear about for kids are something along the lines of “I want my kids to love learning” or “I want my kids to be interested in science’ or “I want to expose my kids to different science areas”. Depending on how you answer this first question, you can pick the homeschool program that will best fit your kids and your goals.
In this video, we’ll outline three simple steps – results, purpose, and actions.
If you want your kids to make more projects like this, and if you found this helpful and you find yourself thinking, “Hey, you know, I want this person to teach my kids science for me, and to create my curriculum lessons for me…” then we can do just that.
Go to www.SuperchargedScience.com
When you get there, you’ll see a video that shows you the science curriculum that I developed and teach.
If you like what you see on that website, just fill in the form below the video and your kids can get started today doing real hands-on science with everyday materials.
By the way, if you know anybody that might find this content useful or helpful, please share it! Thanks so much!!
What IS a homeschool curriculum REALLY? Here are a couple of things to keep in mind as you work through your homeschool curriculum with your child. Watch the video for more details! If you found this helpful and you find yourself thinking, “Hey, you know, I want this person to teach my kids science for me, and to create my curriculum lessons for me…” then we can do just that.
Go to www.SuperchargedScience.com
When you get there, you’ll see a video that shows you the science curriculum that I developed and teach.
If you like what you see on that website, just fill in the form below the video and your kids can get started today doing real hands-on science with everyday materials.
I am going to share with you the three tings you need to do in order to teach science in a way that really works, whether you’re new to homeschooling or just gearing up for lessons this academic year. If you want me to teach your kids hands-on science, go to www.SuperchargedScience.com
If you found this helpful and you find yourself thinking, “Hey, you know, I want this person to teach my kids science for me, and to create my curriculum and lessons…” then we can do just that.
Go to www.SuperchargedScience.com
When you get there, you’ll see a video that shows you the science curriculum that I developed and teach.
If you like what you see on that website, just fill in the form below the video and your kids can get started today doing real hands-on science with everyday materials.
Thanks for watching!
Aurora
Supercharged Science
Homeschool Science Curriculum
P.S. By the way, if you know anybody that might find this content useful or helpful, please share it! Thanks so much!!
P.P.S. You can connect with me on:
Facebook: https://facebook.com/superchargedsci
YouTube: https://www.youtube.com/user/auroram42
Podcast: https://podcast.superchargedscience.com/
Instagram: http://instagram.com/auroralipper/
Twitter: https://twitter.com/aurora_lipper
Want to join (or create) your own Robotics Team? Now you can!
My kids have participated in both of these (links below) and their team has won the World Championship three times!
My two oldest boys, Ben and Joseph, are too old to participate in VEX (it’s for kids up through 8th grade, and they are in high school now), however they are working on helping new teams get going so they have a chance at these competitions.
Now, if you want to start a team or participate in one in your home town:
This is the robotics program you want to get into if you have elementary and junior high school kids:
VEX IQ Robotics (it’s the least expensive to start out with, and the parts are really similar to LEGOs so kids can really get started without getting lost in the learning curve):
The team my kids were on (973 Greybots) were the “underdogs”, and now they have three World Championship wins under their belt! (2011, 2017, 2019) You can learn more about FRC here:
Do you know who your child views as a role model? Most folks don’t give a second thought to who their child is picking up information from, whether it’s a teacher, a textbook, or a babysitter. It’s our job as parents to understand both perspectives and guide your child.
If you found this helpful and you find yourself thinking, “Hey, you know, I want this person to teach my kids science for me, and to create my curriculum and lessons…” then we can do just that.
Go to www.SuperchargedScience.com
When you get there, you’ll see a video that shows you the science curriculum that I developed and teach.
If you like what you see on that website, just fill in the form below the video and your kids can get started today doing real hands-on science with everyday materials.
Thanks for watching! Aurora Supercharged Science Homeschool Science Curriculum
P.S. By the way, if you know anybody that might find this content useful or helpful, please share it! Thanks so much!!
P.P.S. You can connect with me on: Facebook: https://facebook.com/superchargedsci YouTube: https://www.youtube.com/user/auroram42 Podcast: https://podcast.superchargedscience.com/ Instagram: http://instagram.com/auroralipper/ Twitter: https://twitter.com/aurora_lipper
Kids who have a solid science and technology background are better equipped to go to college, and will have many more choices once they get out into the real world.
Learning science isn’t just a matter of memorizing facts and theories. On the contrary, it’s developing a deep curiosity about the world around us, AND having a set of tools that lets kids explore that curiosity to answer their questions.
Teaching science in this kind of way isn’t just a matter of putting together a textbook with a few science experiments and kits.
Science education is a three-step process (and I mean teaching science in a way that your kids will really understand and remember). Here are the steps:
1. Get kids genuinely interested and excited about a topic.
2. Give them hands-on activities and experiments to make the topic meaningful.
3. Teach the supporting academics and theory.
Most science books and programs just focus on the third step and may throw in some experiments as an afterthought. This just isn’t how kids learn.
There is a better way. When you provide your kids with these three keys (in order), you can give your kids the kind of science education that not only excites them, but that they remember for many years to come.
Don’t let this happen to you… you buy science books that were never really used and now your kids are filling out college applications and realizing they’re missing a piece of their education—a REALLY big piece. Now that’s a setback.
So what do you do?
First, don’t worry. It’s not something that takes years and years to do. It just takes commitment.
What if you don’t have time? What I’m about to describe can take a bit of time as a parent, but it doesn’t have to. There is a way to shortcut the process and get the same results! But I’ll tell you more about that later.
Putting It Into Action
Step one: Get kids genuinely interested and excited about a topic. Start by deciding what topic you want your kids to learn. Then, you’re going to get them really interested in it. For example, suppose I want my 10-year old son to learn about aerodynamics. I’ll arrange for him to go up in a small plane with a friend who is a pilot. This is the kind of experience that will really excite him.
Step two: Give them hands-on activities and experiments to make the topic meaningful. This is where I take that excitement and let him explore it. I have him ask my friend for other chances to go flying. I’ll also have my friend show him how he plans for a flight. My son will learn about navigation, figuring out how much fuel is needed for the flight, how the weight the plane carries affects the aerodynamics of it, and so much more.
I’ll use pilot training videos to help us figure this out (short of a live demo, video is incredibly powerful for learning). My son is incredibly excited at this point about anything that has to do with airplanes and flying. He’s sure he wants to be a pilot someday and is already wanting flying lessons (he’s only 10 now).
Step three: Teach the supporting academics and theory. Now it’s time to introduce academics. Honestly, I have my pick of so many topics, because flying includes so many different fields. I mean he’s using angles and math in flight planning, mechanics and energy in how the engine works, electricity in all the equipment on board the plane, and of course, aerodynamics in keeping the plane in the air (to name just a few). I’m going to use this as the foundation to teach the academic side of all the topics that are appropriate.
We start with aerodynamics. He learns about lift and drag, makes his own balsa-wood gliders and experiments by changing different parts. He calculates how big the wings need to be to carry more weight and then tries his model with bigger wings. (By the way, I got a video on model planes so I could understand this well enough to work with him on it). Then we move on to the geometry used in navigation. Instead of drawing angles on a blank sheet of paper, our workspace is made of airplane maps. We’re actually planning part of the next flight my son and my pilot buddy will take. Suddenly angles are a lot more interesting. In fact, it turns out that we need a bit of trigonometry to figure out some things. Of course, a 10-year old can’t do trigonometry, right? Wrong! He has no idea that it’s usually for high school and learns about cosines and tangents.
Throughout this, I’m giving him chances to get together with my pilot friend, share what he’s learned, and even use it on real flights. How cool is that to a kid?! You get the idea. The key is to focus on building interest and excitement first, then the academics are easy to get a kid to learn. Try starting with the academics and…well, we’ve all had the experience of trying to get kids do something they don’t really want to do.
The Shortcut
Okay, so this might sound like it’s time-intensive. If you’re thinking “I just don’t have the time to do this!” or maybe “I just don’t understand science well enough myself to teach it to my kid.” If this is you, you’re not alone.
The good news is, you don’t have to. The shortcut is to find someone who already specializes in the area you want your kids to learn about and expose them to the excitement that persons gets from the field. Then, instead of you being the one to take them through the hands-on part and the academics, use a solid video-based homeschool science program or curriculum (live videos, not cartoons). This will provide them with both the hands-on experiments and the academic background they need. If you use a program that is self-guided (that is, it guides your kids through it step-by-step), you don’t need to be involved unless you want to be.
If you found this helpful and you find yourself thinking, “Hey, you know, I want this person to teach my kids science for me, and to create my curriculum lessons for me…” then we can do just that.
When you get there, you’ll see a video that shows you the science curriculum that I developed and teach. If you like what you see on that website, just fill in the form below the video and your kids can get started today doing real hands-on science with everyday materials.
Aurora
P.S. By the way, if you know anybody that might find this content useful or helpful, please share it! Thanks so much!!
If your kids are interested in magic shows and doing (safe) experiments in thermochemistry, this is one you can do right along with them. PLEASE USE GOOD JUDGEMENT AND DO ALL FIRE EXPERIMENTS WITH AN ADULT.
If you found this helpful and you find yourself thinking, “Hey, you know, I want this person to teach my kids science for me, and to create my curriculum and lessons…” then we can do just that.
Go to www.SuperchargedScience.com
When you get there, you’ll see a video that shows you the science curriculum that I developed and teach.
If you like what you see on that website, just fill in the form below the video and your kids can get started today doing real hands-on science with everyday materials.
Thanks for watching! Aurora Supercharged Science Homeschool Science Curriculum
P.S. By the way, if you know anybody that might find this content useful or helpful, please share it! Thanks so much!!
P.P.S. You can connect with me on: Facebook: https://facebook.com/superchargedsci YouTube: https://www.youtube.com/user/auroram42 Podcast: https://podcast.superchargedscience.com/ Instagram: http://instagram.com/auroralipper/ Twitter: https://twitter.com/aurora_lipper
I am going to share with you the top five things that you’ll need to consider before you start homeschooling, whether you’re new to homeschooling, or just gearing up for lessons this academic year. If you want me to teach your kids hands-on science, go towww.SuperchargedScience.com
If you found this helpful and you find yourself thinking, “Hey, you know, I want this person to teach my kids science for me, and to create my curriculum and lessons…” then we can do just that.
Go to www.SuperchargedScience.com
When you get there, you’ll see a video that shows you the science curriculum that I developed and teach.
If you like what you see on that website, just fill in the form below the video and your kids can get started today doing real hands-on science with everyday materials.
Thanks for watching! Aurora Supercharged Science Homeschool Science Curriculum
P.S. By the way, if you know anybody that might find this content useful or helpful, please share it! Thanks so much!!
P.P.S. You can connect with me on: Facebook: https://facebook.com/superchargedsci YouTube: https://www.youtube.com/user/auroram42 Podcast: https://podcast.superchargedscience.com/ Instagram: http://instagram.com/auroralipper/ Twitter: https://twitter.com/aurora_lipper
Good morning from the Sierra Nevadas! I was really curious about all the different kinds of pine trees I saw as we went through the Sierras, and I tried to find a good way to tell one from the other, but it was impossible with the guidebooks I found. Then I found this app…
If you found this helpful and you find yourself thinking, “Hey, you know, I want this person to teach my kids science for me, and to create my curriculum and lessons…” then we can do just that.
Go to www.SuperchargedScience.com
When you get there, you’ll see a video that shows you the science curriculum that I developed and teach.
If you like what you see on that website, just fill in the form below the video and your kids can get started today doing real hands-on science with everyday materials.
Thanks for watching! Aurora Supercharged Science Homeschool Science Curriculum
P.S. By the way, if you know anybody that might find this content useful or helpful, please share it! Thanks so much!!
P.P.S. You can connect with me on: Facebook: https://facebook.com/superchargedsci YouTube: https://www.youtube.com/user/auroram42 Podcast: https://podcast.superchargedscience.com/ Instagram: http://instagram.com/auroralipper/ Twitter: https://twitter.com/aurora_lipper
Have you noticed that some curriculum seems to really work with your child and others don’t? The secret is in finding one that is in alignment with your child’s values – what they feel is most important in the world. This doesn’t mean giving them free reign to do whatever they want, but rather gives you guidance about what style of learning program works best for them to really “get it”. This podcast will outline the important things to keep in mind when picking a curriculum from your child’s perspective.
Extraordinary Homeschool Science Lessons by Focusing on Wonder, Discover & Imagination
FINALLY I have a podcast! I’ve been meaning to for a long time and (check this out)… I have the first 30 episodes already recorded and ready to go. I just needed time and space to put everything together into a format that would work for everyone. Whew! It’s even on Spotify, so if you don’t have the app for PodBean on your phone, just access it through a web browser. It’s fun, free, and full of interesting ideas for you to share with your kids. Suggestions for topics are welcome!
After putting together this video, it is so clear what makes some kids successful when it and why others really struggle. Watch the video for more details!
If you want your kids to make more projects like this, and if you found this helpful and you find yourself thinking, “Hey, you know, I want this person to teach my kids science for me, and to create my curriculum lessons for me…” then we can do just that.
Go to www.SuperchargedScience.com
When you get there, you’ll see a video that shows you the science curriculum that I developed and teach.
If you like what you see on that website, just fill in the form below the video and your kids can get started today doing real hands-on science with everyday materials.
Thanks for watching!
Aurora
Supercharged Science
Homeschool Science Curriculum
P.S. By the way, if you know anybody that might find this content useful or helpful, please share it! Thanks so much!!
This is my personal reading list for my own kids. These are all the books we’ve read up through about 6th grade, and we’ve read them aloud and with our kids.
When I was growing up, I was a very avid reader… like 1-2 books per day. At 200-400 pages each, you can image how many books I read!
What I didn’t realize is how much of my character and values were shaped with those books!
I did not have strong role models within my family growing up, so I found my role models in my books. I spend a lot of time with the characters in the stories and biographies I read, and I realize today how much of who I am was shaped by specific titles.
As a parent, I realize that this can be really useful in teaching strong values and life lessons to my kids. Sadly most books published today are pure “eye candy”, meaning that they are like sugar for the body – empty calories that do not contribute to what the body needs.
It’s so easy to publish a book today compared to 50 or 100 years ago, so it’s no wonder the market is flooded with books! It can be hard to tell the good from the junk.
I want more for my kids, and so I have spend a lot of time and energy over the years cultivating a list of books that I think are the important for them to learn from.
So here’s my reading list – I have more titles now that they are older, but these are the ones that I am really excited about sharing with you.
Also, I didn’t just hand them the book. We would read them *together*, which also means I taught them not only how to decide if a book is good for them to read (there’s a whole art in learning how to choose which book to spend your time on), but also how you read a book.
It surprised them when they learned that you don’t have to read every single word, you don’t have to read it all at the same pace, and you don’t even have to like the ending. In fact, most authors of decent books have over a dozen different endings they come up with before deciding on the one that is to be published int he book, so we make it a game to figure out what all the possibilities are.
The older ones are now starting to learn how to see the author in what they read, that invisible connection that binds reader and author in a woven tapestry of words.
So here’s my reading list – I do hope you enjoy it!
Homeschooling is fun, exciting, fulfilling, and downright hard. There’s no one-size-fits-all, no magic formula that will work with all kids. And if you’re new to homeschooling, you’ve also got overwhelm added in there too! I’ve put together the ideas from others who have traveled this road before, and I wanted to share these with you in the format of a workbook.
1. Your first step is to find a quiet place. Do this now. If this isn’t possible now, wait until it is and then go through this workbook. Put this workbook where you’ll see it when you have 10 minutes to yourself to relax and be in resourceful state.
2. Go get a pencil.
3. Do you enjoy coffee? Tea? Flavored water? Go get some.
This is a “sit by yourself with your favorite tea/coffee” type of moment that will save you time in the long run. Are you ready?
Zion was a surprise! It was so dramatic to see the mountains and steep canyons rise up and tower above us!
INSERT VIDEO zion-drivethru.mp4
The steep cliffs, narrow canyons and wild weather made this national park quite the adventure. When we first arrived, we noticed there was an extra $15 folks had to pay for an “escort”. We didn’t know what that meant (we didn’t have to pay it, but the RV in front of us did). When we saw the tunnels!
The Zion-Mt. Carmel Tunnel connects Zion Canyon to the east side of the part, and it was built 100 years ago when vehicles were much smaller! This means that large vehicles need an “escort”, which means they stop traffic in one direction and allow you to go through, using the entire tunnel. You do get two trips per paid escort, though.
They had daily programs nearly every other hour, and most of them were so interesting! The one that really caught my attention wasn’t a program, though. it was all the shoes people were wearing. They were all the same!
I could not figure out why everyone had the exact same red (sometimes green, but same exact style) on. I mean, I really shouldn’t be bothered looking and people’s shoes when we’re at such a spectacular national park, right?
Well, I couldn’t help it.
And good thing, too! I learned all about hiking “The Narrows”.
The Narrows are 16 miles of 2000′ deep, and at times only 20 feet wide, canyon trail that has soaring walls, sandstone grottos, natural springs, and hanging gardens that you can opt to hike! The only thing is, summertime is prime monsoon weather, and flash floods come up with little to no warning. More than half of the hike is spend swimming or wading in a cold, swift current river, so don’t expect a maintained trail to follow. And that’s what the shoes are for!
We got back in the car (no, we didn’t hike it – we had a 6 year old with us, and they don’t allow kids on the trail)… and headed out for our next stop.
The guidebook we got from the ranger station said “Poetry in Stone”.. and they could not be more right! Bryce Canyon’s structures are deceptive – they never stay the same, since weathers of and erosion of the canyons are constantly changing the shape of the statuesque rock features. When the water melts and flows, it seeps into the cracks and crevices and freezes, expanding and cracking the rocks around it (called “frost wedging”).
For half the year, the temperature swing from freezing at night to warm afternoons, and this big swing causes the water to freeze and melt, freeze and melt, and also causes the soil to creep and move the stone fragments downhill.
Today we are hiking through Bryce Canyon in southwest Utah! The geology here is amazing. You can see the vertical columns of limestone that have been eroded away by weather and water.
INSERT VIDEO bryce-queensgardentrail.mp4
Just being in this area made me want to be a field geologist!
INSERT VIDEO bryce-geology.mp4
At the end of our day, we set up camp and relaxed…
INSERT bryce-camping.mp4
…. only to find glowing worms winking and blinking at us! The peachy shape on the right is my finger, so you can see how zoomed in this is! It was also pitch dark, so the camera was doing its best:
Then we turned off our white lights, and on a whim, I turned on my UV black light – and guess what?
INSERT VIDEO fluorescent-rocks.mp4
The rocks beneath our feet started to glow!
INSERT VIDEO fluorescentrocks2.mp4
In the morning, we were treated to such a beautiful landscape! The colors of the canyon go through the entire spectrum of the rainbow. The Reds and yellows are from the iron, and the blues and purples are from the manganese in the soil.Erosion is happening quickly in the canyon, it will look different every time you visit. The rim is actually receding about 1 foot every 65 years.
This is especially evident in the springtime after the snow begins to melt, the water slips in between cracks and crevices, picking up gravel and rocks and bouncing them around, breaking off small bits every time they do.
Ice also wedges in there and creates the gouges that you see in the rocks .The effects of water, wind, and especially ice is what gives Bryce Canyon its distinctive look. The usage above also has a mini crater of crystals (image above).
Bryce Canyon is not actually a canyon by the way. It’s a series of about a dozen amphitheaters that have been carved out about a thousand feet in.
Some of the wildlife here includes glowing worms, horny toads, elk, mule deer, chipmunks, prairie dogs, porcupines, Green Basin rattlesnakes, sage lizard and short-horned lizard. I only managed to get a picture of the Chipmunk, the lizard was too quick for me!
If you want your kids to do really cool geology projects like this, and if you found this helpful and you find yourself thinking, “Hey, you know, I want this person to teach my kids science for me, and to create my curriculum lessons for me…” then we can do just that.
Go to www.SuperchargedScience.com
When you get there, you’ll see a video that shows you the science curriculum that I developed and teach.
If you like what you see on that website, just fill in the form below the video and your kids can get started today doing real hands-on science with everyday materials.
(If you’re already a member, visit Unit 20 for the earth science lessons in geology.)
We drove up to the Grand Tetons, right as soon as the orchestra music began to play in the car! It was so funny and so perfect!
Today we hiked around the foothills of the Grand Tetons. We were treated to beautiful views of dense forests, rushing rivers, and a crystal clear lake.
The Snake River winds its way throughout the trails. There’s over 200 miles of trails, and some 4,000 rock climbers visit to scale the high peaks!
Did you notice how there are not foothills to obscruct the view? The jagged peaks and deep canyons of the Teton Range are near Jackson Hole, Wyoming. The most common tree we noticed was the lodgepole fine tree, which had cones that need heat to open and release the seeds. There were also Douglas Fir, limber pine, and Engelmann spruce.
At the end of our short hike is Tagget Lake, cold from melted snow. Brrrr!!!!
As we left the Tetons for Jackson Hole, we noticed the speed limit signs were only 45 mph, even though there wasn’t much out there to hit. And then we saw this… (we stayed in the car and FAR from him!)
We made it to Yellowstone! 1200+ miles, only 4 coffees, and 3 jars of peanut butter and the six of us were ready for an adventure in the forest!
It was so beautiful here we just pulled over and had a picnic right in the park. If it was like this all the time, I’d move in next week. But fortunately it’s protected and snowed in part of the time, which is even more amazing!
INSERT VIDEO yellowstone-intro.mp4
We started off with a picnic in the park, then drove to the Lower Geyser Basin to find the Fountain Paint Pots!
The paintpots are on unstable sediments on top of solid rock.
They can have either a lot of water (called hot springs and geysers) like the ones below:
…or not much water (mudpots and fumaroles) like the ones in the next video:
In the early summer the paintpots are thin and watery from all that rain and snow from the winter, but in late summer, they are thick and bubbly. The mud you see bubbling is made of minerals like silica, and the rhyolite in the area is composed of quartz and feldspar. The steam has acids which break down the feldspar into clay (called kaolinite).
INSERT VIDEO paintpot-intro.mp4
Thermophiles are microorganisms that love heat (these are cyanobacteria) and you can see them in these photos in brown, green, and orange. They change color depending on the temperature of the water that they inhabit. As they cool down will turn more orange or brown. They also change color depending on the season and how much sunlight they are getting. These love water around 165 degrees Fahrenheit.
Yellowstone is one of the few places on earth where geysers happen. The rain and snow from winter provide the water for the geysers, and the heat from under the ground warms up the rocks and water and cracks in the rock allow the water the circulate and bubble up into a hot spring.
Originally, the rainbow of colors at Yellowstone were taken to be minerals. Now scientists have discovered that they are living creatures!
INSERT VIDEO yellowstone-hotsprings1.mp4
Here are some basic definitions for the microorganisms at Yellowstone:
Extremophile: A microorganism living in extreme conditions such as heat and acid, and cannot survive without these conditions.
Thermophile: Heat-loving extremophile.
Microorganism: Single- or multi-celled organism of microscopic or submicroscopic size. Also called a microbe.
Microbes in Yellowstone: In addition to the thermophilic microorganisms, millions of other microbes thrive in Yellowstone’s soils, streams, rivers, lakes, vegetation, and animals. Some of them are discussed in other chapters of this book.
Bacteria (Bacterium): Single-celled microorganisms without nuclei, varying in shape, metabolism, and ability to move.
Archaea (Archaeum): Single-celled microorganisms without nuclei and with membranes different from all other organisms. Once thought to be bacteria.
Viruses: Non-living parasitic microorganisms consisting of a piece of DNA or RNA coated by protein.
Eukarya (Eukaryote): Single- or multi-celled organisms whose cells contain a distinct membrane-bound nucleus.
Did you see these odd looking trees? We were curious why they looked burned and dead. I mean, how could they have started growing in the first place when they ended up like this?
It turns out that the trees were here first! These lodgepole pine trees were drowned in super hot water that shifted up underneath them. The silica in the mud went into the bark into the tree and hardened the bases and turned them white.
We were surprised that the ground could shift under a tree within its lifetime.
There’s so much to learn and do here! We’re going to drive onto Firehole Lake now, so we can see all the geysers, and end up at Old Faithful!
If you want your kids to learn more about the world like this by doing hands-on projects in life science and biology, not to mention thermodynamics and chemistry, and if you found this information I’ve shared with you helpful and you find yourself thinking, “Hey, you know, I want this person to teach my kids science for me, and to create my curriculum lessons for me…” then we can do just that.
When you get there, you’ll see a video that shows you the science curriculum that I developed and teach.
If you like what you see on that website, just fill in the form below the video and your kids can get started today doing real hands-on science with everyday materials.
If you’ve ever wanted to view the sun, you know how dangerous it is to point ANYTHING with lenses at the sun. I mean, you can really fry your retina faster than you can say “sunlight”.
So what do you do if your kid who’s crazy wild about astronomy, but don’t know how to view the sun safely? Here’s a video that show you step-by-step how to do just that.
Even if you don’t have a fancy telescope, it doesn’t mean that you can’t appreciate the cool images that this scope takes. Not only do you get to see sunspots, but you also get to see solar flares and prominences around the outer edge. (Image below courtsey of Mark Hellweg).
The image above was taken by an expert solar astrophotographer, as well as a camera permanently mounted to the eyepiece.
Here’s some handouts that you might find useful:
The above images are handouts I put together that go with the solar telescope for when the general public come up and ask if they can look through it. They usually want to know what I’m looking at, if it’s safe, and then they usually have a million questions about the sun itself that they never asked before. This is the kind of excitement you want to ignite in your own child.
If you’d like to do astronomy with your students this coming year, be sure to check out my online science curriculum for grades K through 12 at www.SuperchargedScience.com/easy
We made it to Yellowstone National Park! 1242 miles, 4 kids, and 3 jars of peanut butter later, we find ourselves looking at one of the very few places on earth for there are natural geysers.
We started our tour with on Firehole Lake Drive (which is a road that you can drive on that connects several amazing geysers and hot springs) by looking at the Surprise Pool. When people first discovered it, they tossed in rocks and sand to get it to bubble and “boil” even more, and fortunately their actions didn’t do the spring any real harm (whew!) The deep blue/purple colors are so beautiful.
We continued our drive to the Great Fountain Geyser. We didn’t see this one erupt (thankfully), since it shoots up 100-200 feet high, lasting nearly a full hour of bursts. This geyser takes 10-14 hours to rebuild itself. As the pool slowly fills, you can tell it’s going to erupt because it starts to overflow 70-100 minutes before it starts.
INSERT VIDEO yellowstone-great-fountain-geyser.mp4
The White Dome Geyser has a massive cone that indicates its probably been erupting for hundreds of years. When it erupts, it’s not that tall – onlt about 30′ which lasts about 2 minutes, and changes from a spray into steam. It tends to erupt every 30 minutes to 3 hours.
We saw more geysers, and ended up really enjoying Firehole Lake. Several vents bubble out carbon dioxide, heating up the water to 160 deg F (ouch!), which means that the water can carry a more-than-usual amount of calcium. You’ll see the white deposit ring around the lake’s edge.If you see black deposits, those are manganese oxide, and you’ll also find thermophiles in there! Can you see both in the video below?
INSERT yellowstone-geysers-hotsprings.mp4
We had to stop by Old Faithful of course! In the Upper Geyser Basin, we found Old Faithful, which is one of the largest three geyer basincs along Firehole River. Old Faithful erupts more frequently than ano of the other big geysers, but it’s not the largest or the most regular at Yellowstone. It’s average interval is about 90 minutes, and the eruption lasts 2-5 minutes long, expelling 3700-8400 gallons of boiling hot water up to nearly 200 feet in the air.
INSERT oldfaithful0.mp4
Here it is erupting real-time (the ground was shaking!)
INSERT old-faithful1.mp4
and here it is in the last stages:
oldfaithful2.mp4
That was such a beautiful, amazing sight!
There are lots of other things in the park besides geysers, though. We saw hot springs (water circulating up to the surface and bubbling up, where heat escapes through evaporation or by running off. There are also fumaroles, Yellowstone’s hottest surface features. They vent steam bu having their underground plumbing reach way down into the hot rock. The mudpots are acidic features with very little water – the hydrogen sulfide rises from deep with the earth is used by microorganisms as an energy source and they convert the gas into sulfuric acid which breaks down the rocks into the bubbling clay you see.
We had an interesting day today crossing Nevada. We started in South Lake Tahoe, spending a beautiful afternoon in a playground park so the kids could run around near the lake.
Then we crossed the state line into Nevada. We decided to make this a long drive, so we spent most of the afternoon in the car which was fine because the weather was a bit warm.We needed a pit stop, and pulled off on an uninhabited on/off exit but quickly decided it wasn’t worth getting out of the car because the ground was crawling with hundreds of giant grasshoppers!
INSERT VIDEO winemucca.mp4
We tried to stop at a Mexican Cantina, but decided it was more Cantina than Mexican and didn’t want to bring the kids in there.So we pulled off the side of the road again and I fired up the jetboil and quickly made six different dinners from dehydrated backpacking dinners.
We’re 45 minutes from our final stop in Elko Nevada. The thought for today is that nothing can ever replace the feeling of a happy family, even when you are unkempt, miles from anywhere, and having the time of your life.
Today I got to wake up in one of the most beautiful places in California, the Sierra Nevadas! I did a Facebook Live here on how to use it.
One of the things that struck me on our drive was how many different varieties of pine trees there were, within such a close spacing of each other.
I got curious about which pine tree was which, but could not find any decent videos or descriptions of Sierra Nevada Pine species online. I know my resources were limited, but I’m glad they were otherwise I would not have found this really cool app. I describe how to use it in my Facebook live.
It’s called Plantnet, and you can download it for free in the Google Play Store.
Now like any scientific tool, this is basically like a research book that you can interact with to narrow down your choices. It’s not and end-all final solution to determining a plant species, you have to be smart about how you use your tool. The app uses the GPS in your phone to determine your approximate location, cross-reference is it with known species in your area, and gives you its best suggestions by image matching the photo you took with its database.
What this means is that you will have to go in after you’ve narrowed your choice it down to a standard reference book or online resource to figure out exactly which species you have. Don’t count on the app to give you an exact answer the first time. You can take pictures of bark, leaf, fruit, and more. It’s super handy!
You can get free experiment downloads on my website, which is www.SuperchargedScience.com. just click the “Free Stuff” tab to get the packet I specially made for science experiments you can do right at home email directly to you. Just entering your email address and tell me where to send it.
And if you’d like to go one step further…
If you’d like to learn how to make a compound microscope using hand-held magnifiers, discover how to grow your own carnivorous garden, measure photosynthesis using a hole punch and a spinach leaf and baking soda… and so much more using hands-on lessons in life science and biology, check out my online e-science curriculum here.
We made an ambitious plan to drive the first day about seven hours to get to just stopping short of South Lake Tahoe from San Luis Obispo.
We were rewarded with a beautiful spot to have lunch, it was nearly a hundred degrees even though it was 4 p.m.!
The kids did great on the drive, and one of the games we invented was a new version of the license plate game using numbers. You take 3 numbers of a license plate and try to get to 10 using any math operators you want.
For example our license plate has 333, so we would take 3 squared added to 3 / 3 to get 10.
The one shown below is a little trickier (there may be more than one solution also.)
I would do 2 cubed added to the √ 4 to get 10. you don’t have to use all the numbers, and littler kids can use the numbers more than once.
We can have fun with math operations even though we’re not in a math class!
We had one that no one could figure out until my husband remembered that any number raised to the power of 0 equals 1, and saved the day by getting us to 10. (We did run into a super hard one with 004. I guess some aren’t able to be done without doubling up.)
Time to pack up again and finish our last hour of driving to get to a first campsite! We thought we rented a cabin, but from the message from the host it sounds like it’s little more than four walls of ceiling in a floor. I’ll post more pictures soon!
I’ve had only one coffee today, but already have been so productive in Preparing for our trip! I went to the grocery store, the dollar store, and office supply store, a gas station, and a coffee shop which was first.
Originally I had only planned out the first two days, but then realized that it would put us in the middle of Nevada with no supplies. So I planned out 5 days of stops, food, and fun.
Now this all started on a paper plate 2 days ago during dinner on the back patio. We were wondering what kind of experiences we would like to have the summer as a family, and the paper plate quickly got full of our ideas. Then we voted on everyone’s top 3, and after looking at it again it sure look like a road trip!
Then I figured out the travel distance, time in the car, stop to want to make, budget, and started my research. I want to share with you the top tips that I found that would be useful for our family.
Since we are family of six people, with kids ranging from 6 to 17, this trip was going to have to be something that everyone would enjoy.
Also, we do not have laptops, tablets, iPads, video games, DVD players, CDs, or cell phone use (other than for actually calling people), on a regular daily basis. Most of the website information I found had the advice “plug your kids in to keep them happy” mentality, and that just would not work for us. I mean, why go on a road trip if you’re going to keep a head down and your ears plugged?
So how do you keep everyone engaged, excited and happy with a trip like this?
I went to the dollar store and put together activity packs for my kids to work there ways through. I got them a road Atlas, figuring that my out of date GPS in the car would not work half the time. I also went around the house and picked up a couple of their favorite games that were portable that I wouldn’t mind having in the car.
So the first tip is to figure out what is already of interest or kids, and get them a new experience in this area.
My kids love activities, craft, and building things so I put activity packs together for them.
My kids also love geography and maps, so I got them a real road atlas along with “color-in-the-license-plate game” and other geography things they could do.
Since my kids also love to write in journal, every kid got their own fresh new notebook. In addition, I got dollar store white boards with erasable pens, washable pencils, and washable crayons for the two younger kids.
My kids love games, so I also picked up a few sets of dice and small cardboard boxes so they could play Yahtzee and Boggle. I printed out some Yahtzee score cards to make it easier. These also went inside their notebooks.
They also had toys from around the house like Rubik’s Cubes, nature study books, and a laminated map of the United States.
When packing for a road trip, remember that less is more. The more you bring, the more you’re going to have to keep organized and clean up after. Only bring what you’re willing to pend time and energy cleaning up.
That said, the Play-Doh, Legos, markers, beading kits, and games with small parts all stayed home.
I did bring a small beading kit for my daughter to play while we have picnics. She recently broke her arm, and I imagine her wishing she could play with the other kids when we stopped at a playground. This is something I will pull out when we’ve stopped at a rest stop to brighten her day.
In the car, each kid has a basket to share. I didn’t put suction cup organizers on the windows or organizers over the backs of the seats, or buy shower caddies for each individual kid’s plethora of supplies for a car ride. The bin goes on the seats between the kids, and mostly contain activity books, reading books, and a a few supplies.
I did include glow sticks so they could read at night so I am not disturbed by the white flashlights or book lights coming from the back.
Everything they have goes in the bin or it gets pitched.
For food, we opted to eat mostly vegetarian so we didn’t have to worry about storing raw meat. We also figured we could run to the store and whatever city we were at to pick it up so we didn’t have to worry about it getting spoiled.
We wanted to maintain our regular healthy diet on the road, so I bought mostly what we normally eat anyway, with a heavy emphasis on food that travels well. For example I normally don’t buy corn in a can, but for making veggie chili this is a must.
For meals, we’re going to have spaghetti and marinara, veggie burgers, vegetarian chili with baked potato, pesto caprese sandwiches, and a whole lot of peanut butter and jelly. I also brought our freeze-dried backpacking food in case we are so tired and all we can do is manage to boil a pot of water.
I made the breakfast basket, a lunch and picnic bin, the kitchen (pots, pans, cook stove, spatulas, spices), and a campsite dinner pantry.
We decided not to eat in the car (actually, I decided and everyone else is stuck with this decision). And normally I would panic at the thought, however the occasional apple is fine. We are planning to picnic at different playgrounds, so we have something to look forward to! The car stays cleaner, kids don’t constantly eat all the time (this will be a challenge with my teen boys, I know), and we can focus on things other than eating.
We could just pull out the basket that we needed and it had everything we would need, including the picnic blanket and Frisbee.
We didn’t have enough room inside the car for six people and all our equipment, so we loaded up the cargo bay on the back.
With just a few more finishing touches, we are ready to go!
This month, I’m going on a road trip…. AND YOU’RE INVITED!
Get away from every life with me!
Come with me and my family on a road trip to Yellowstone National Park (an incredible place not only for Earth Science, but also for Life Science).
Along the way, I’ll show you real world science across America as we travel from Central California to Wyoming.
Science is everywhere from museums to deserts and everything in between. Come with me and my family and I’ll show you how to integrate science lessons into many aspects of a family trip.
Plus, I’ll be doing Facebook Live broadcasts throughout our journey to give you the play-by-play experience. You can see them here: www.facebook.com/superchargedsci/
So, if you’re ready, pack your suitcase and jump on board.
If you’re on our way, you might get a surprise visit from Aurora and a class for you and your home school group or friends!
She’s traveling on a road trip with her family (remember two of her oldest just won the world championships in Robotics!) so you can meet them live and in-person!
Here’s the tentative itinerary:
July 5th: Lake Tahoe, CA
July 7th: Idaho Falls, ID
July 9th: Yellowstone, WY
July 12th: Badlands, SD
July 15th: Arches, UT
July 20th: Home via Las Vegas and LA
*She’s also considering a detour through Billings, MT as well, as there’s a family ranch she wants to explore and do a dino dig with. We’ll see how it goes.
Now this trip is totally dependent on how it goes traveling with six people! She’s got until the end of the month to return home, so it’s a very flexible trip.
If you’re on the route, she’d love to stop by to visit with your family, scout or home school group!
Spread the word… if you know of anyone near her traveling road, let them know to contact us asap so we can be sure to meet up with everyone we possibly can.
She’s also got a few new science experiments up her sleeve she wants to try out with your kids, too.
Summer’s here and your kids are already bugging you because they can’t figure out what to do with themselves!!
Here’s ten of my absolute favorite summer science activities. Most of the materials you’ll need are simple, cheap and easy to find (exception is the Hot Icicle experiment at the end). Let me know what you think of these by sending me an email!
#1: Star Gazing
There are a couple of options for this: you can find a Local Astronomy Club and peek through their telescopes, because chances are, no matter where you live, there’s probably an astronomy club within driving distance. Click here to find the one that is nearest to you! Another option is to star gaze using software to help you figure out what’s up there in the sky tonight. Use the video below to learn how to do this…
#2: Pen and Paper Games
Good for overwhelmed parents and bored kids! Engage your sense of play and give your brain a fun workout with these rewarding classic games for two. You’ll need two different colored pens or crayons, two pencils, this packet and a friend to play with! Click here to download the packet.
#3: Create Flying Machines
Ever since I was a kid, I have always wanted to fly. In fact, at four years old you could find me on top of a ladder armed with a box fan (plugged in and turned on) and an umbrella, just like Mary Poppins. Unfortunately, I didn’t really understand how some things flew while I didn’t, so I thought we’d look at some of the most amazing flying machines that are real, and also show you how to start designing your own by looking at the aerodynamic forces that you have to deal with whether you’re a kid or an airplane. Click on the video below!
#4: Build a Popsicle Stick Bridge
Can you build a bridge using only popsicle sticks and hot glue that can carry a bottle of water? (For smaller kids, use a smaller water bottle.) The only limitation is that you may not glue the bridge to the table. I will use masking tape to attach the end of the bridge to the table if needed only after they build the bridge and are ready for testing. Click here to get started!
#5: Catapults!
Ancient people teach us a thing or two about energy when they laid siege to an enemy town. Although we won’t do this today, we will explore some of the important physics concepts about energy that they have to teach us by making a simple catapult. Click here to get started!
#6: Secret Codes and Ciphers
Cryptography is the writing and decoding of secret messages, called ciphers. Now for governments these secret ciphers are a matter of national security. They hire special cryptanalysts who work on these ciphers using cryptanalysis. The secret is, solving substitution ciphers can be pretty entertaining! Ciphers are published daily in newspapers everywhere. If you practice encoding and decoding ciphers, you too can become a really great cryptanalyst. Click video below to start!
#7: Rocketry!
Rockets are vehicles that launch people and payloads into space. Newton’s Third Law of Motion is the principle of action and reaction. With rockets, the action is the force generated by the exhaust gases shooting out the back end of the rocket through the nozzle. This force moves the rocket in the opposite direction. Click video below to get started!
#8: Take a Geology Field Trip!
My robot-award-winning teenager just started his own science kit business recently, and he’s selling geology field trips in a box! If you want one of his, complete with video instructions, he’ll put one together for you and ship it right to your door, all parts included. His store is called ZapScience on Etsy. Otherwise, you can scoop up some of your own rocks from a nature hike and visit this website to try to figure out what you’ve found.
Or, you can help your kid go beyond the lemonade stand and start their own business doing what they know how to and love doing!
#9: Find Meteorites!
Tonight when you get home, put a sheet of white paper on your back porch step. (You may have to put a couple of rocks or tape at the corners to make sure it’s there in the morning!) When you wake up, grap a thin but strong magnet and slide it *gently* under the paper. Any bits that wiggle and move when the magnet comes by are most likely space dust!
#10: Make a Hot Summer Icicle from Sodium Acetate
Does the idea of heating a substance in order to cool it sound a little weird to you? It’s called supercooling, and it happens when you cool a liquid very slowly past the point where it would normally freeze into a solid, and if you do it right, you can get it to stay a liquid even though it should have turned into a solid. When this happens, all you have to do is trigger the substance (like hitting it or throwing something in it) and it will start turning into a solid, but in order to do that it has to heat back up to the freezing point.
You can do this by placing a glass of water in the fridge tonight before bedtime, and when you wake up, carefully take it out and set it on the counter and add one small ice cube. The whole thing should freeze right over! If you want to, you can put the ice in a bowl and pour the supercooled water in a thin trickle on top of the ice cube, and it will instantly crystallize and freeze. The water has to be around 30 degrees F in order for this to work, so check the temperature of your water before you use it. You may have to stick it in the freezer for ten minutes before you use it.
You can do this with water, but it’s much more dramatic to do this with the liquid inside a reusable hand warmer, because it heats up something like 70 degrees in order to freeze! Inside a hand warmer is sodium acetate, which freezes into a solid at 130 deg F. If you’ve ever seen one of these hand warmers, you know that it’s at room temperature (70 degrees) in a liquid state! When the hand warmer gets disturbed, the sodium acetate actually heats up from 70 to 130 in order to freeze solid. That’s because the liquid was below the freezing point, so it has to heat up in order to freeze!
(You’ll want to use reusable hand warmers that contain sodium acetate for this experiment!)
Ever notice how your kids have pocketfuls of rocks, especially when you do the laundry? Here’s how you can do simple lessons in geology using the treasures your kids pick up and find.
In this experiment, you’re looking for two different things: first you’ll be dropping objects and making craters in a bowl of flour to see how energy is transformed from potential to kinetic, but you’ll also note that no matter how carefully you do the experiment, you’ll never get the same exact impact location twice.
To get started, you’ll need to gather your materials for this experiment. Here’s what you need:
several balls of different weights no bigger then the size of a baseball (golf ball, racket ball, ping pong ball, marble etc. are good choices)
fill a good size container or mixing bowl with flour or corn starch (or any kind of light powder)
If you’re measuring your results, you’ll also need a tape measure (or yard stick) and a spring scale (or kitchen scale).
Are you ready?
1. Fill the container about 2 inches or so deep with the flour.
2. Weigh one of the balls (If you can, weigh it in grams).
3. Hold the ball about 3 feet (one meter) above the container with the flour.
4. Drop the ball.
5. Whackapow! Now take a look at how deep the ball went and how far the flour spread. (If all your balls are the same size but different weights it’s worth it to measure the size of the splash and the depth the ball went. If they are not, don’t worry about it. The different sizes will effect the splash and depth erratically.
6. Try it with different balls. Be sure to record the mass of each ball and calculate the potential energy for each ball.
Each one of the balls you dropped had a certain amount of potential energy that depended on the mass of the ball and the height it was dropped from. As the ball dropped the potential energy changed to kinetic energy until, “whackapow”, the kinetic energy of the ball collided with and scattered the flour. The kinetic energy of the ball transferred kinetic energy and heat energy to the flour.
Calculate the gravitational potential energy of the ball. Take the mass of the ball, multiply it by 10 m/s2 and multiply that by 1 meter. For example, if your ball had a mass of 70 grams (you need to convert that to kilograms so divide it by 1000 so that would be .07 grams) your calculation would be
PE=.07 x 10 x 1 = .7 Joules of potential energy.
So, how much kinetic energy did the ball in the example have the moment it impacted the flour? Well, if all the potential energy of the ball transfers to kinetic energy, the ball has .7 Joules of kinetic energy.
Create a table in your science journal or use ours. (You’ll need Microsoft Excel to use this file.)
Note: Do the pendulum experiment first, and when you’re done with the heavy nut from that activity, just use it in this experiment.
You can easily create one of these mystery toys out of an old baking powder can, a heavy rock, two paper clips, and a rubber band (at least 3″ x 1/4″). It will keep small kids and cats busy for hours.
You’ll need two holds punched through your container – one in the lid and the bottom. Thread your rubber band through the heavy washer and tie it off (this is important!). Poke the ends of the rubber band through one of the holes and catch it on the other side with a paper clip. (Just push a paper clip partway through so the rubber band doesn’t slip back through the hole.) Do this for both sides, and make sure that your rubber band is a pulled mildly-tight inside the can. You want the hexnut to dangle in the center of the can without touching the sides of the container.
Now for the fun part… gently roll the can on a smooth floor away from you. The can should roll, slow down, stop, and return to you! If it doesn’t, check the rubber band tightness inside the can.
The hexnut is a weight that twists up the rubber band as the can rolls around it. The kinetic energy (the rolling motion of the can) transforms into potential (elastic) energy stored in the rubber band the free side twists around. The can stops (this is the point of highest potential energy) and returns to you (potential energy is being transformed into kinetic). The farther the toy is rolled the more elastic potential energy it stores.
Exercises
Explain in your own words two types of energy transfer:
True or false: All energy in a system is lost to heat.
Are you curious about pulleys? This set of experiments will give you a good taste of what pulleys are, how to thread them up, and how you can use them to lift heavy things.
We’ll also learn how to take data with our setup and set the stage for doing the ultra-cool Pulley Lift experiments.
Are you ready?
[am4show have=’p8;p9;p11;p38;p14;p41;p75;p85;p88;p92;’ guest_error=’Guest error message’ user_error=’User error message’ ]
For this experiment, you will need:
One pulley (from the hardware store… get small ones that spin as freely as possible. You’ll need three single pulleys or if you can find one get a double pulley to make our later experiment easier.)
About four feet of string
2 paper cups
many little masses (about 50 marbles, pennies, washers etc.)
1. Take a look at the video to see how to make your “mass carriers”. Use the nail to poke a hole in both sides of the cup. Be careful to poke the cup…not your finger! Thread about 4 inches of string or a pipe cleaner through both holes. Make sure the string is a little loose. Make two of these mass carriers. One is going to be your load (what you lift) and the other is going to be your effort (the force that does the lifting).
2. Dangle the pulley from the table (check out the picture).
3. Bend your two paper clips into hooks.
4. Take about three feet of string and tie your paper clip hooks to both ends.
5. Thread your string through the pulley and let the ends dangle.
6. Put 40 masses (coins or whatever you’re using) into one of the mass carriers. Attach it to one of the strings and put it on the floor. This is your load.
7. Attach the other mass carrier to the other end of the string (which should be dangling a foot or less from the pulley). This is your effort.
8. Drop masses into the effort cup. Continue dropping until the effort can lift the load.
9. Once your effort lifts the load, you can collect some data. First allow the effort to lift the load about one foot (30 cm) into the air. This is best done if you manually pull the effort until the load is one foot off the ground. Measure how far the effort has to move to lift the load one foot.
10. When you have that measurement, you can either count the number of masses in the load and the effort cup or if you have a scale, you can get the mass of the load and the effort.
11. Write your data into your pulley data table in your science journal.
Double Pulley Experiment
You need:
Same stuff you needed in Experiment 1, except that now you need two pulleys.
1. Attach the string to the hook that’s on the bottom of your top pulley.
2. Thread the string through the bottom pulley.
3. Thread the string up and through the top pulley.
4. Attach the string to the effort.
5. Attach the load to the bottom pulley.
6. Once you get it all together, do the same thing as before. Put 40 masses in the load and put masses in the effort until it can lift the load.
7. When you get the load to lift, collect the data. How far does the effort have to move now in order to lift the load one foot (30 cm)? How many masses (or how much mass, if you have a scale) did it take to lift the load?
8. Enter your data into your pulley table in your science journal.
Triple Pulley Experiment
You Need
Same stuff as before
If you have a double pulley or three pulleys you can give this a shot. If not, don’t worry about this experiment.
Do the same thing you did in experiments 1 and 2 but just use 3 pulleys. It’s pretty tricky to rig up 3 pulleys so look carefully at the pictures. The top pulley in the picture is a double pulley.
1. Attach the string to the bottom pulley. The bottom pulley is the single pulley.
2. Thread the string up and through one of the pulleys in the top pulley. The top pulley is the double pulley.
3. Take the string and thread it through the bottom pulley.
4. Now keep going around and thread it again through the other pulley in the top (double) pulley.
5. Almost there. Attach the load to the bottom pulley.
6. Last, attach the effort to the string.
7. Phew, that’s it. Now play with it!
Take a look at the table and compare your data. If you have decent pulleys, you should get some nice results. For one pulley, you should have found that the amount of mass it takes to lift the load is about the same as the amount of mass of the load. Also, the distance the load moves is about the same as the distance the effort moves.
All you’re really doing with one pulley, is changing the direction of the force. The effort force is down but the load moves up.
Now, however, take a look at two pulleys. The mass needed to lift the load is now about half the force of the load itself! The distance changed too. Now the distance you needed to move the effort, is about twice the distance that the load moves. When you do a little math, you notice that, as always, work in equals work out (it won’t be exactly but it should be pretty close if your pulleys have low friction).
What happened with three pulleys? You needed about 1/3 the mass and 3 times the distance right? With a long enough rope, and enough pulleys you can lift anything! Just like with the lever, the pulley, like all simple machines, does a force and distance switcheroo.
The more distance the string has to move through the pulleys, the less force is needed to lift the object. The work in, is equal to the work out (allowing for loss of work due to friction) but the force needed is much less.
Exercises Answer the questions below:
What is the load and effort of a pulley? Draw a pulley and label it.
What is the best way to say what a simple machine helps us do?
Do work without changing force applied
Change the direction or strength of a force
Lift heavy shipping containers
None of these
Name one other type simple machine and an example:
We're going to be using pulleys to pull two (or more) kids with one hand. You will be using something called ‘Mechanical Advantage’, which is like using your brains instead of brute strength. When you thread the rope around the broom handles, you use 'mechanical advantage' to leverage your strength and pull more than you normally could handle.
How can you possibly pull with more strength than you have? Easy - you trade ‘force’ for ‘distance’ - you can pull ten people with one hand, but you have to pull ten feet of rope for every one foot they travel.
Here's what you do:
[am4show have='p8;p9;p11;p38;p14;p41;p88;p92;' guest_error='Guest error message' user_error='User error message' ]
nylon rope (at least 50')
two strong dowels (like the handle from a broomstick)
friends and you
Download Student Worksheet
Have two people face each other and each hold a smooth pipe or strong dowel (like a mop or broom) horizontally straight out in front of their chest. Tie a length of strong nylon rope (slippery rope works best to minimize friction) near the end of the mop.
Drape the rope over the second handle (broom), loop around the bottom, then back to the top of the broom. You're going to zigzag the rope back and forth between the mop and broom until you have four strings on each handle.
Attach a third person to the free end of the rope. Make a quick handle for a third person: Thread a 6" length of PVC pipe onto the end and tie the rope back onto itself to form a handle.
The two people hold the dowels will not be able to resist the pull you give when pulling on the end of the rope! Be careful with this one - there's a lot of force going through your rope, and that's usually the first thing to break. If everyone pulls gently, you don't have to worry.
Troubleshooting Tip: If you’re finding there’s just too much friction between the rope and the broomstick (meaning that the rope doesn’t slide smoothly over the broom handles, then click here to learn how to upgrade to pulleys.
[/am4show]
Simple machines make our lives easier. They make it easier to lift, move and build things. Chances are that you use simple machines more than you think. If you have ever screwed in a light bulb, put the lid on a jam jar, put keys on a keychain, pierced food with a fork, walked up a ramp, or propped open a door, you've made good use of simple machines. A block and tackle setup is also a simple machine.
Block and tackle refers to pulleys and rope (in that order). One kid can drag ten adults across the room with this simple setup – we've done this class lots of times with kids and parents, and it really works! Be careful with this experiment - you'll want to keep your fingers away from the rope and don't pull too hard (kids really get carried away with this one!)
If you haven't already, make sure you try out the broomstick version of this activity first.
[am4show have='p8;p9;p11;p38;p14;p41;p88;p92;' guest_error='Guest error message' user_error='User error message' ]
Materials:
Rope
pulleys
chain link fence (or a broom)
three people
Cut off about 12" of rope and circle a loop around a strong support, like a chain link fence. Before you tie a knot, thread three pulleys onto the rope… and now tie it off.
Make another circle of rope and add three more pulleys onto it. Loop the rope over the handle of a mop or broom. Thread the rest of the nylon rope through zigzag fashion first through one pulley on the fence, then through a pulley on the mop, then to an open pulley back on the fence, then another free pulley on the mop, etc… Knot the end of the rope to the mop. You should have one free end of rope left.
Attach a kid to the free end of the rope by adding a handle. You can thread a rope through a 6" piece of PVC pipe and tie the rope back on itself. Attach adults to the mop, holding it straight out in front of their chest. The adults' job is to resist the pull they will feel as the kid pulls with his end of the rope.
Silly as our application for this experiment may sound, we use this system to keep pens handy near the shopping list on the fridge. It’s saved us from many pen-searches over the years!
We install these at various places around the house (by the telephone, fridge, front door, anywhere that you usually need a pen at the last minute), and have even seen them at the counters of local video-rental stores.
[am4show have='p8;p9;p11;p38;p92;p14;p41;p88;p92;' guest_error='Guest error message' user_error='User error message' ]
Download Student Worksheet Troubleshooting: It’s important to note that the weight needs to slide freely both up and down the length of the cord (which is why fishing line is a great choice – the surface of the line is very low friction). Another important tip: the weights you use must weigh more than the object at the end of the string plus the force of friction in the lines (and the pulley). Hollow, metal objects work great like nuts (for bolts).
You’ll need to practice to find just the right balance point: where the pen flies up to its resting position when you let go of the pen.
This is a great addition to any tree house or playground structure! Hang a loop of rope from a tree branch (don't forget to thread the pulleys onto the rope before you tie the knot! Connect one pulley to the basket handle made from a circle of short rope. Tie a length of rope to the basket handle, then up through one tree pulley, down through the basket pulley, and up through the second tree pulley. Thread a 6" length of PVC pipe onto the end and tie the rope back onto itself to form a handle.
[/am4show]
This experiment is for Advanced Students. For ages, people have been hurling rocks, sticks, and other objects through the air. The trebuchet came around during the Middle Ages as a way to break through the massive defenses of castles and cities. It’s basically a gigantic sling that uses a lever arm to quickly speed up the rocks before letting go. A trebuchet is typically more accurate than a catapult, and won’t knock your kid’s teeth out while they try to load it.
Trebuchets are really levers in action. You’ll find a fulcrum carefully positioned so that a small motion near the weight transforms into a huge swinging motion near the sling. Some mis-named trebuchets are really ‘torsion engines’, and you can tell the difference because the torsion engine uses the energy stored in twisted rope or twine (or animal sinew) to launch objects, whereas true trebuchets use heavy counterweights.
This is a serious wood-construction project. If you have access to scrap wood and basic tools (and glue!), you have everything you need to build this project. You will need to find heavy objects (like rocks or marbles) for the weights.
We want kids to discover that science isn’t in the special parts that come with a kit, but rather in the imagination and skill of the kid building it. We strive to avoid parts that are specially made just for a kit, molded plastic pieces, etc. and instead use parts that any kid could buy from the store. This means that kids can feel free to change things around, use their own ideas to add improvements and whatever else their imagination can come up with. So on this note, let’s get started.
WARNING: This project requires the use of various hand tools. These tools should only be used with adult supervision, and should not be used by children under 12 years of age.
Tools you’ll need:
Hammer
Electric drill with ¼” bit
Hot glue gun & glue sticks
Measuring tape or ruler
Hand saw & clamp (or miter box)
Scissors
Screwdriver (flathead) or wood chisel
Materials:
7 pieces of ½” x ½” x 24″ pieces of wood stock
2 pieces of ¾” x 24″ wood
1 piece of 3″ x 24″ wood
18″ Wooden dowel
Screw eye
Nails
String
Clear tube
Rubber mesh
Note: wood pieces may be slightly larger or smaller than specified. Just use your best judgment when sizing.
From ½” x ½” x 24″ pieces of wood stock cut:
3 pieces 5″ long
2 pieces 9″ long
3 pieces 3-1/2″ long
4 pieces 5-1/2″ long
From the dowel cut:
2 pieces 7″ long
1 piece 4″ long
From the 3″ x 24″ flat piece of wood cut:
2 pieces 3″ long (one of these has a 1″ square notch in it)
2 pieces 5″ long
1 piece 4-1/2″ long
AND…
String should be cut into 2 pieces 14-16″ long
The pouch is cut from the rubber mesh and is 5″ x 1-1/2″
We’re going to practice measuring and calculating real life stuff (because science isn’t just in a textbook, is it?) When I taught engineering classes, most students had never analyzed real bridges or tools before – they only worked from the textbook. So let’s jump out of the words and into action, shall we? This experiment is for Advanced Students.
Before we start, make sure you’ve worked your way through this experiment first!
[am4show have=’p8;p9;p11;p38;p41;p85;p88;p92;’ guest_error=’Guest error message’ user_error=’User error message’ ]
For this experiment, you need:
2. Now lift it off the table straight up until you lift it one meter (one yard).
3. Start the timer and at the same time start lifting the object up and down 20 times.
4. Stop the timer when you’re done with the 20 lifts.
So, do you have the power of the Dodge Viper? Hmmm, probably not but let’s take a look.
First of all figure out how much work you did. Work = force x distance so take the force you used and multiply that by the distance you moved it. In this case, you can multiply 1 Newton x 20 meters and get 20 Joules of work.
Now figure out how much power you used. Power is work divided by time so take your work (20 Joules) and divide it by how much time it took you to do that work.
For example, if you lifted the block 20 times (doing 20 Joules of work) in 5 seconds, you did 20 Joules/5 seconds = 4 Watts of power. To convert Watts to horsepower we multiply by .001 so in this example, you did 4 x .001 = .004 horsepower. Not exactly vroom vroom!
This experiment is for Advanced Students. We’re going to really get a good feel for energy and power as it shows up in real life. For this experiment, you need:
Something that weighs about 100 grams or 4 ounces, or just grab an apple.
A meter or yard stick
This might seem sort of silly but it’s a good way to get the feeling for what a Joule is and what work is.
[am4show have=’p8;p9;p11;p38;p41;p85;p88;p92;’ guest_error=’Guest error message’ user_error=’User error message’ ]
2. Now lift it off the table straight up until you lift it one meter (one yard).
3. Lift it up and down 20 times.
A 100 gram object takes about one Newton of force to lift. Since it took one Newton of force to lift that object, how much work did we do? Remember work = force x distance so in this case work = 1 Newton x 20 meters or work = 20 Joules.
You may ask “but didn’t we move it 40 meters, 20 meters up and 20 down?” That’s true, but work is moving something against a force. When you moved the object down you were moving the object with a force, the force of gravity. Only in lifting it up, are you actually moving it against a force and doing work. Four Joules are about 1 calories so we did 5 calories of work.
“Wow, I can lift an apple 20 times and burn 5 calories! Helloooo weight loss!” Well…not so fast there Richard Simmons. When we talk about calories in nutrition we are really talking about kilo calories. In other words, every calorie in that potato chip is really 1000 calories in physics. So as far as diet and exercise goes, lifting that apple actually only burned .005 calories of energy,…rats.
It is interesting to think of calories as the unit of energy for humans or as the fuel we use. The average human uses about 2000 calories (food calories that is, 2,000,000 actual calories) a day of energy. Running, jumping, sleeping, eating all uses calories/energy. Running 15 minutes uses 225 calories. Playing soccer for 15 minutes uses 140 calories. (Remember those are food calories, multiply by 1000 to get physics calories). This web site has a nice chart for more information: Calories used in exercise.
Everything we eat refuels that energy tank. All food has calories in it and our body takes those calories and converts them to calories/energy for us to use. How did the food get the energy in it? From the sun! The sun’s energy gives energy to the plants and when the animals eat the plants they get the energy from the sun as well.
So, if you eat a carrot or a burger you are getting energy from the sun! Eating broccoli gives you about 50 calories. Eating a hamburger gives you about 450 calories! We use energy to do things and we get energy from food. The problem comes when we eat more energy than we can use. When we do that, our body converts the energy to fat, our body’s reserve fuel tank. If you use more energy then you’ve taken in, then your body converts fat to energy. That’s why exercise and diet can help reduce your weight.
Let’s take the concept of work a little bit farther. If Bruno carries a 15 pound bowling ball up a 2 meter (6 foot) flight of stairs, how much work does he do on the bowling ball? It takes 66 Newtons of force to lift a 15 pound bowling ball 1 meter. Remember work = force x distance.
So, work = 66 Newtons x 2 meters. In this case, Bruno does 132 Joules of work on that bowling ball. That’s interesting, but what if we wanted to know how hard poor Bruno works? If he took a half hour to go up those stairs he didn’t work very hard, but if he did it in 1 second, well then Bruno’s sweating!
That’s the concept of power. Power is to energy like miles per hour is to driving. It is a measure of how much energy is used in a given span of time. Mathematically it’s Power = work/time. Power is commonly measured in Watts or Horsepower. Let’s do a little math and see how hard Bruno works.
In both cases mentioned above Bruno, does 132 Joules of work, but in the first case he does the work in 30 minutes (1800 seconds) and in the last case he does it in 1 second. Let’s first figure out Bruno’s power in Watts. A Watt is 1 Joule/second so:
For the half hour Bruno’s Power = 132 Joules/1800 seconds = .07 Watts
For the second Bruno’s Power = 132 joules/1 second = 132 Watts
You can see that the faster you exert energy the more power you use. Another term for power is horsepower. You may have heard the term horsepower in car ads. The more powerful car can exert more energy faster, getting the car moving faster. A Dodge Viper has 450 horsepower which can accelerate a 3,300 pound car from 0 to 60 mph in 4.1 seconds…WOW!
One horsepower is 745 Watts or one Watt is .001 horsepower. So converting Watts to horsepower poor Bruno exerts:
.07 x .001 = .00007 horsepower over the half hour
132 x .001 = .132 horsepower over the second (not exactly a Dodge Viper!)
Exercises
If something has a weight of 2 Newtons and is moved half a meter, how many Joules of energy are used? Show your work.
What is the source of all this energy we’re working with here?
It doesn’t count as work when you move the apple back down. Why not?
We’re going to use everyday objects to build a simple machine and learn how to take data. Sadly, most college students have trouble with these simple steps, so we’re getting you a head start here. The most complex science experiments all have these same steps that we’re about to do… just on a grander (and more expensive) scale. We’re going to break each piece down so you can really wrap your head around each step. Are you ready to put your new ideas to the test?
1. Tape one paper cup to each end of lever. (This allows for an easy way to hold the pennies on the lever.)
2. Set your fulcrum on the table and put your lever (ruler or paint stick) on top of it. Try to get the ruler to balance on the fulcrum.
3. Put five pennies on one side of your lever.
4. Now, put pennies, one at a time on the other side of your lever, this is your effort. Keep adding pennies until you get your lever to come close to balancing. Try to keep your fulcrum in the same place on your lever. You may even want to tape it there.
5. Count the pennies on the effort side and count the pennies on the load side. If you have a scale, you can weigh them as well. With the fulcrum in the middle you should see that the pennies/mass on both sides of the lever are close to equal.
6. This part’s a little tricky. Measure how high the lever was moved. On the load side, measure how far the lever moved up and on the effort side measure how far the lever moved down. Be sure to do the measuring at the very ends of the lever.
7. Write your results in your science journal as shown in the video.
8. Remove the pennies and do it all over again, this time move the fulcrum one inch (two centimeters) closer to the load side.
9. Continue moving the fulcrum closer to the load until it gets too tough to do. You’ll probably be able to get it an inch or two (two to four centimeters) from the load.
10. If you didn’t use a scale feel free to stop here. Don’t worry about the “work in” and “work out” parts of the table. Take a look at your table and check out your results. Can you draw any conclusions about the distance the load moved, the distance the effort moved, and the amount of force required to move it?
11. If you used a scale to get the masses you can find out how much work you did. Remember that work=force x distance. The table will tell you how to find work for the effort side (work in) and for the load side (work out). You can multiply what you have or if you’d like to convert to Joules, which is a unit of work, feel free to convert your distance measurements to meters and your mass measurements to Newtons. Then you can multiply meters times Newtons and get Joules which is a unit of work.
1 inch = .025 meters
1 cm = .01 meter
1 ounce =0.278 Newtons
1 gram = 0.0098 Newtons
By taking a look at your data and by all the other work we did this lesson, you can see the beautiful switcheroo of simple machines. Simple machines sacrifice distance for force. With the lever, the farther you had to push the lever, the less force had to be used to move the load.
The work done by the effort is the same as the work done on the load. By doing a little force/distance switcheroo, moving the load requires much less force to do the work. In other words, it’s much easier. Anything that makes work easier gets a thumbs up by me! Hooray for simple machines!
When people mention the word “hydraulics”, they could be talking about pumps, turbines, hydropower, erosion, or river channel flow. The term “hydraulics” means using fluid power, and deals with machinesand devices that use liquids to move, lift, drive, and shove things around.
Liquids behave in certain ways: they are incompressible, meaning that you can’t pack the liquid into a tighter space than it already is occupying.
If you've ever filled a tube partway with water and moved it around, you've probably noticed that the water level will remain the same on either side of the tube.
However, if you add pressure to one end of the tube (by blowing into the tube), the water level will rise on the opposite side. If you decrease the pressure (by blowing across the top of one side), the water level will drop on the other side.
In physics, this is defined through Pascal's law, which tells us how the pressure applied to one surface can be transmitted to the other surface. As liquids can't be squished, whatever happens on one surface affects what occurs on the other. Examples of this effect include siphons, water towers, and dams. Scuba divers know that as they dive 30 feet underwater, the pressure doubles. This effect is also show in hydraulics - and more importantly, in the project we're about to do!
But first, let's understand what's happening with liquids and pressure:
Here’s an example: If you fill a glass full to the brim with water, you reach a point where for every drop you add on top, one drop will fall out. You simply can’t squish any more water molecules into the glass without losing at least the same amount. Excavators, jacks, and the brake lines in your car use hydraulics to lift huge amounts of weight, and the liquid used to transfer the force is usually oil at 10,000 psi.
Air, however, is compressible. When car tires are inflated, the hose shoves more and more air inside the tire, increasing the pressure (amount of air molecules in the tire). The more air you stuff into the tire, the higher the pressure rises. When machines use air to lift, move, spin, or drill, it’s called “pneumatics”. Air tools use compressed air or pure gases for pneumatic power, usually pressurized to 80-100 psi.
Different systems require either hydraulics or pneumatics. The advantage to using hydraulics lies in the fact that liquids are not compressible. Hydraulic systems minimize the “springy-ness” in a system because the liquid doesn’t absorb the energy being transferred, and the working fluids can handle much heavier loads than compressible gases. However, oil is flammable, very messy, and requires electricity to power the machines, making pneumatics the best choice for smaller applications, including air tools (to absorb excessive forces without injuring the user).
We're going to build our own hydraulic-pneumatic machine. Here's what you need to do:
[am4show have='p8;p9;p11;p38;p14;p41;p75;p88;p92;' guest_error='Guest error message' user_error='User error message' ]
Materials:
plastic cup
20 tongue-depressor-size popsicle sticks
6 syringes (anything in the 3-10mL size range will work)
6 brass fasteners
5’ of flexible tubing (diameter sized to fit over the nose of your syringes)
four wheels (use film canister lids, yogurt container lids, milk jug lids, etc.)
4 rubber bands
two naked (unwrapped) straws
skewers that fit inside your straws
hot glue gun (with glue sticks)
sharp scissors or razor (get adult help)
drill with small drill bits (you’ll be drilling a hole large enough to fit the stem of a brass fastener)
Let’s play with these different ideas right now and really “feel” the difference between hydraulics and pneumatics. Connect two syringes with a piece of flexible tubing. Cut the tubing into three equal-sized pieces and use one to experiment with. Shove the plunger on one syringe to the “empty”, and leave the other in the “filled” position before connecting the tubing. What happens when you push or lift one of the plungers? Is it quick to respond, or is there “slop” in the system?
Now remove both plungers and, leaving the tubing attached, fill the system with water to the brim on both ends (this is a good bath-time activity!). Keep the open ends of the syringes at the same level as you fill them. What happens if you lower one of the syringes? What happens when you raise it back up? Is there now air in your system?
Fill your syringe-tube system up with water again, keeping the plungers at the same height as you work. Insert one of the plungers into one of the syringes and play with the levels of the syringes again, lifting one and lowering the other. Now what happens, or doesn’t happen?
Why does that work? Because both syringes are open to the atmosphere, they both have equal amounts of air pressure pushing down on the surface of the water. When you raise one syringe higher than the other, you have increased the elevation head of higher syringe, which works to equalize the water levels in the two syringes (thus shoving water out of the lower syringe). Elevation head is due to the fluid’s weight (gravitational force) acting on the fluid and is related to the potential energy of the raised syringe (which increased with elevation).
Now connect your plungers into a fully hydraulic system: Push the plunger all the way down to expel the water from one of the syringes (water should leak all over the place from the open syringe). Now add the second plunger to the open syringe and push the plunger down halfway. What happens? You have just made a hydraulic system!
Are you ready to build it into a three-axis machine? Then click the play button below:
This isn't strictly a 'levers' experiment, but it's still a cool demonstration about simple machines, specifically how pulleys are connected with belts.
Take a rubber band and a roller skate (not in-line skates, but the old-fashioned kind with a wheel at each corner.) Lock the wheels on one side together by wrapping the rubber band around one wheel then the other. Turn one wheel and watch the other spin.
Now crisscross the rubber band belt by removing one side of the rubber band from a wheel, giving it a half twist, and replacing it back on the wheel. Now when you turn one wheel, the other should spin the opposite direction. Here's a quick video on what to expect:
[am4show have='p8;p9;p11;p38;p14;p41;p88;p92;' guest_error='Guest error message' user_error='User error message' ]
Levers, being simple machines, have only three simple parts. The load, the effort, and the fulcrum. Let’s start with the load. The load is basically what it is you’re trying to lift. The books in the last experiment where the load. Now for the effort. That’s you. In the last experiment, you were putting the force on the lever to lift the load. You were the effort. The effort is any kind of force used to lift the load. Last for the fulcrum. It is the pivot that the lever turns on. The fulcrum, as we’ll play with a bit more later, is the key to the effectiveness of the lever.
There are three types of levers. Their names are first-class, second-class and third-class. I love it when it’s that simple. Kind of like Dr. Seuss’s Thing One and Thing Two. The only difference between the three different levers is where the effort, load and fulcrum are.
[am4show have='p8;p9;p11;p38;p14;p41;p88;p92;' guest_error='Guest error message' user_error='User error message' ]
Are you ready for some 'vintage Aurora' video? We thought you'd want to check out one of the first videos she ever made (in her basement with the auto-focus stuck in the ON position). Enjoy!
A first-class lever is a lever in which the fulcrum is located in between the effort and the load. This is the lever that you think of whenever you think of levers. The lever you made in Experiment 1 is a first-class lever. Examples of first-class levers are the see-saw, a hammer (when it’s used to pull nails), scissors (take a look, it’s really a double lever!), and pliers (same as the scissors, a double lever).
First Class Lever Experiment
For this experiment, you'll need:
A nice strong piece of wood. 3 to 8 feet long would be great if you have it.
A brick , a thick book or a smaller piece of wood (for the fulcrum)
Books, gallons of water or anything heavy that’s not fragile
Be careful with this. Don’t use something that’s so heavy someone will get hurt. Also, be sure not to use something so heavy that you break the wooden lever. Last but not least, be sure to keep your head and face away from the lever. I’ve seen folks push down on the lever and then let go. The lever comes up fast and can pop you pretty hard.
1. Put your fulcrum on the ground.
2. Put your lever on the fulcrum. Try to get your fulcrum close to the middle of the lever.
3. Put some weight on one end of the lever.
4. Now push down on the other side of the lever. Try to remember how hard (how much force) you needed to use to lift the heavy object.
5. Move the fulcrum under the lever so that it is closer to the heavy object.
6. Push down on the other side of the lever again. Can you tell the difference in the amount of force?
7. Move the fulcrum closer still to the heavy object. Feel a difference now?
8. Feel free to experiment with this. Move the fulcrum farther away and closer to the object. What conclusions can you draw?
What you may have found, was that the closer the fulcrum is to the heavy object, the less force you needed to push with to get the object to move. Later we will look at this in greater detail, but first let me tell you about the other types of levers.
Second-Class Lever
The second-class lever is a little strange. In a second-class lever, the load is between the fulcrum and the effort. A good example of this, is a wheel-barrow. The wheel is the fulcrum, the load sits in the wheel-barrow bucket and the effort is you. Some more examples would be a door (the hinge is the fulcrum), a stapler, and a nut-cracker.
Second-class Lever Experiment
You need:
A nice strong piece of wood. 3 to 8 feet long would be great if you have it.
A brick, a thick book or a smaller piece of wood (for the fulcrum)
Books, gallons of water or anything heavy that’s not fragile
Again, be careful with this. Don’t use something that’s so heavy someone will get hurt. Also, be sure not to use something so heavy that you break the wooden lever. Last but not least, be sure to keep your head and face away from the lever. I’ve seen folks push down on the lever and then let go. The lever comes up fast and can pop you pretty hard.
1. Put your fulcrum, the book or the brick, whatever you’re using on a nice flat spot.
2. Put the end of your lever on the fulcrum.
3. Put the books or gallon jugs or whatever you’re using for a load, in the middle of the lever.
4. Now, put yourself (the effort) on the opposite end of the lever from the fulcrum.
5. Lift
6. Experiment with the load. Move it towards the fulcrum and lift. Then move it toward the effort and lift. Where is it harder(takes more force) to lift the load, near the fulcrum or far? Where does the load lift the greatest distance, near the fulcrum or far?
Third-Class Lever
This fellow is the oddest of all. The third-class lever has the effort between the load and the fulcrum. Imagine Experiment 1 but this time the fulcrum is at one end of the board, the books are on the other end and you’re in the middle. Kind of a strange way to lift books huh? A few examples of this are tweezers, fishing rods (your elbow or wrist is the fulcrum), your jaw (the teeth crush the load which would be your hamburger), and your arm (the muscle connects between your elbow (fulcrum) and your load( the rest of your arm or whatever you’re lifting)). Your skeletal and muscular system are, in fact, a series of levers!
Third-class Lever Experiment
You need:
A nice strong piece of wood. 3 to 8 feet long would be great if you have it.
A brick , a thick book or a smaller piece of wood (for the fulcrum)
Books, gallons of water or anything heavy that’s not fragile
Again, be careful with this. Don’t use something that’s so heavy someone will get hurt. Also, be sure not to use something so heavy that you break the wooden lever. Last but not least, be sure to keep your head and face away from the lever. I’ve seen folks push down on the lever and then let go. The lever comes up fast and can pop you pretty hard.
1. Put your fulcrum on the ground in a nice flat place.
2. Put your lever on the fulcrum so that the fulcrum is at the very end of the lever.
3. Put your load on the lever at the end farthest from the fulcrum.
4. Now, put yourself (the effort) in the middle of the lever.
5. Lift. You may need someone to hold down the lever on the fulcrum
6. Experiment with the effort (you). Move towards the fulcrum and lift the load Then move toward the load and lift. Where is it harder(takes more force) to lift the load, near the fulcrum or far? Where does the load lift the greatest distance, near the fulcrum or far?
We’ve had a lot of fun levering this and levering that but now we have to get to the point of all this simple machine stuff. Work equals force times distance, right? Well, what have you been doing all this time with these levers? You’ve been moving something (the load) a distance against a force (gravity). You’ve been doing work. You’ve been exerting energy. See how it all ties in nicely?
In experiment 1,2 and 3, I wanted you to notice how much force you exerted and how much the load moved. You may have noticed that when the force was small (it was very easy to lift) the load moved a very small distance. On the other hand, when the force was large (hard to lift), the load moved a greater distance. Let me point your attention to one more thing and then we’ll play with this.
When the force used to lift the load was small, you moved the lever a large distance. When the force used to lift the load was great you moved the lever a small distance. Remember, work=force x distance. There is work done on both sides of the lever. The effort (you in this case) pushes the lever a distance against a force...work is done. The load also moves a distance against a force so there too...work is done.
Now, here’s the key to this that I hope you can see in the next experiment. Work in is equal to work out. The work you do on one side of the lever (work in), is equal to the work that happens to the load (work out). Let’s do a quick bit of math for an example. Phillip wants to move a 10 kg (22 lb.)box. He uses a lever and notices that when he lifts the box .1meter (4 inches) he has to push the lever down 1 meter with a force of 1 kg. Now let’s do some math. (Officially we should convert kilograms (a unit of mass) to Newtons (a unit of force) so that we can work in Joules which is a unit of work. However, we’ll do it this way so you can see the relationship more easily.)
Phillip’s work (the work in) = 1 kg x 1 m = 1
Work on the bowling ball (the work out) = 10 kg x .1 m = 1
Work in equals work out! Later in this energy unit, you’ll learn about energy efficiency. At that point, you’ll see that you never get all the energy you want from the energy you put in. Some is lost to sound and some to heat. A lever is incredibly efficient but you may still see, in your measurements, that the energy in is greater than the energy you get out.
For Advanced Students:
[/am4show][am4show have='p9;p41;' guest_error='Guest error message' user_error='User error message' ]
Speaking of your measurements...let’s make some. Open up your science journal and record the type of lever, weight, and location information for your different trial runs. Take a look at your data - can you figure out how much weight you'd need to lift your parents?
Let's see if we can figure this out. For a 10' long beam with the fulcrum in the exact center, you can lift as much as you weigh. For example, if you weigh 100 pounds, you can lift some sitting on the other end, as long as they weigh 100 pounds or less. If you slide the beam and move the fulcrum so that the longer end is on your side, you can lift more than you weigh.
So if there's 7 feet of beam on Alice's side and only 3 feet on Bob's end, you can easily figure this out with a little math (and principles of torque). Here's what you do:
(Alice's Weight) * (Distance from Alice to the Fulcrum) = (Alice's Lifting Ability) * (Distance from Bob to the Fulcrum)
If Alice weighs 100 pounds and when standing on the 7-foot end of the see saw, she barely can lift Bob, let's find out how much Bob weighs.
(100 pounds) (7 feet) = (Alice's Lifting Ability) * (3 feet)
700 / 3 = Alice's Lifting Ability, and since she can just barely lift Bob...
Bob weighs 233 pounds!
Now can you figure out how much lever arm distance you need to lift your parents? If Mom and Dad together weigh 300 pounds, and you have a 10' long beam and you weigh 100 pounds, let's find the fulcrum distance you'd need to lift them. Let's put your algebra to use here:
Let's make 'x' the distance from you to the fulcrum. This makes the distance from your parents to the fulcrum 10' - x. (If you're 4 feet from the fulcrum, that means your parents are 6', right?)
(100 pounds) (x) = (300 pounds) (10' - x)
100 x = 3000 - 300 x
400 x = 3000
x = 3000 / 400
Solve for x and you'll find that the distance from you to the fulcrum is 7.5 feet!Exercises Answer the questions below:
What is the best definition for a simple machine?
A machine with less than three parts
A machine with a simple name
A machine that changes the direction or amount of a force
A machine that helps you do work quickly
What are the three parts of a lever? Circle all that apply:
Fulcrum
Weight
Load
Effort
Name two examples of levers that you could find in your house:
What’s an inclined plane? Jar lids, spiral staircases, light bulbs, and key rings. These are all examples of inclined planes that wind around themselves. Some inclined planes are used to lower and raise things (like a jack or ramp), but they can also used to hold objects together (like jar lids or light bulb threads).
Here’s a quick experiment you can do to show yourself how something straight, like a ramp, is really the same as a spiral staircase.
Cut a right triangle out of paper so that the two sides of the right angle are 11” and 5 ½” (the hypotenuse – the side opposite the right angle – will be longer than either of these). Find a short dowel or use a cardboard tube from a coat-hanger. Roll the triangular paper around the tube beginning at the short side and roll toward the triangle point, keeping the base even as it rolls.
Notice that the inclined plane (hypotenuse) spirals up as a tread as you roll. Remind you of screw threads? Those are inclined planes. If you have trouble figuring out how to do this experiment, just watch the video clip below:
Inclined planes are simple machines. It’s how people used to lift heavy things (like the top stones for a pyramid).
Here’s another twist on the inclined plane: a wedge is a double inclined plane (top and bottom surfaces are inclined planes). You have lots of wedges at home: forks, knives, and nails just name a few.
When you stick a fork in food, it splits the food apart. You can make a simple wedge from a block of wood and drive it under a heavy block (like a tree stump or large book) with a kid on top.
Exercises
What is one way to describe energy?
The amount of atoms moving around at any given moment
This is a satisfyingly simple activity with surprising results. Take a tennis ball and place it on top of a basketball… then release both at the same time.
Instant ball launcher!
You’ll find the top ball rockets off skyward while the lower ball hit the floor flat (without bouncing much, if at all). Now why is that? It’s easier to explain than you think…
Remember momentum? Momentum can be defined as inertia in motion. Something must be moving to have momentum. Momentum is how hard it is to get something to stop or to change directions. A moving train has a whole lot of momentum. A moving ping pong ball does not. You can easily stop a ping pong ball, even at high speeds. It is difficult, however, to stop a train even at low speeds.
Mathematically, momentum is mass times velocity, or Momentum=mv.
One of the basic laws of the universe is the conservation of momentum. When objects smack into each other, the momentum that both objects have after the collision, is equal to the amount of momentum the objects had before the crash. Once the two balls hit the ground, all the larger ball’s momentum transferred to the smaller ball (plus the smaller ball had its own momentum, too!) and thus the smaller ball goes zooming to the sky.
Materials:
two balls, one significantly larger than the other
Do you see how using a massive object as the lower ball works to your advantage here? What if you shrink the smaller ball even more, to say bouncy-ball size? Momentum is mass times by velocity, and since you aren’t going to change the velocity much (unless you try this from the roof, which has its own issues), it’s the mass that you can really play around with to get the biggest change in your results. So for momentum to be conserved, after impact, the top ball had to have a much greater velocity to compensate for the lower ball ‘s velocity going to zero.
You can also try a small bouncy ball (about the size of a quarter) and a larger bouncy ball (tennis-ball size) and rest the small one on top of the large one. Hold upright as high as you can, then release. If the balls stay put (the small one stays on top of the larger) at impact, the energy transfer will create a SUPER high bounce for the small ball. (Note how high the larger ball bounces when dropped.)





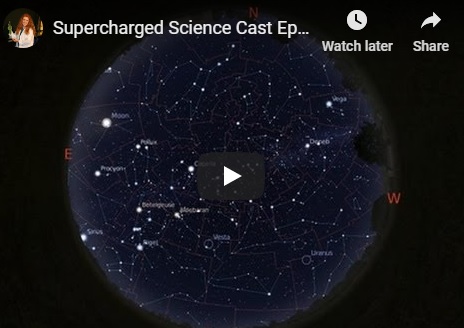

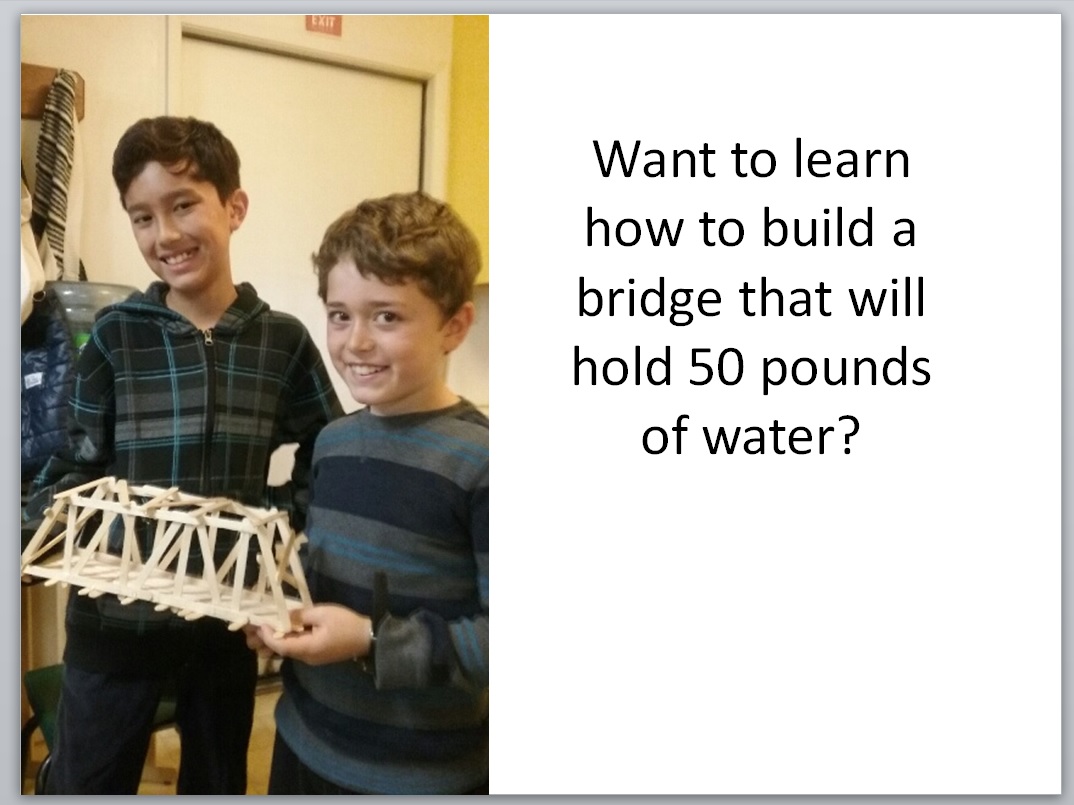
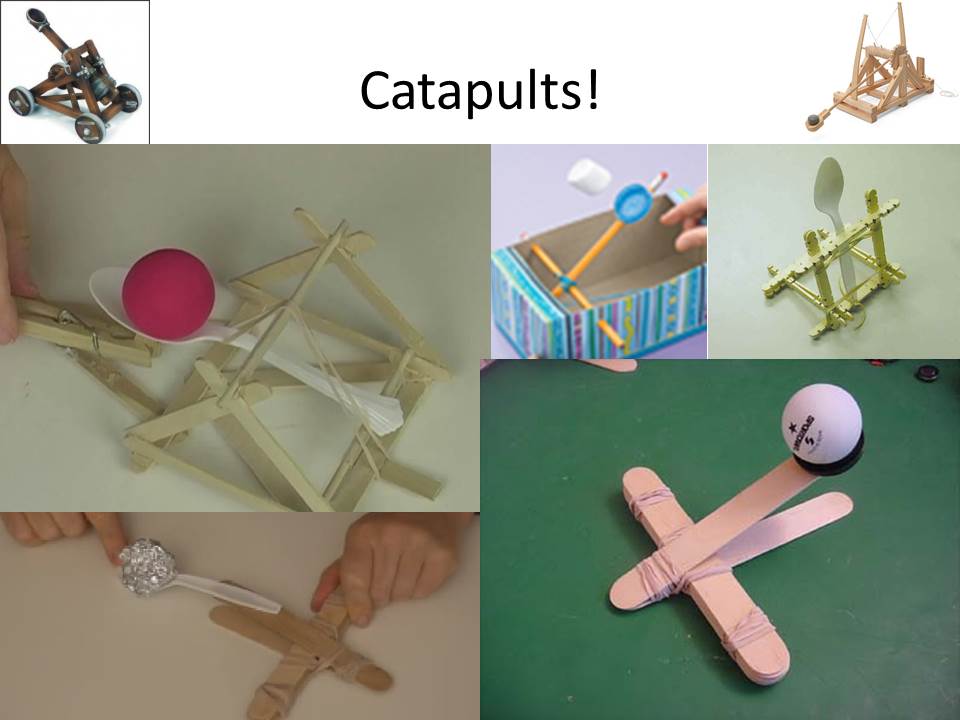



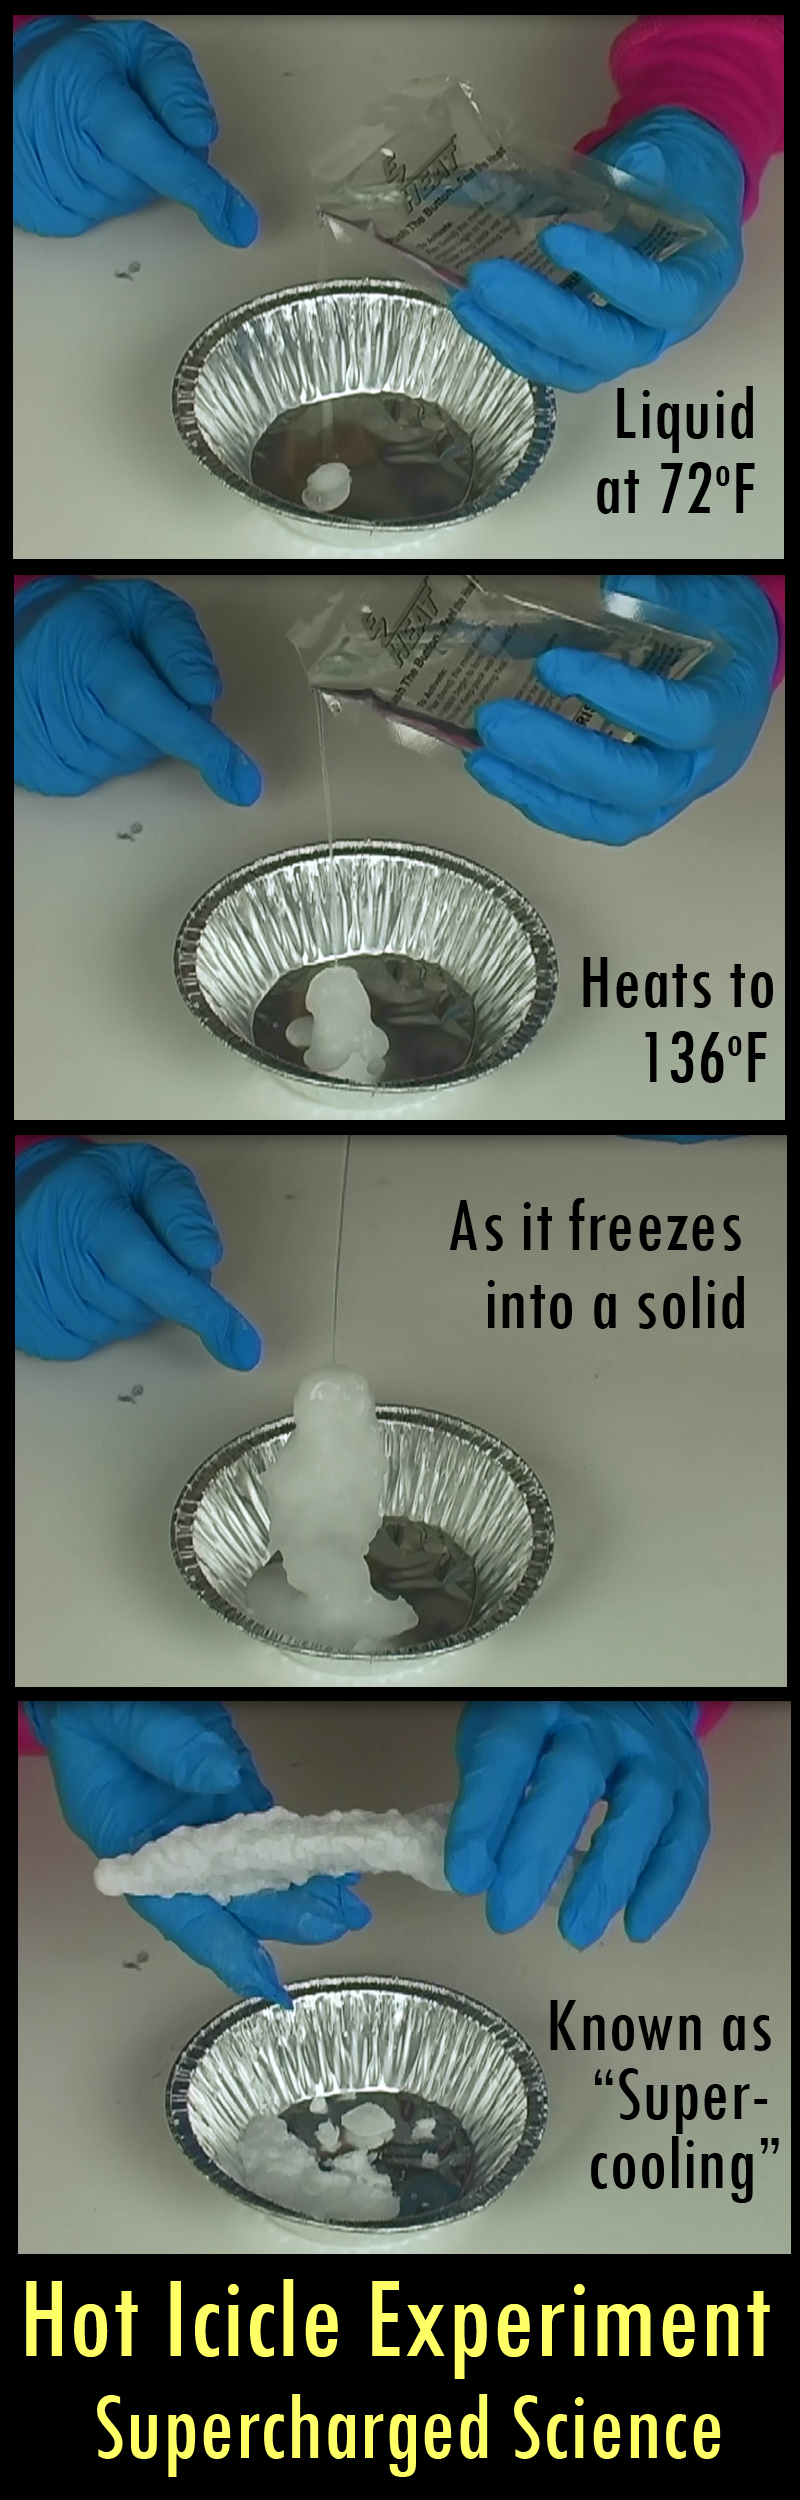

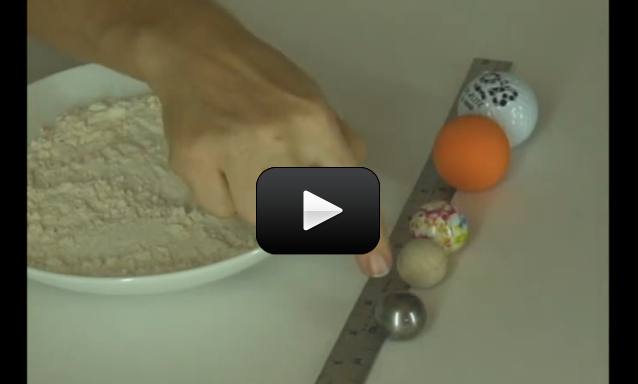
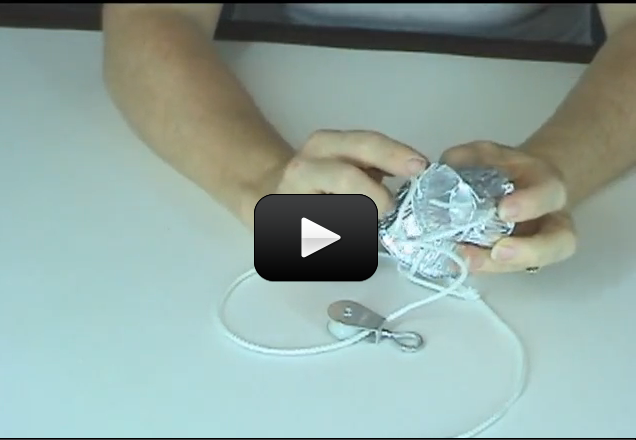


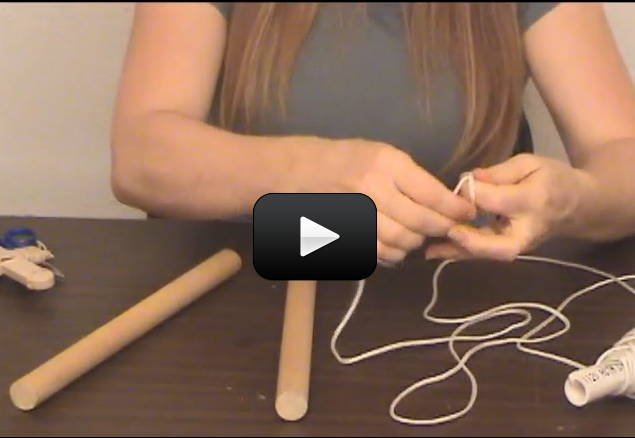
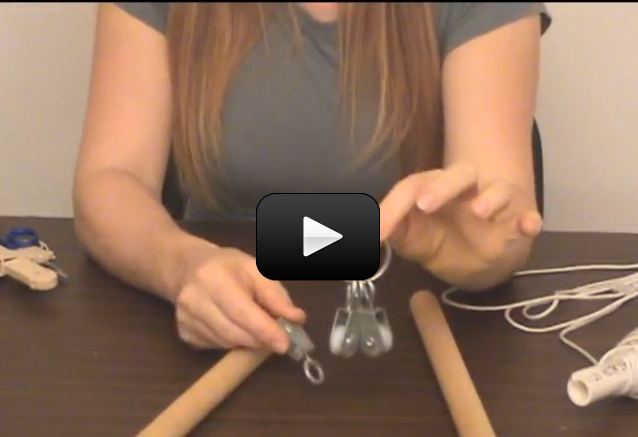
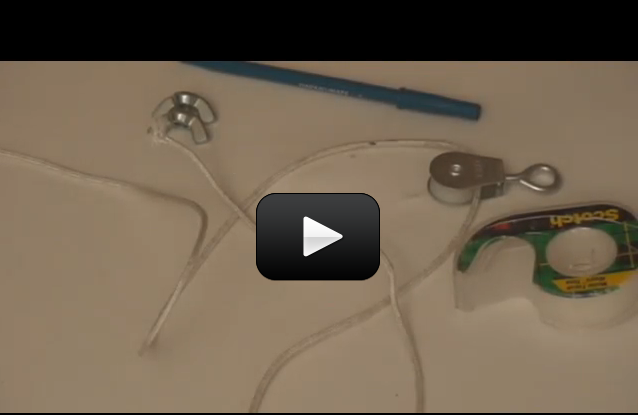
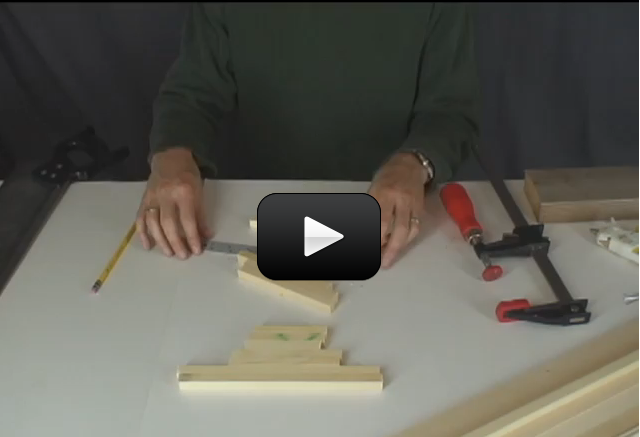
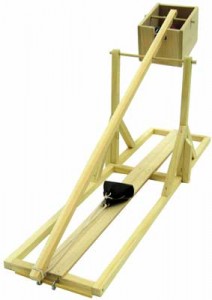 This experiment is for Advanced Students. For ages, people have been hurling rocks, sticks, and other objects through the air. The trebuchet came around during the Middle Ages as a way to break through the massive defenses of castles and cities. It’s basically a gigantic sling that uses a lever arm to quickly speed up the rocks before letting go. A trebuchet is typically more accurate than a catapult, and won’t knock your kid’s teeth out while they try to load it.
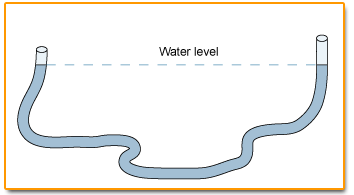
 Let’s play with these different ideas right now and really “feel” the difference between hydraulics and pneumatics. Connect two syringes with a piece of flexible tubing. Cut the tubing into three equal-sized pieces and use one to experiment with. Shove the plunger on one syringe to the “empty”, and leave the other in the “filled” position before connecting the tubing. What happens when you push or lift one of the plungers? Is it quick to respond, or is there “slop” in the system?
Now remove both plungers and, leaving the tubing attached, fill the system with water to the brim on both ends (this is a good bath-time activity!). Keep the open ends of the syringes at the same level as you fill them. What happens if you lower one of the syringes? What happens when you raise it back up? Is there now air in your system?
Fill your syringe-tube system up with water again, keeping the plungers at the same height as you work. Insert one of the plungers into one of the syringes and play with the levels of the syringes again, lifting one and lowering the other. Now what happens, or doesn’t happen?
Why does that work? Because both syringes are open to the atmosphere, they both have equal amounts of air pressure pushing down on the surface of the water. When you raise one syringe higher than the other, you have increased the elevation head of higher syringe, which works to equalize the water levels in the two syringes (thus shoving water out of the lower syringe). Elevation head is due to the fluid’s weight (gravitational force) acting on the fluid and is related to the potential energy of the raised syringe (which increased with elevation).
Now connect your plungers into a fully hydraulic system: Push the plunger all the way down to expel the water from one of the syringes (water should leak all over the place from the open syringe). Now add the second plunger to the open syringe and push the plunger down halfway. What happens? You have just made a hydraulic system!
Are you ready to build it into a three-axis machine? Then click the play button below:
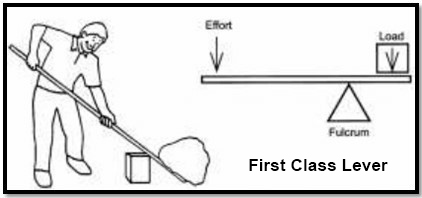
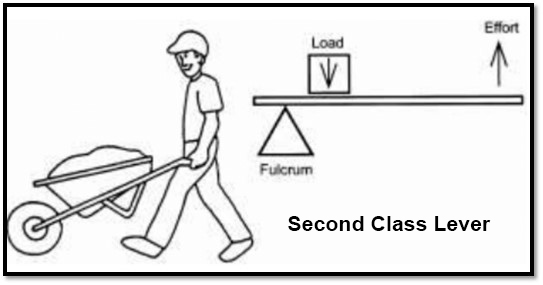
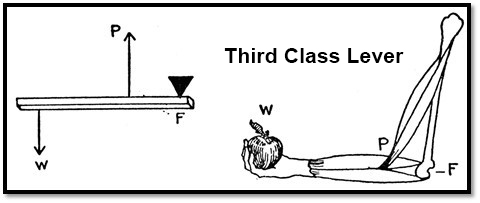
 he has to push the lever down 1 meter with a force of 1 kg. Now let’s do some math. (Officially we should convert kilograms (a unit of mass) to Newtons (a unit of force) so that we can work in Joules which is a unit of work. However, we’ll do it this way so you can see the relationship more easily.)
Phillip’s work (the work in) = 1 kg x 1 m = 1
Work on the bowling ball (the work out) = 10 kg x .1 m = 1
Work in equals work out! Later in this energy unit, you’ll learn about energy efficiency. At that point, you’ll see that you never get all the energy you want from the energy you put in. Some is lost to sound and some to heat. A lever is incredibly efficient but you may still see, in your measurements, that the energy in is greater than the energy you get out.